TDM ICIS Inventory Tracking
From ICISWiki
ICIS INVENTORY TRACKER
Introduction
The ICIS Inventory Tracker module (InTrack) is an application that manages any item in storage. It can operate as a Stand-Alone system or integrated with other interface modules such as the SETGEN.
The functions of InTrack are:
• to retrieve inventory information for entities, where they are stored, what quantities are in storage and what quantities are available for use,
• to do reservation for an item, and
• to deposit an amount for storage.
InTrack allows the user to specify default values to use at start-up by reading the [IMS] section of the current INI file. The types of default values are: SeedStorageLocation, SeedStockTrait, Label1, Label2, Label3, Label4 and Prefix.
The [IMS] section follows the INI file format. For example, to specify the location type for InTrack, the [IMS] section must include the following line: SEEDSTORAGELOCATION = 1500. The table below contains IMS keys that may be specified to a desired value, if the default value is otherwise. If a key is not found, the corresponding default value (in parenthesis) is assigned.
| Key | Valid Values | Remarks |
|---|---|---|
| SEEDSTORAGELOCATION | 1500 (-1) | indicates the ltype (locationtype)from the locations table of the GMS database to filter the locations used by IMS |
| SEEDSTOCKTRAIT | 1500 (-1) | indicates the traitid from the TRAIT table of the DMS database to filter the scales used by IMS |
| LABEL | LEVEL1 LEVEL2 LEVEL3 LEVEL4 | indicates the titles of each location level e.g. LABEL1 = name of organization, LABEL2 = name of organizational unit, LABEL3 = name of Storage Location (Shelf,room), LABEL4 = name of storage inside LABEL3(tray) |
| PREFIX | (GR) | any four-letter-acronym that identifies which unit or group the inventory data belongs to;this is used for barcoding purposes e.g. PREFIX = GR means the inventory data belongs to Genetic Resources |
| DEF_CTRYID | 171 | the default COUNTRY ID to be used in filtering locations |
| NTYPE | (1) | determines which name is to be displayed on the inventory details section which is linked to the UDFLDS table of the central GMS database,for example, 0 is for designation designation, 11 for IRTP name, 1 for accession name. |
Starting InTrack
Start InTrack by selecting InTrack from the ICIS Launcher.
Stand-Alone
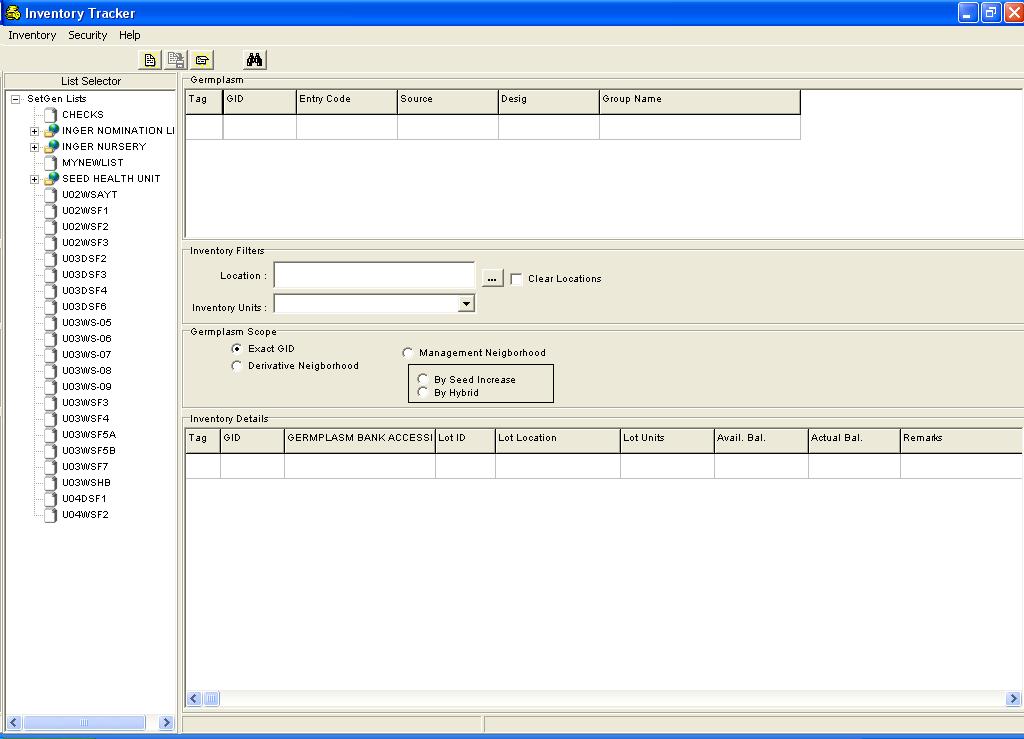
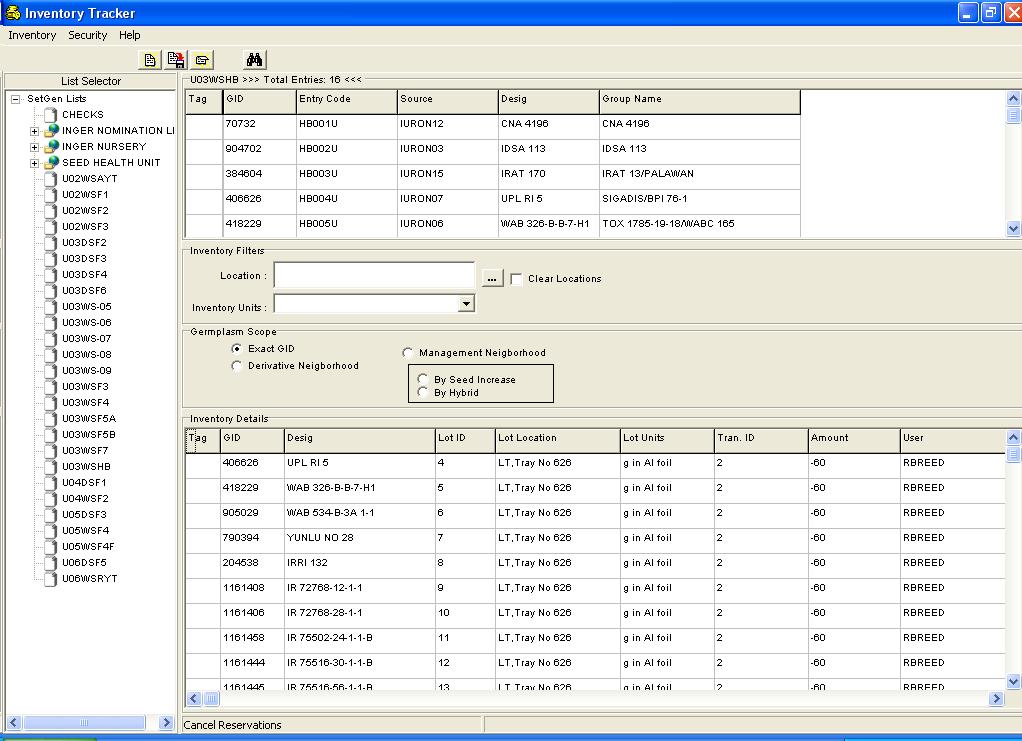
Main Screen
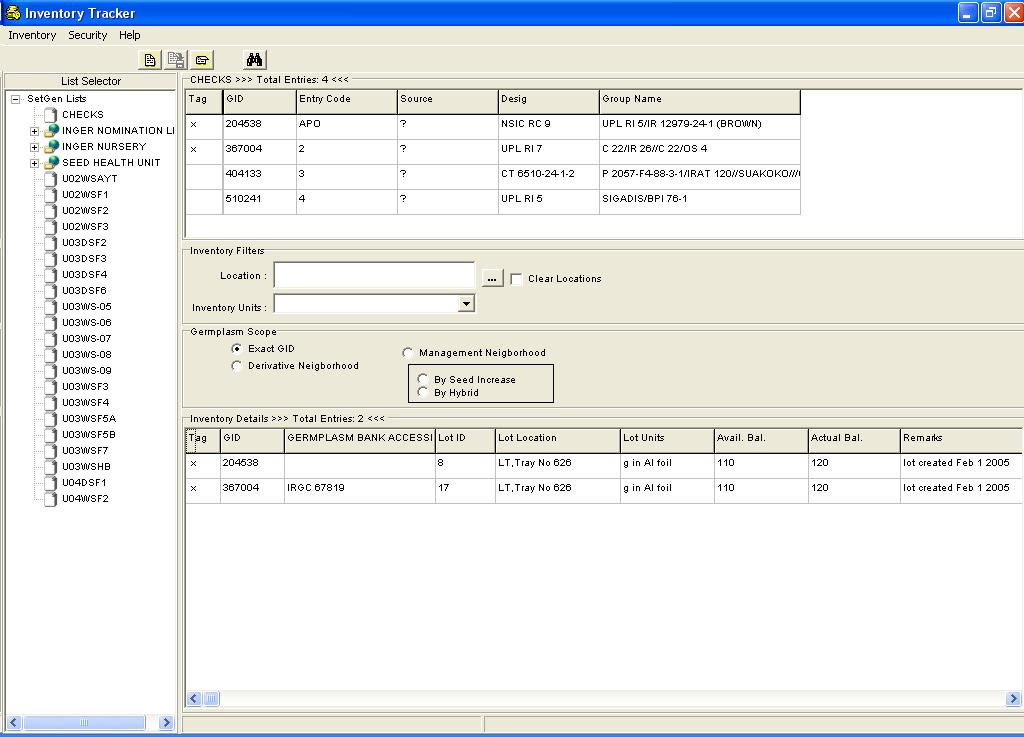
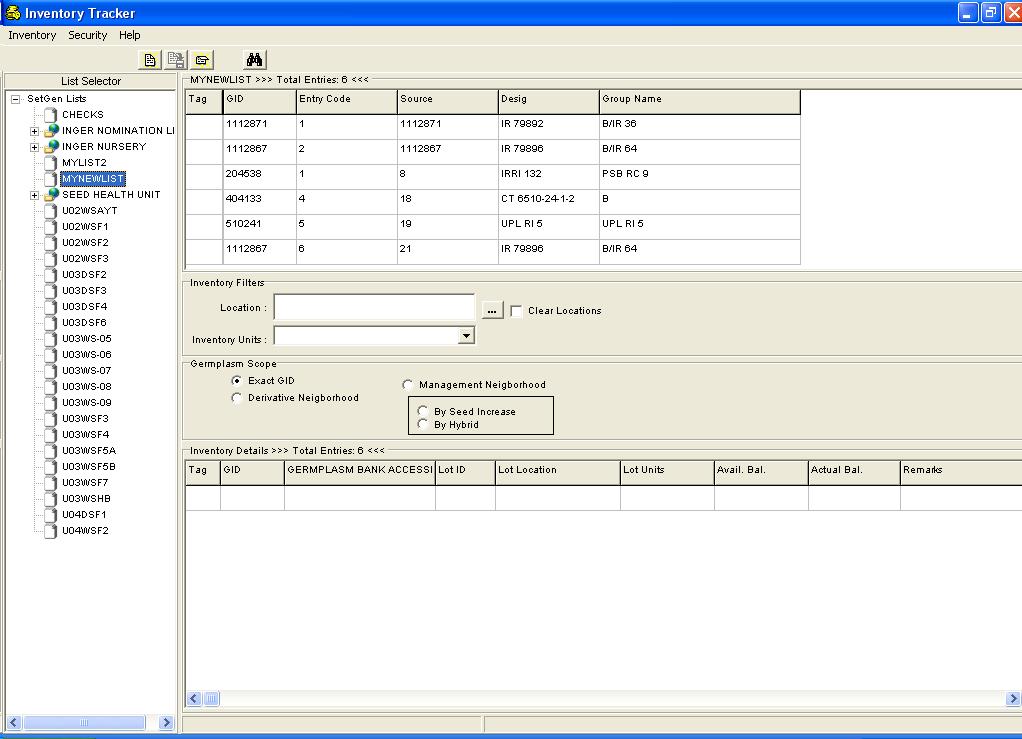
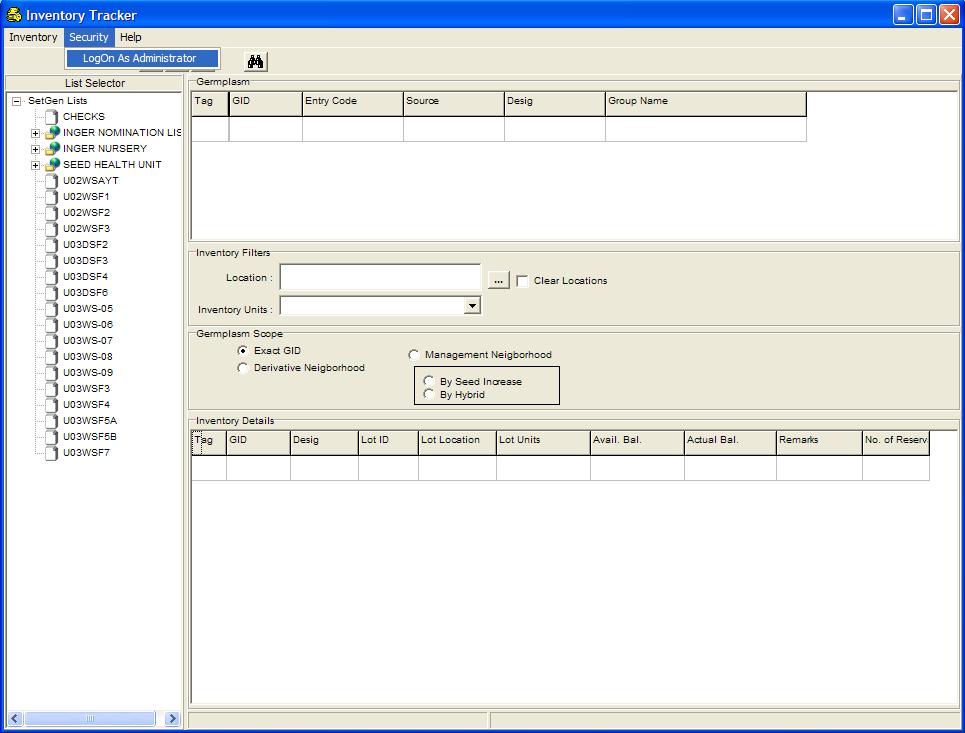
The screen is basically a form on which the user retrieves inventory information for any germplasm. The Main Screen is also the starting point from which the user can access all other parts of the program: Reserve seeds, Deposit seeds, Create Lots, and enter the Administrator’s Form by logging on as administrator.
The Main Screen is divided into five parts.
- The first part is the List Selector window which is located on the left window panel. This window displays the lists in tree form, where a list can be a parent or a child of another list.
- The second part is the List Data window located at the upper right-hand window panel. This window displays all germplasm records grouped together from a selected list.
- The third part is the Inventory Filters window. The user can filter an inventory list by Location and/or by Lot Units. The small blank window called the location list window is populated when a location is selected.The ellipses button beside the location list window displays the Locations window where a list of locations in hierarchial form can be viewed. From here the user can select a location.More explanation on the Locations window will be discussed on the latter part of this document. The Clear Locations checkbox beside the ellipses button clears the locations list, when tagged, and reverts the location list when untagged.
- The fourth part is the Germplasm Scope window where the type of retrieval of germplasm is specified. The button Exact GID retrieves the inventory information of the germplasm selected from the List Data window.The Derivative Neighborhood button retrieves all inventory information of the derived germplasms of the selected germplasm from the List data window. While the Management Neighborhood button retrieves all inventory information of the selected germplasm either by Seed Increase or By Hybrid. Take note that the facility on retrieving Management Neighborhood by Hybrid is curently unavailable.
- The fifth part is the Inventory Details window where the inventory information of the selected germplasm is displayed. The information on this window are : the Tag column sets which row/s the user has selected by clicking on the row/tag column combination. An x mark is displayed for tagged rows; the GID column is the unique identifier of a germplasm which populated by the system; the Germplasm Bank Accession column displays the Accession number of a germplasm. Take Note that this column's name and data changes depending on what type is specidied in the [IMS]- NTYPE section of the INI file, for example, it can be named Designation and the designation of the germplasm is displayed or it can be named IRTP name and the IRTP name is displayed; the LotID column is the unique number assigned to each inventory Lot, where a Lot is a combination of GID, Location and Scale;the Lot Location column displays the location of the germplasm in the stock room; the Lot Units column displays the scale used in weighing the germplasm;the Available Balance column displays the actual amount inside the stock room plus/minus the deposit/reserved amount, respectively; the Actual Balance column displays the exact amount that is in storage; the Remarks column displays any comments set by the user upon adding lots; and the No. of Reserves column displays the number of reservations for a germplasm.
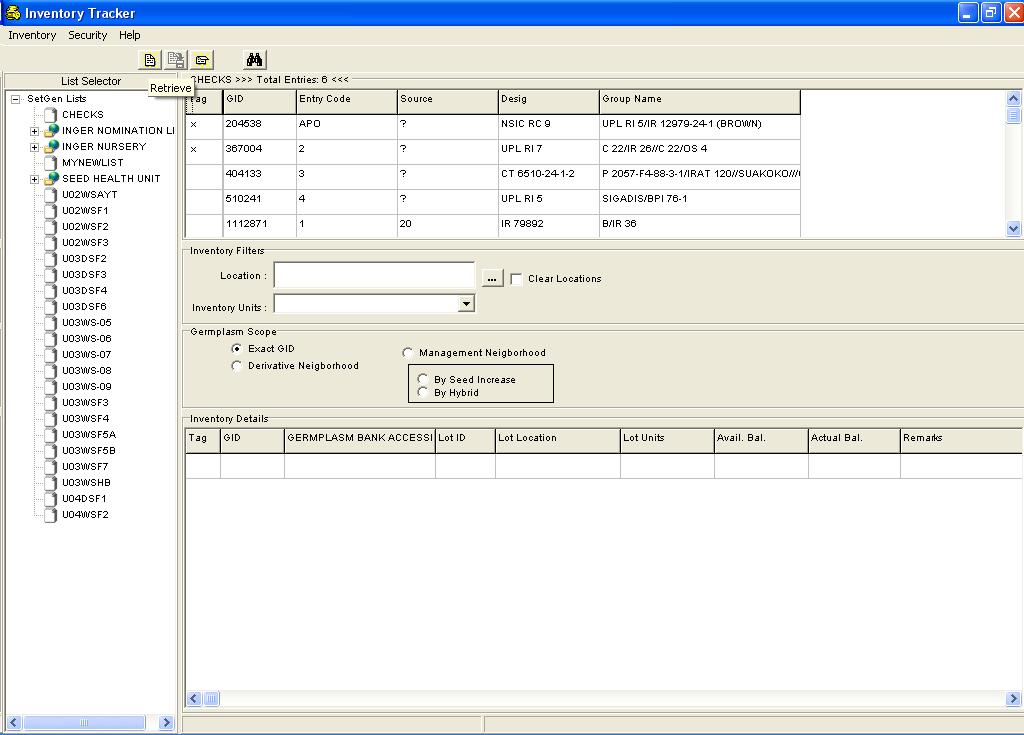
Retrieve Mode
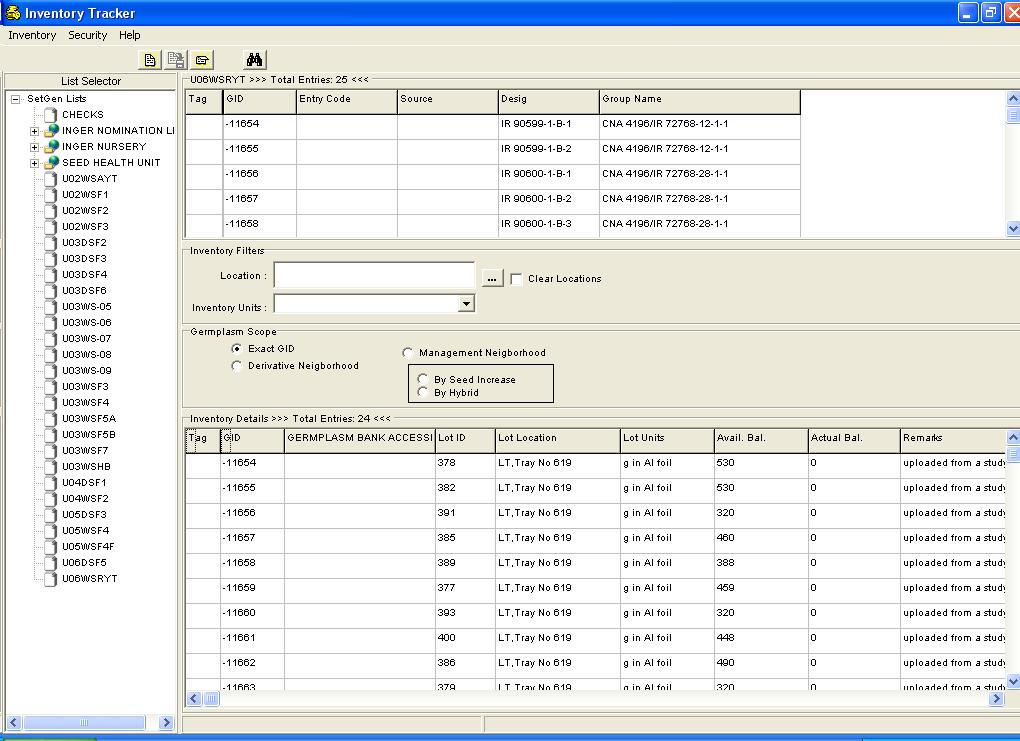
Retrieving of records is done by double-clicking on a list from the list selector. A list of germplasm is displayed on the List Data window located on the upper right window pane. Notice that the title of this window is the name of the selected list and the total number of entries (in this case germplasm) in that list.
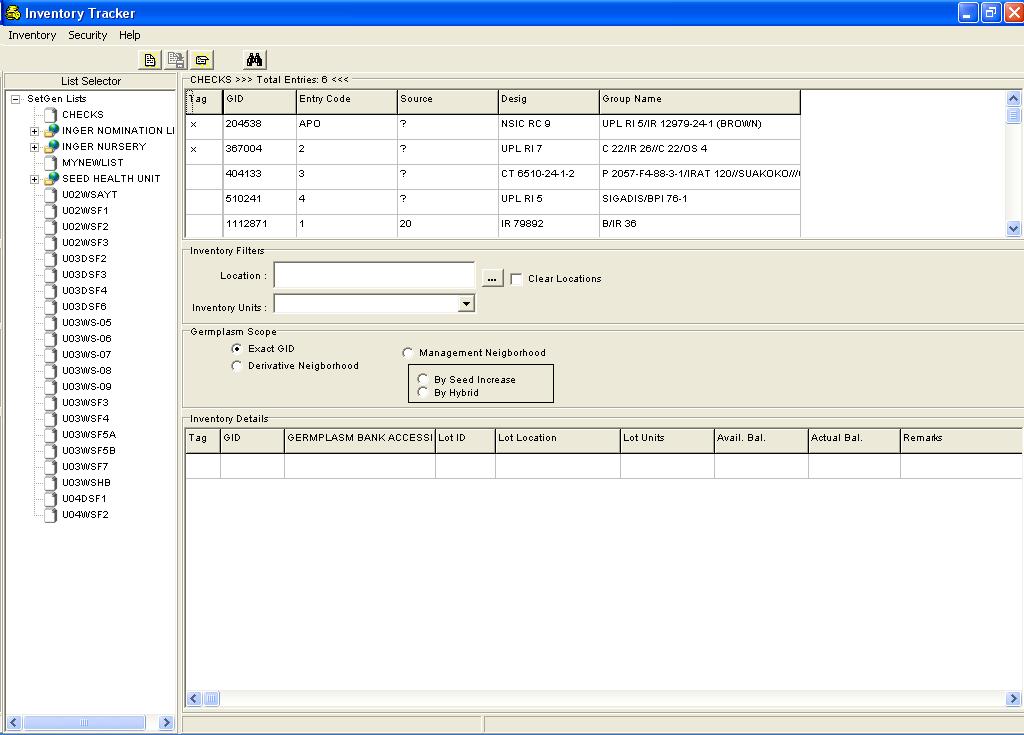
The user is then given the option to supply the necessary information – the GID (by clicking on (a) row/s on the List Data window ), the Lot Location and Lot Units which are both located on the Inventory Filters window. The user then clicks on the Retrieve button on the toolbar to display the inventory information on the Inventory Details window.
If only the List is provided by the user, the system retrieves all inventory records for that list. When the user supplies GID, Lot Location and Lot Units, or any combination of these three items along with the list, the system filters the retrieval of records to those criteria.Notice that the title of the Inventory Details window shows the total number of inventory entries.

On the event that there are no existing lot records for the selected GID/lot location/lot units combination, a Non-Existent Lot Data window displays.
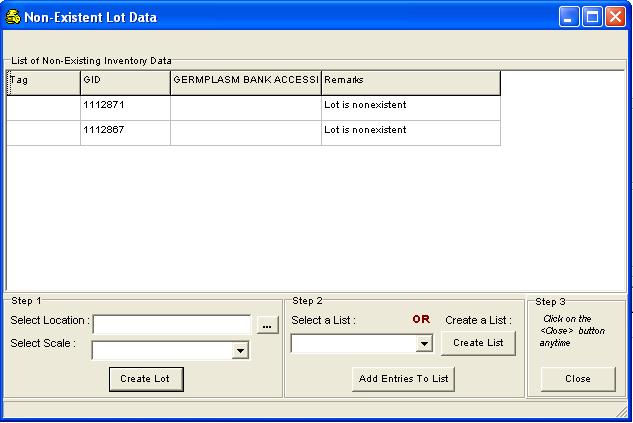
The Non-Existent Lot Data window is divided into two parts:
- The first part called the List of Non-Existing Inventory Data window displays the following information : the Tag column sets which row/s the user has selected by clicking on the row/tag column combination. An x mark is displayed for tagged rows; the GID column is the unique identifier of a germplasm that is not existing in the IMS database; the Germplasm Bank Accession column displays the accession number of a germplasm. Take Note that this column's name and data changes depending on what type is specified in the [IMS]- NTYPE section of the INI file, for example, it can be named Designation and the designation of the germplasm is displayed or it can be named IRTP Name and the IRTP name is displayed; and the Remarks column displays any comments related to the germplasm information.
- The second part prompts the user to do certain actions which is divided into 3 steps :
(a) Step 1 allows the user to create a lot data in the IMS database. The user can select a location by clicking on the ellipses button, then the Locations window displays.
Locations in the inventory system are treated in hierarchal order,that is,locations have a parent-child relationship. On this window,the first filter is the Country where the user can select which country the storage space is located. The second filter is the first level or the highest level of hierarchy.On this example it is named Organization. Under this is the organizational unit where the storage space belongs,which is the third filter and second level of hierarchy,given on this example it is named Unit . The fourth filter is the third level of hierarchy,which is named Collection or the group where the germplasm belongs. The fifth filter is the fourth level of hierarchy called Tray on our example. After selecting a location, the user clicks on the Ok button to go back to the Non-Existent Lot Data window. Notice that the location list window displays the selected location.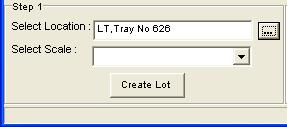
Then the user selects a scale from the pulldown window.
Clicking on the Create Lot button creates and saves the lot/s to the database. A confirmation window displays. Notice that the Remarks column displays the Lot ID of the added records.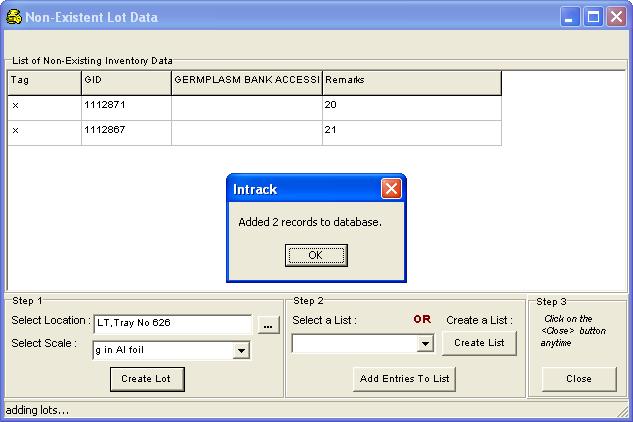
(b) Step 2 allows the user to add the germplasm in a list. The user has two options : either to select and existing list or create a list.
When selecting a list, the user clicks on a listname from from pull-down window
Then clicks on the Add Entries to list button.
A confirmation window shows
Clicking on the Yes button adds entries to the selected list.Then an information window displays.
While a list can be created by clicking on the Create List button displaying first an information message stating that creating a list automatically adds entries from the List of Non-Existing Inventory Data window.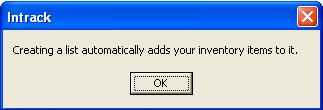
Then the SaveAs window displays where the user has to supply the following information: - The List Name which has maximum length of 47.
- The List Type.
- The Title of the list.
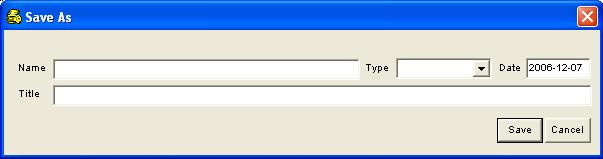
After supplying these information, clicking on the Save button adds the list to the database, otherwise clicking on the Cancel button aborts the operation.

When the user opts to save the list an information window displays.

(c) Step 3 allows the user to close the window. The user can close the window anytime without creating lots or adding germplasm to a list. Notice that the new list is added on the List Selector window, in case the user creates a new list.
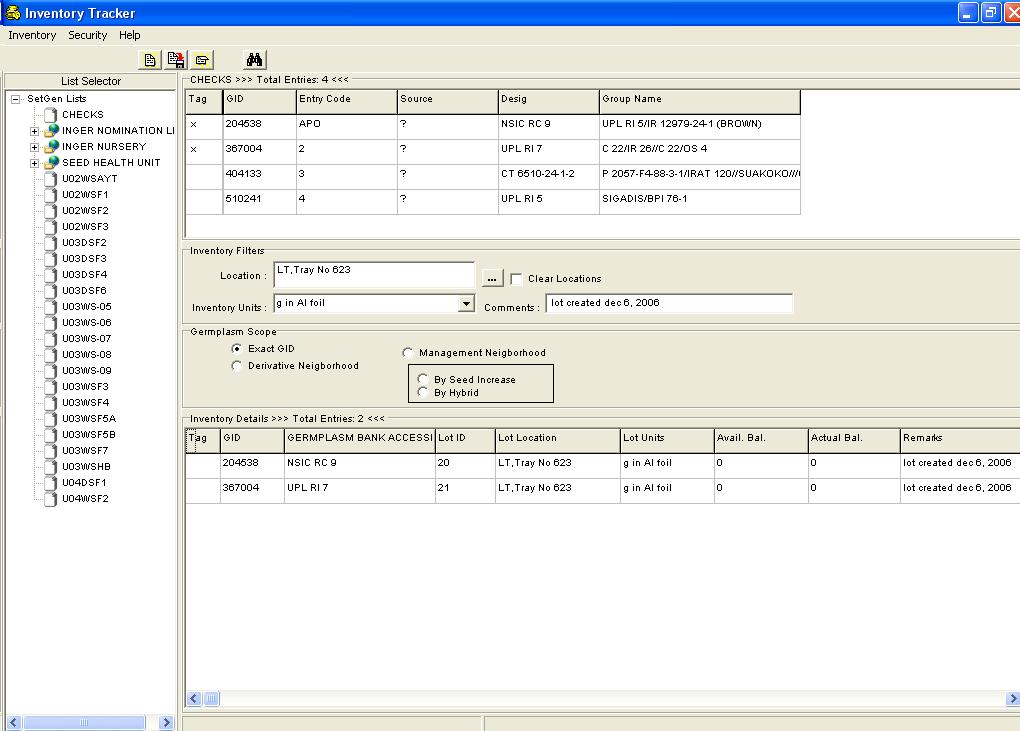
Adding a Lot Record
To add a Lot record, select Add Lot/Location sub-menu item on the Main Menu.
Then do the following:
(a) Select a list from the List Selector then tag an entry/entries from the List Data window.
(b) Select a location by clicking on the ellipses button to display the Locations window.
Locations in the inventory system are treated in hierarchal order,that is,locations have a parent-child relationship. On this window,the first filter is the Country where the user can select which country the storage space is located. The second filter is the first level or the highest level of hierarchy.On this example it is named Organization. Under this is the organizational unit where the storage space belongs,which is the third filter and second level of hierarchy,given on this example it is named Unit . The fourth filter is the third level of hierarchy,which is named Collection or the group where the germplasm belongs. The fifth filter is the fourth level of hierarchy called Tray on our example. Notice that the location list window displays the selected location.

(c) Select a scale from the Lot Units list on the Inventory Filters window.

These entries are required for adding a lot record. On the Comments line, enter any remark, then pressing on the Save button on the toolbar will save the record to the database. The new record is then shown on the Inventory Details window.Notice that the data on the Available Balance and Actual Balance columns are 0.
Reserve Mode
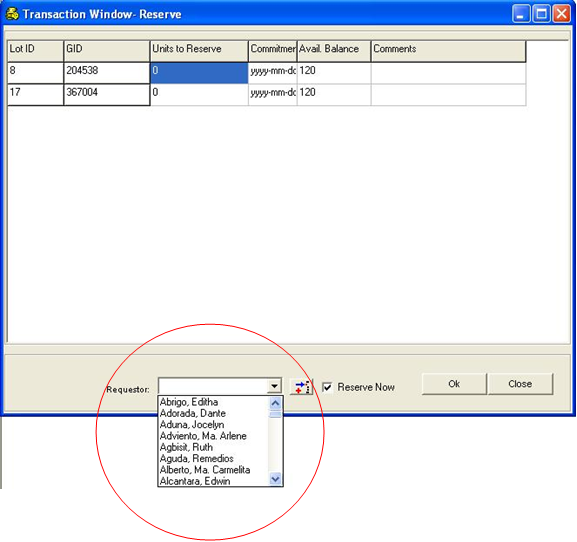
Accessing the Transaction-Reserve Window is done by tagging on items on the Inventory Details window (after retrieving records) then selecting Reserve sub-menu item on the Main Menu.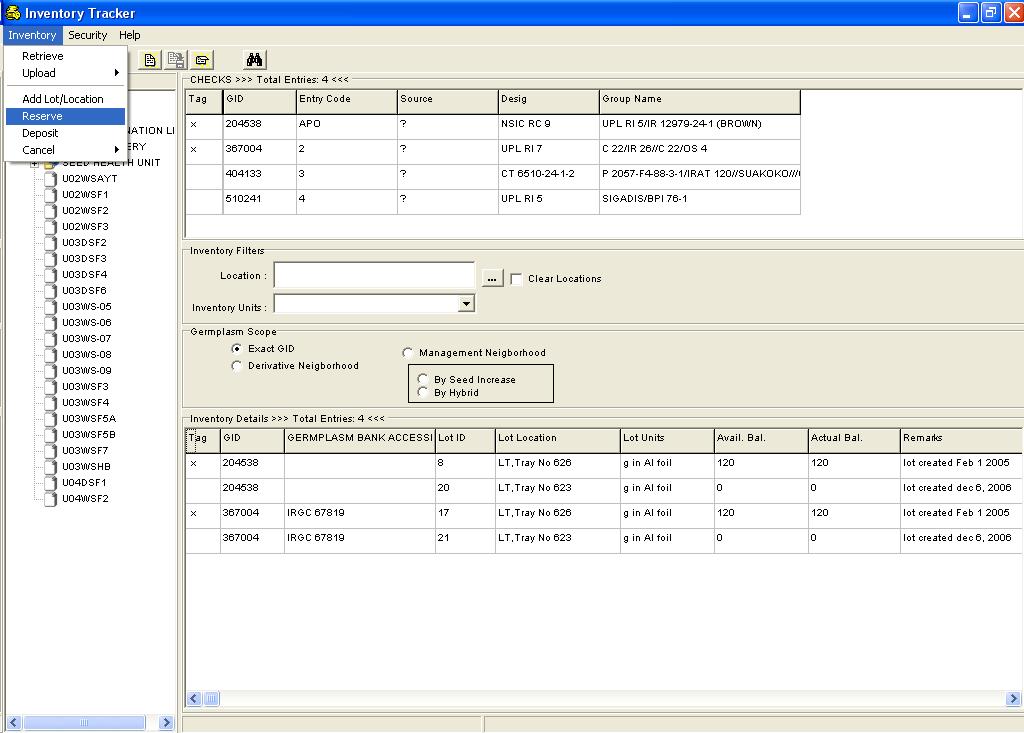
The Transaction Window is shown by the system displaying the Lot ID, GID and Available Balance of the tagged items from the previous window.
The user can then encode the number of units to reserve, commitment date of the reservation and any comment on the reservation being made, on the space provide for each item
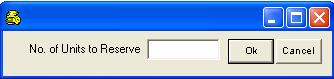
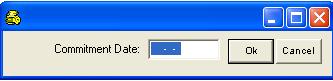
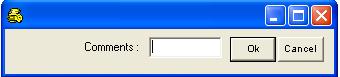
In the event that values for all items are the same, the user can click on the column headers of Units to Reserve, Commitment Date and Comments, where a pop-up menu will be displayed.
A small window will display prompting the user to enter the No. of Units to Reserve, the Commitment Date and Comments when the user clicks on their respective column headers. Pressing on the Ok button will apply these values to all Lot IDs in the window.
   |
When the user wants to assign a Requestor for this transaction, an item is selected from the Requestor drop-down list.
Notice the Reserve Now checkbox is tagged. This means that the user wants to make the reserve immediately. If untagged, the user has the option to send the list of items to reserve to the administrator via email.
The system will show a confirmation message on sending an email request to the administrator.
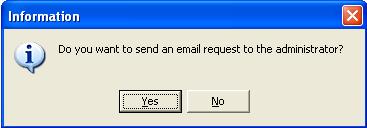
The user then clicks on No to continue without sending an email message to the administrator.

The following are the items on this window:
- The From box displays the name of the selected user from the previous window.
- The To box displays the name and email address of the person that the document is sent to. The user can select the name by clicking on the pulldown window beside the box, select a person, then click on the Add button.
- The CC box displays the name of and email address of the person that needs to be copy furnished.The user can select the name by clicking on the pulldown window beside the box, select a person, then click on the Add button.
- The subject is given by the system but the user can change it.
- The file attachment is given by the system but the user has an option to select another file by clicking on the ellipses button.
- The user can write anything on the body of the email,which is the white space below the attachment.

After deciding whether to send email notification to the adminstrator or not, an information window displays the number of transactions added to the database.
The user has to click on the Ok button of the Transaction Window to save changes to the database. The Transaction Window closes and the system brings the user back to the IMS Main Screen.
Notice that the Available Balance column has decreased by the reserved amount.
Deposit Mode
Accessing the Transaction-Deposit Window is done by tagging on items on the Inventory Details window (after retrieving records) then selecting Deposit sub-menu item on the Main Menu.
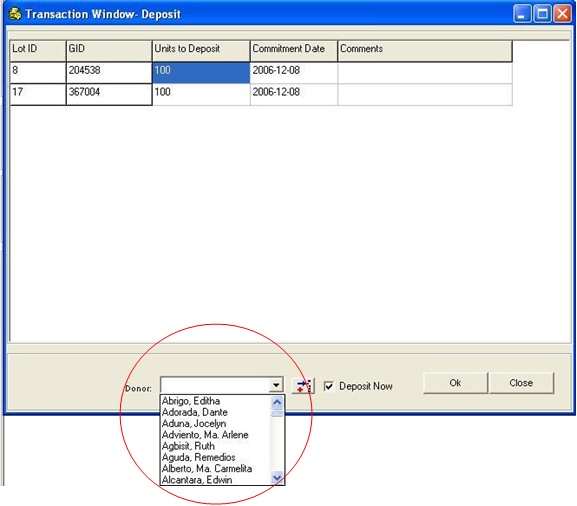
The Transaction Window is shown by the system displaying the Lot ID and GID of the tagged items from the previous window.
The user can then encode the number of units to deposit, commitment date of the deposit and any comment on the deposit being made, on the space provide for each item
In the event that values for all items are the same, the user can click on the column headers of Units to Deposit, Commitment Date and Comments, where a pop-up menu will be displayed.
A small window will display prompting the user to enter the No. of Units to Deposit, the Commitment Date and Comments when the user clicks on their respective column headers. Pressing on the Ok button will apply these values to all Lot IDs in the window.
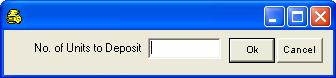 |
When the user wants to assign a Donor for this transaction, an item is selected from the Donor drop-down list.
Notice the Deposit Now checkbox is tagged. This means that the user wants to make the deposit immediately. If untagged, the user has the option to send the list of items to deposit to the administrator via email.
The system will show a confirmation message on sending an email request to the administrator.
The user then clicks on No to continue without sending an email message to the administrator.
The following are the items on this window:
- The From box displays the name of the selected user from the previous window.
- The To box displays the name and email address of the person that the document is sent to. The user can select the name by clicking on the pulldown window beside the box, select a person, then click on the Add button.
- The CC box displays the name of and email address of the person that needs to be copy furnished.The user can select the name by clicking on the pulldown window beside the box, select a person, then click on the Add button.
- The subject is given by the system but the user can change it.
- The file attachment is given by the system but the user has an option to select another file by clicking on the ellipses button.
- The user can write anything on the body of the email,which is the white space below the attachment.
After deciding whether to send email notification to the adminstrator or not, an information window displays the number of transactions added to the database.
The user has to click on the Ok button of the Transaction Window to save changes to the database. The Transaction Window closes and the system brings the user back to the IMS Main Screen.

Notice that the Available Balance column has increase by the deposit amount.
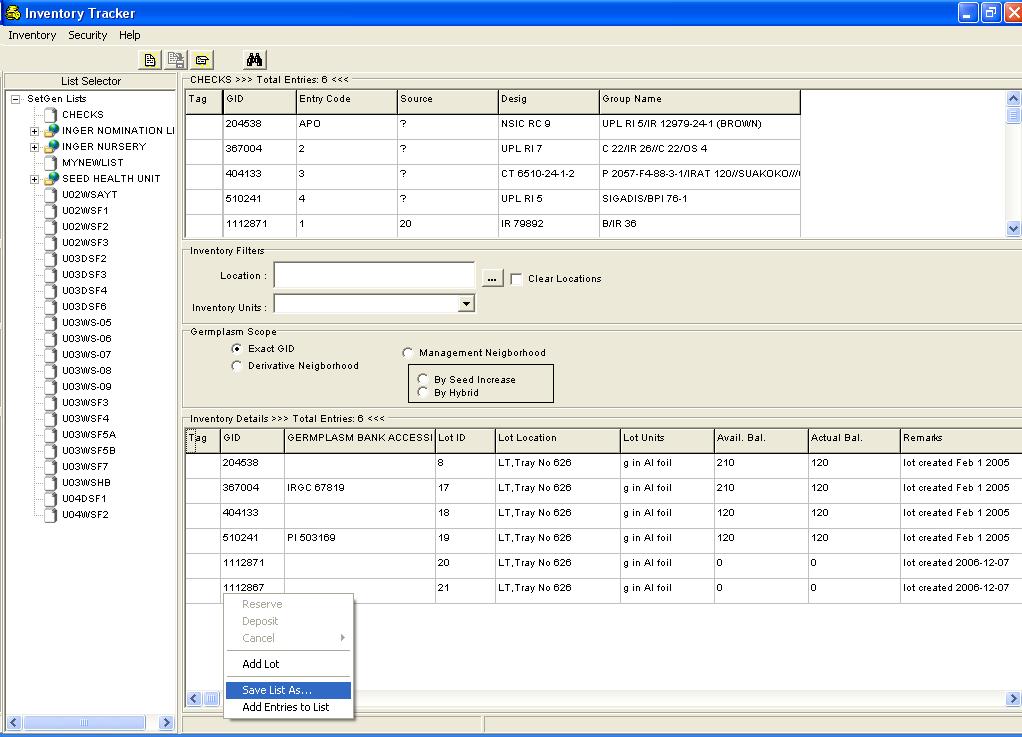
Saving A List As...
Saving a copy of the active list with a different name or in a different location is done by
- Selecting a list from the List Selector window,
- Retrieving inventory information,
- Tagging on the items on the Inventory Details window,
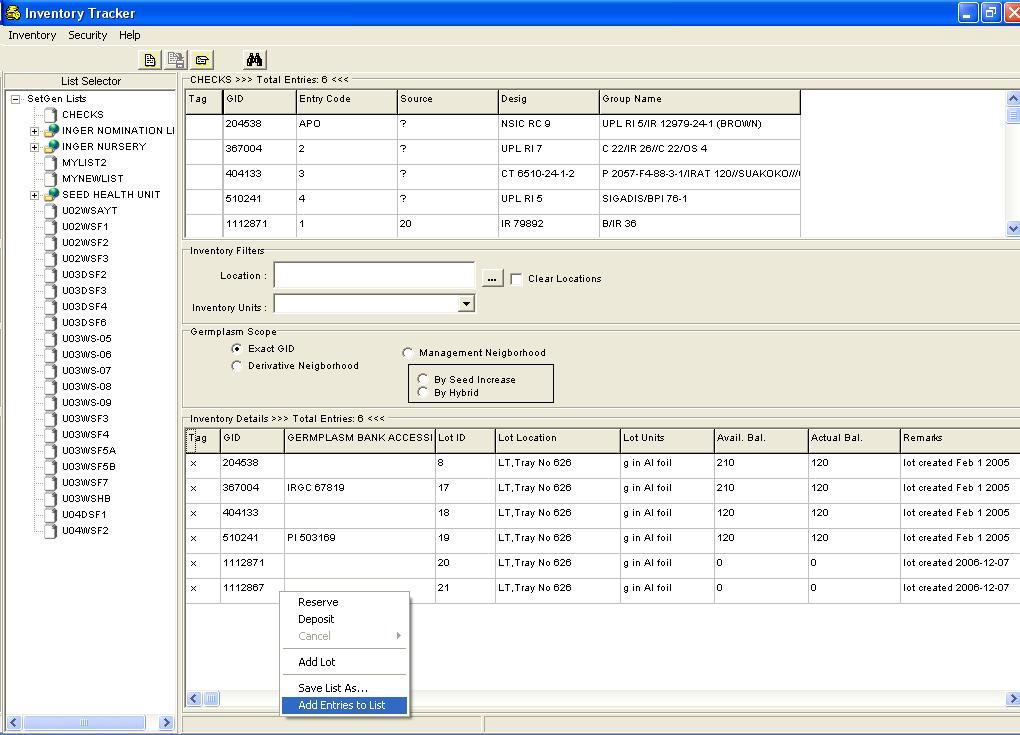
- And right-clicking on the white space then selecting Save List As... item from the pop-up menu.
The SaveAs window displays where the user has to supply the following information:
- The List Name which has maximum length of 47.
- The List Type.
- The Title of the list.
After supplying these information, clicking on the Save button adds the list to the database, otherwise clicking on the Cancel button aborts the operation.
When the user opts to save the list an information window displays.
Notice that the created list is displayed on the List Selector window.
Adding Entries To A List
Entries to a list can be added by
- Selecting a list from the List Selector window,
- Retrieving inventory information,
- Tagging items on the Inventory Details window,
- Selecting a list from the List Selector window where you want to add these entries,
- Then right-clicking on the white space and selecting Add Entries to List item on the popup menu.
if entries are successfully added to the list an information window displays.
Notice that the entries are added on the selected list.
Adding an Extra Column to the Inventory Details window
Adding Extra an Extra Column is done by
- Selecting a list from the List Selector window,
- Retrieving inventory information,
- Then right-clicking on the white space and selecting Add Extra Column item on the popup menu.

Scroll to the right of the Inventory Details window to see the extra column.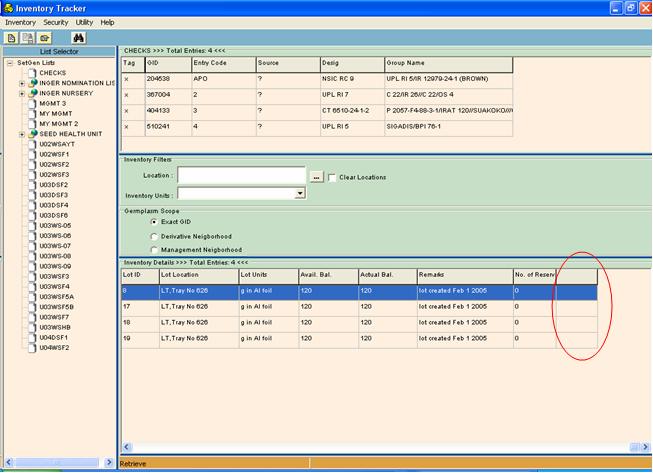
Filling Up a column With DMS Data
After adding an extra column (please refer to the function prior to this), right-click on the extra column and select Fill With DMS Data... on the pop-up menu.
On the event that the selected column is not the extra column, an error window displays.

If the selected column is the extra column, the Retrieve DMS Variate window displays.

Then
- Select an item on the Study pulldown list,
- Select an item on the GID Factor pulldown list, and
- Select an item on the Variate pulldown list
and click on the Ok button to continue. Otherwise, click on the Cancel button to abort.
When opting to continue, the extra column is filled with DMS data.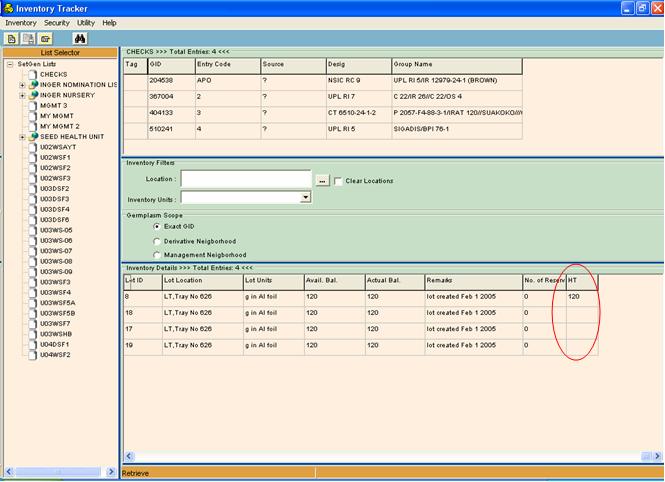
Notice that the column header of the extra column is the name of the selected variate. Some rows may be empty, meaning these records doesn't have that particular variate from the DMS database.
Uploading From a Study
Uploading inventory information from a study is possible by selecting Inventory -> Upload -> From a Study on the menu.Take note that in this facility, your study should have been pre-uploaded in your DMS database using the Work Book, which is another module of ICIS.
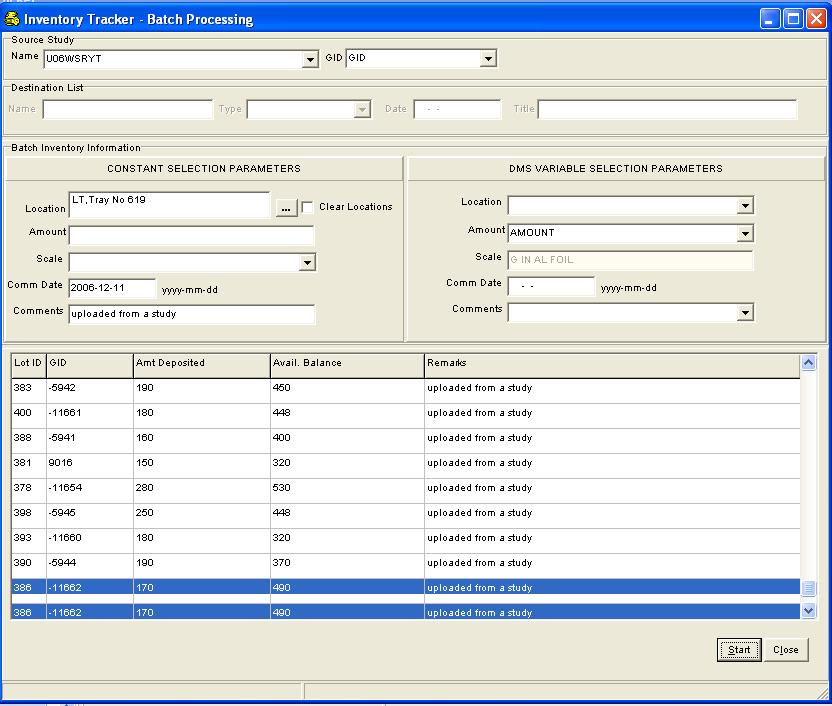
The Inventory Tracker - Batch Processing window displays.

This window is divided into three parts:
- The first part is the Source Study window where the user has to provide the Name of the source study by selecting a study name the Name pulldown window and the GID from the GID pulldown window.
- The second part is the Batch Inventory Information window which is subdivided into two parts :
(a) the Constant Selection Parameters window has information that the user can select/encode if data is fixed for each record
(b) while the Variable Selection Parameters window has information that the user can select if data is changeable for each record. Both of these windows have the following items as selection :
(i) Location which is the location of a germplasm seed in the storage area
(ii) Amount which is the quantity of seed
(iii) Scale which is the measurement in units
(iv) Commitment Date which is the date of entry of the seed in the storage room, and
(v) Comments which is any remarks.
Take note that the user can only select one type for each item, that is, either from the Constant Selection Parameters or from the Variable Selection Parameters. - The third part is the window that displays added inventory data in the IMS database.
Click on the Close button will close this window.Retrieving inventory information of the list will then show that the uploaded items have been added to the database.
Cancelling a Deposit
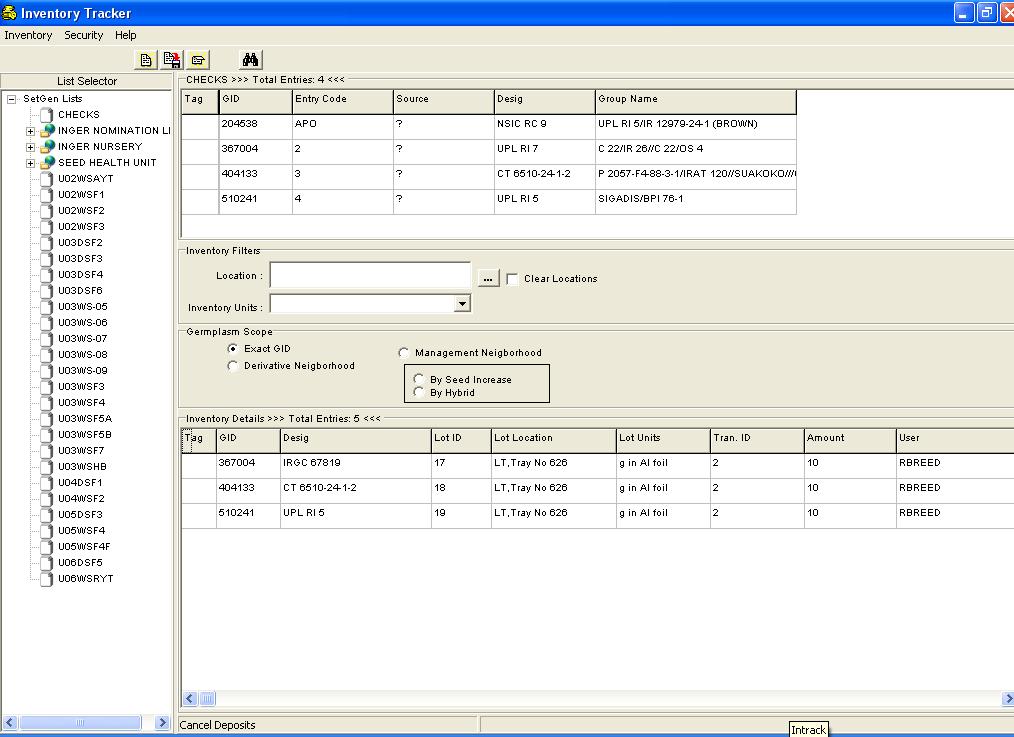
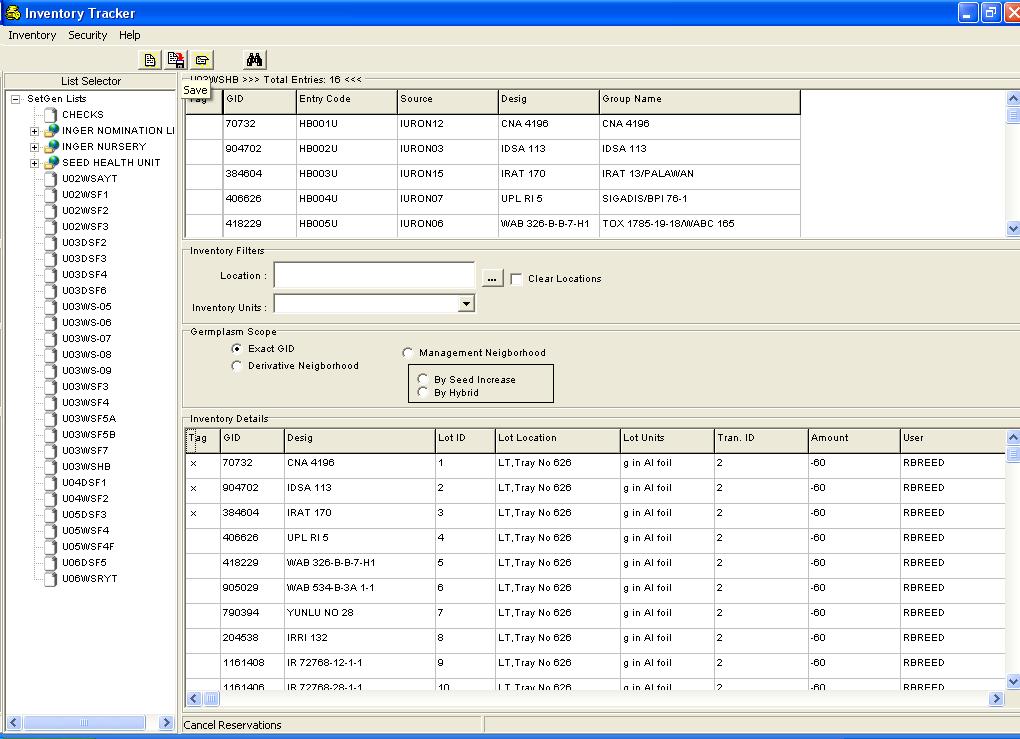
The user can cancel a deposit made by selecting a list from the List Selector window. Take note that the user must know which list has deposit records. Then selecting Inventory-> Cancel -> Deposits from the menu.
This will retrieve inventory records that has deposits.
Tag on the rows that needs to be cancelled then click on the Save button on the toolbar
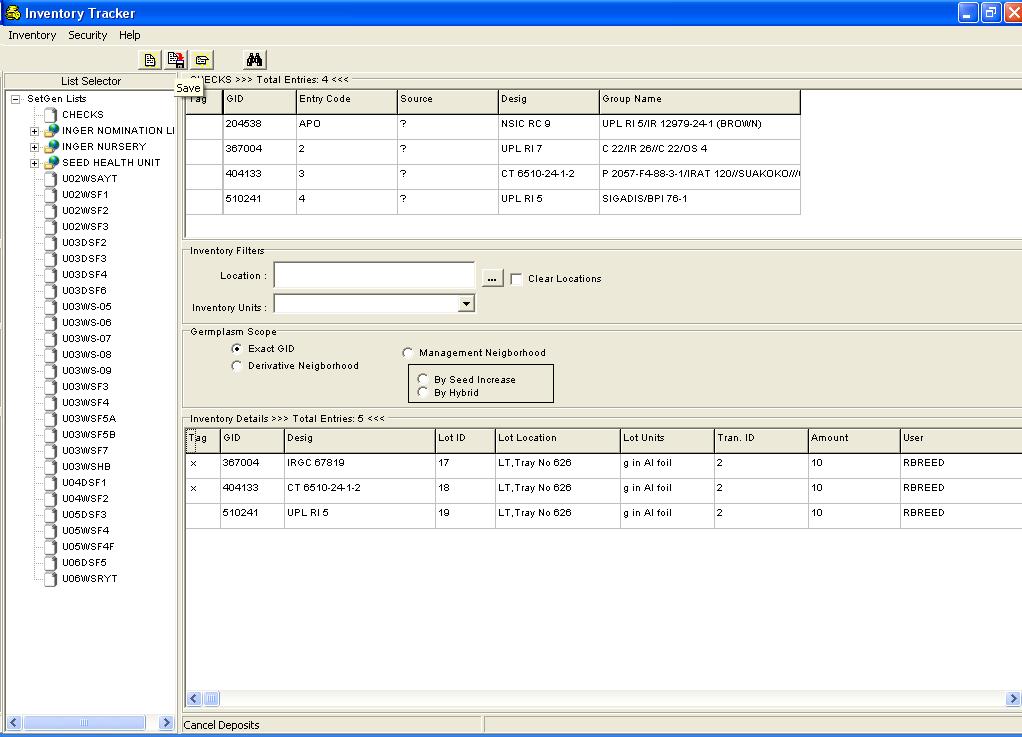
This will display a confirmation message
Click on the Yes button to continue or the No button to abort.If the user opts to continue with the cancellation, an information window will display

Clicking on the ok button will go back to the Inventory Tracker Main Screen.
Notice that the cancelled deposit records are no longer on the Inventory Details window.
Cancelling a Reserve
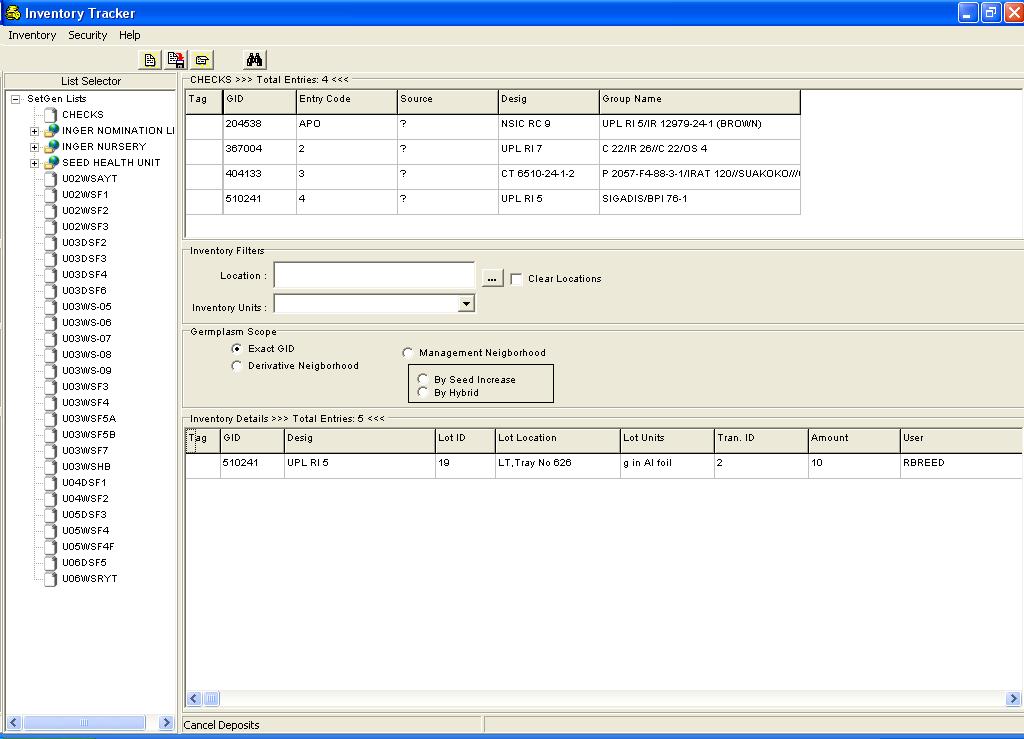
The user can cancel a reserve made by selecting a list from the List Selector window. Take note that the user must know which list has reserve records. Then selecting Inventory-> Cancel -> Reservation from the menu.
This will retrieve inventory records that has reserve.
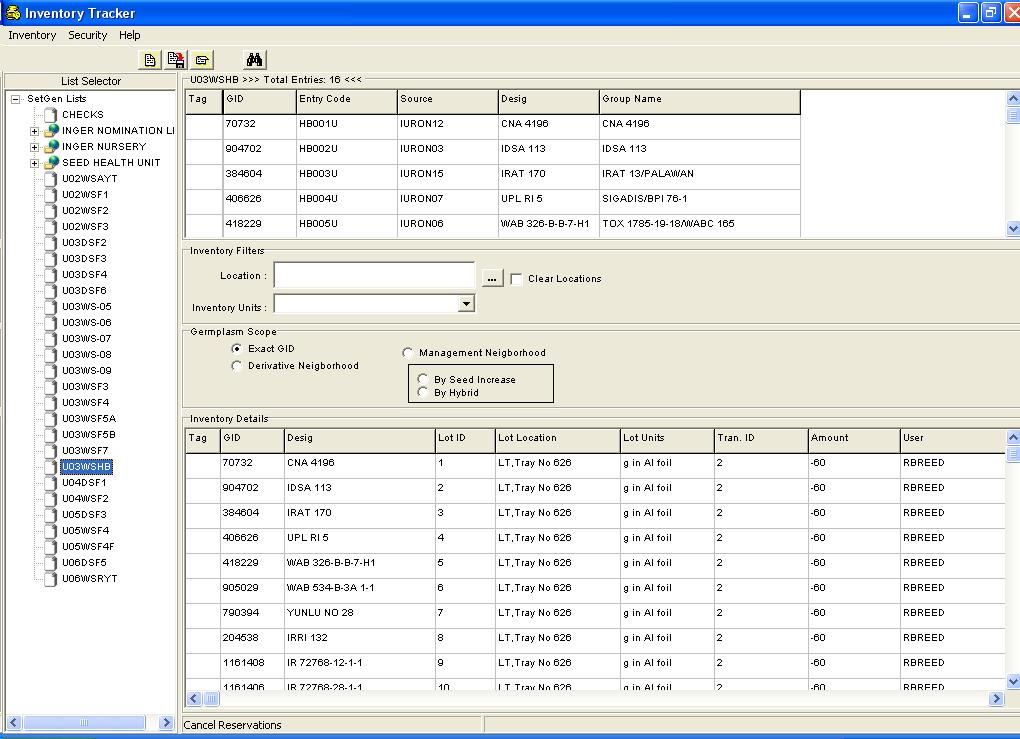
Tag on the rows that needs to be cancelled then click on the Save button on the toolbar
This will display a confirmation message
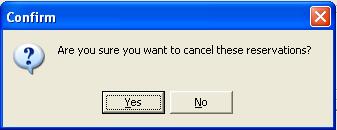
Click on the Yes button to continue or the No button to abort.If the user opts to continue with the cancellation, an information window will display

Clicking on the ok button will go back to the Inventory Tracker Main Screen.
Notice that the cancelled reserve records are no longer on the Inventory Details window.
Administrator’s Screen
When the user who has administrator rights can access the Administrator’s Form by logging on as Administrator. On the Inventory Tracker Main Screen’s main menu, an item named Security is provided for this facility. The user has to select on LogOn as Administrator sub-menu item under it, as follows:
The Administrator Log-On window displays, prompting the user to provide a valid User Name and Password.
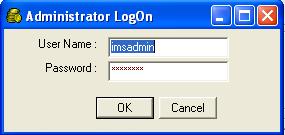
For the sake of system testing, valid values are as follows:
User Name : imsadmin
Password : imsadmin
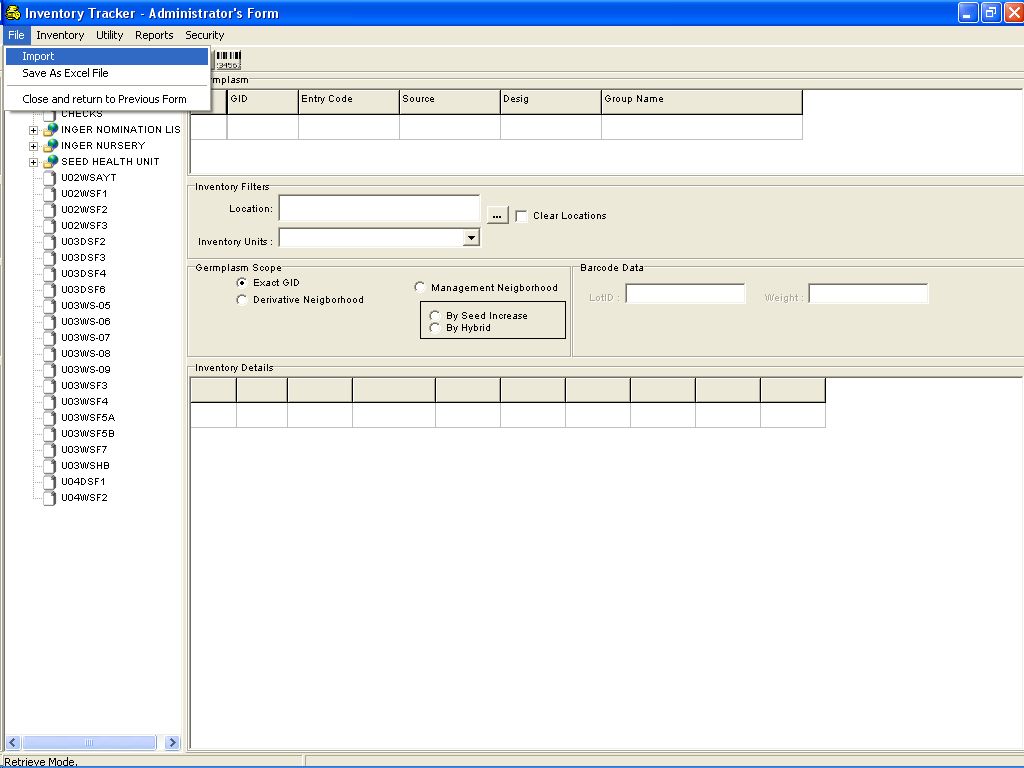
Upon clicking on the Ok button, the system displays the Inventory Tracker - Administrator’s Form
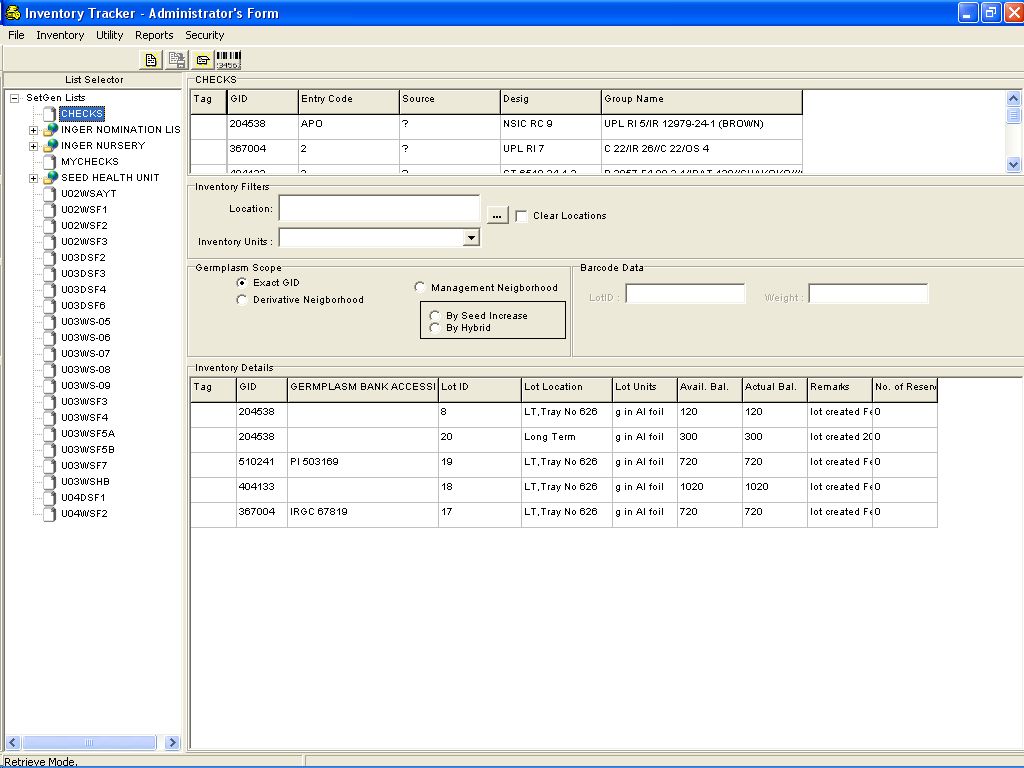
Main Screen
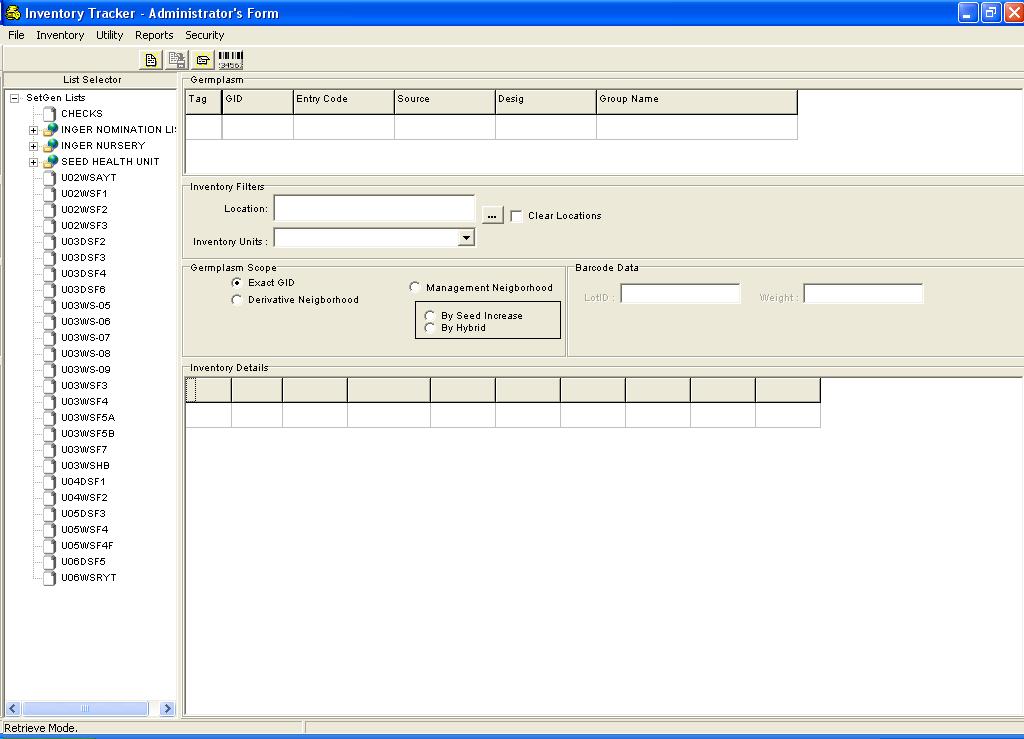
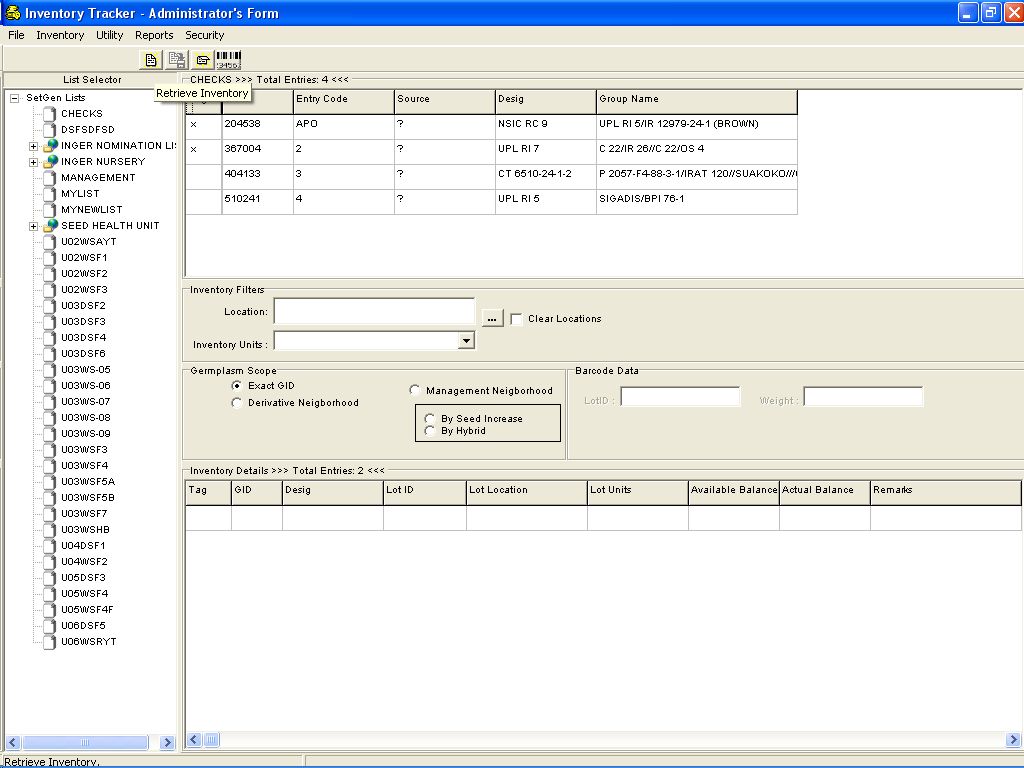
The screen is basically a form on which the user retrieves inventory information for any germplasm. The Inventory Tracker - Administrator's Form Main Screen is also the starting point from which the user can access all other parts of the program: Retrieve Inventory; Retrieve Inventory for Updating Requestor/Donor; Retrieve Deposits; Retrieve Reservations; Move a Lot; Split a Lot; Merge Lots; Discard a Lot; Cancel Reservation; Cancel Deposits; Update Lot Data; Update Requestor/Donor; Search Inventory Data by : List, Requestor, Donor; Add Person Information; Add Locations; Choosing Skin Color; Generating and Printing Barcode Labels; Reports : Get Balance(Total and Reserve), Get Transactions, Get Lots, Dormant Entries, Empty Lots, Amount Less Than Minimum, Distribution of Materials by : a Selected Requestor, by All Requestors; Save Data As An Excel File.
The Main Screen is divided into six parts.
- The first part is the List Selector window which is located on the left window panel. This window displays the lists in tree form, where a list can be a parent or a child of another list.
- The second part is the List Data window located at the upper right-hand window panel. This window displays all germplasm records grouped together from a selected list.
- The third part is the Inventory Filters window. The user can filter an inventory list by Location and/or by Lot Units. The small blank window called the location list window is populated when a location is selected.The ellipses button beside the location list window displays the Locations window where a list of locations in hierarchial form can be viewed. From here the user can select a location.More explanation on the Locations window will be discussed on the latter part of this document. The Clear Locations checkbox beside the ellipses button clears the locations list, when tagged, and reverts the location list when untagged.
- The fourth part is the Germplasm Scope window where the type of retrieval of germplasm is specified. The button Exact GID retrieves the inventory information of the germplasm selected from the List Data window.The Derivative Neighborhood button retrieves all inventory information of the derived germplasms of the selected germplasm from the List data window. While the Management Neighborhood button retrieves all inventory information of the selected germplasm either by Seed Increase or By Hybrid. Take note that the facility on retrieving Management Neighborhood by Hybrid is curently unavailable.
- The fifth part is the Barcode Data window which can be used for scanning barcode labels and weighing the amount when a barcode reader and weighing scale are attached to the work station. However, if there are no equipment attached, the user may type in the barcode on the LotID window and the amount on the weight window.
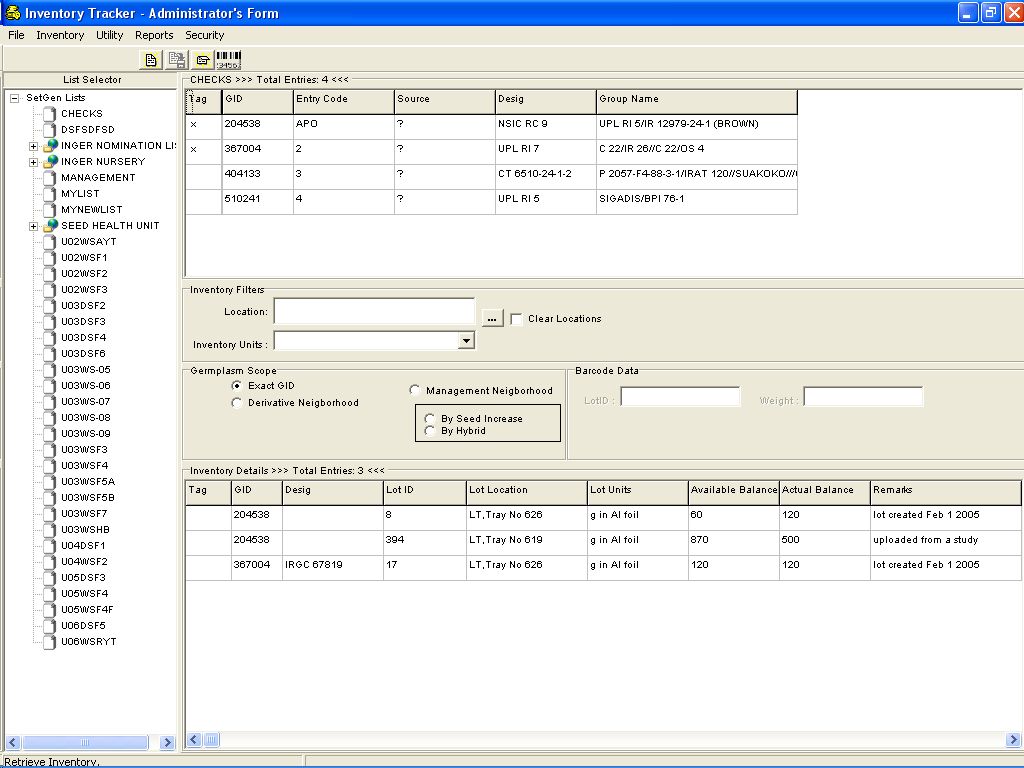
- The sixth part is the Inventory Details window where the inventory information of the selected germplasm is displayed. The information on this window are : the Tag column sets which row/s the user has selected by clicking on the row/tag column combination. An x mark is displayed for tagged rows; the GID column is the unique identifier of a germplasm which populated by the system; the Germplasm Bank Accession column displays the Accession number of a germplasm. Take Note that this column's name and data changes depending on what type is specidied in the [IMS]- NTYPE section of the INI file, for example, it can be named Designation and the designation of the germplasm is displayed or it can be named IRTP name and the IRTP name is displayed; the LotID column is the unique number assigned to each inventory Lot, where a Lot is a combination of GID, Location and Scale;the Lot Location column displays the location of the germplasm in the stock room; the Lot Units column displays the scale used in weighing the germplasm;the Available Balance column displays the actual amount inside the stock room plus/minus the deposit/reserved amount, respectively; the Actual Balance column displays the exact amount that is in storage; the Remarks column displays any comments set by the user upon adding lots; and the No. of Reserves column displays the number of reservations for a germplasm.
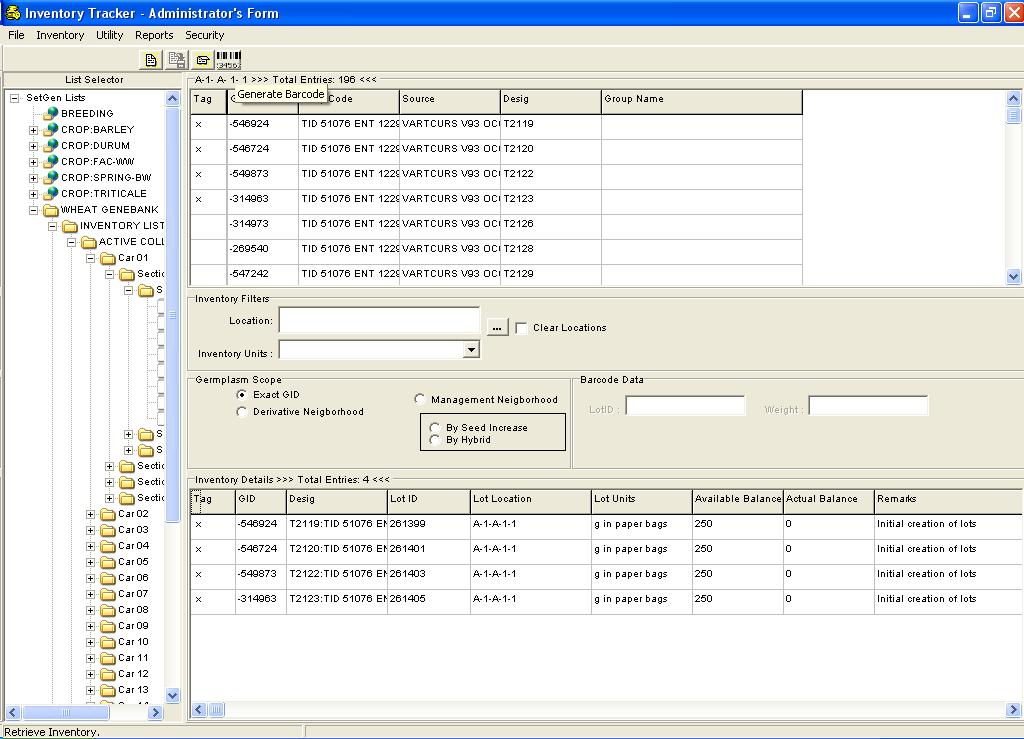
Retrieving Inventory
Retrieving of records is done by double-clicking on a list from the List Selector. A list of germplasm is displayed on the List Data window located on the upper right window pane. Notice that the title of this window is the name of the selected list and the total number of entries (in this case germplasm) in that list.

The user is then given the option to supply the necessary information – the GID (by clicking on (a) row/s on the List Data window ), the Lot Location and Lot Units which are both located on the Inventory Filters window. The user then clicks on the Retrieve Inventory button on the toolbar to display the inventory information on the Inventory Details window.
If only the List is provided by the user, the system retrieves all inventory records for that list. When the user supplies GID, Lot Location and Lot Units, or any combination of these three items along with the list, the system filters the retrieval of records to those criteria.Notice that the title of the Inventory Details window shows the total number of inventory entries.
Retrieving a Reserve
Retrieving reserve records is done by double-clicking on a list from the List Selector. On the Inventory Tracker - Administrator's Form, an item in the menu called Inventory - Retrieve - Reservations is then selected.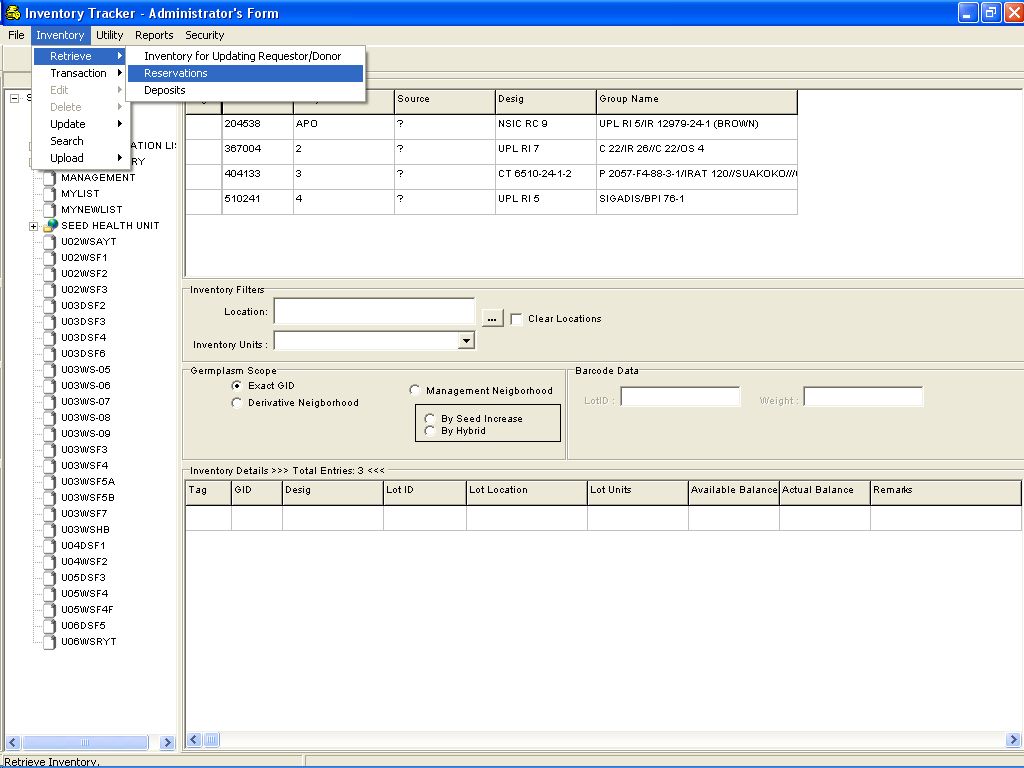
A list of inventory records with reserve is displayed on the Inventory Details window. Notice that the title of the Inventory Details window shows the total number of inventory entries.

There are 2 ways of approving reserves :
(a) If a barcode reader and/or weighing scale are/is attached to the workstation, the Barcode Details window can be used.
Using the barcode reader to read the label on the seed stock and weighing the amount of seed on the scale automatically selects the record and updates/confirms the amount reserved.
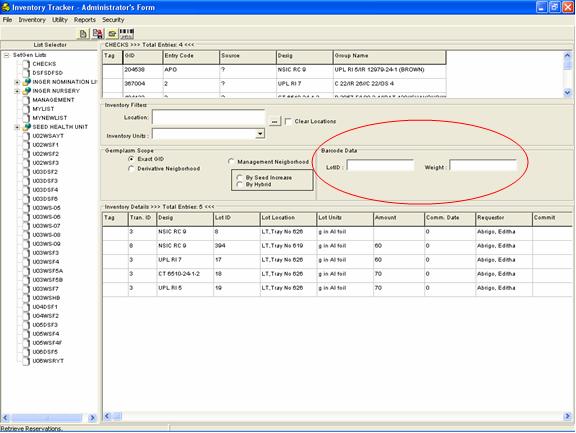
(b) If no equipments are attached to the work station :
- Select reserve records to approve by double-clicking on Commit column of the Inventory Details window.
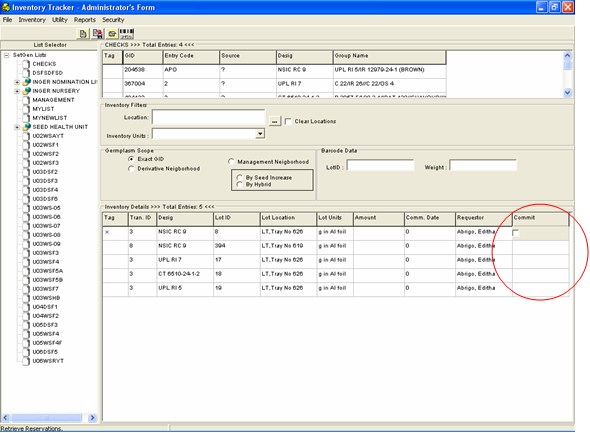
Notice that the value on the Commit column changes to Yes.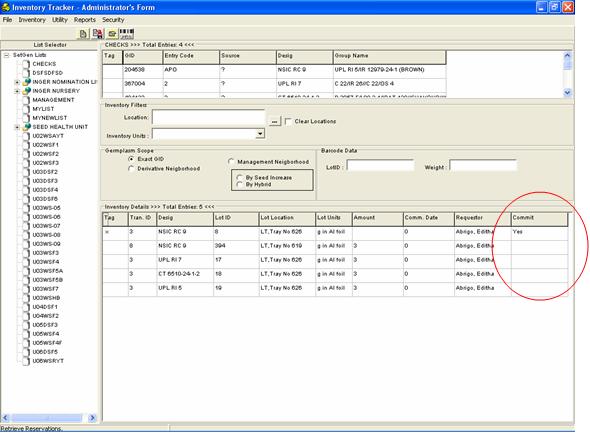
- Click on the amount column when the actual amount is not equal to the reserved amount then encode the correct amount and press <Enter> on the keyboard.

Notice that the amount changes to negative.
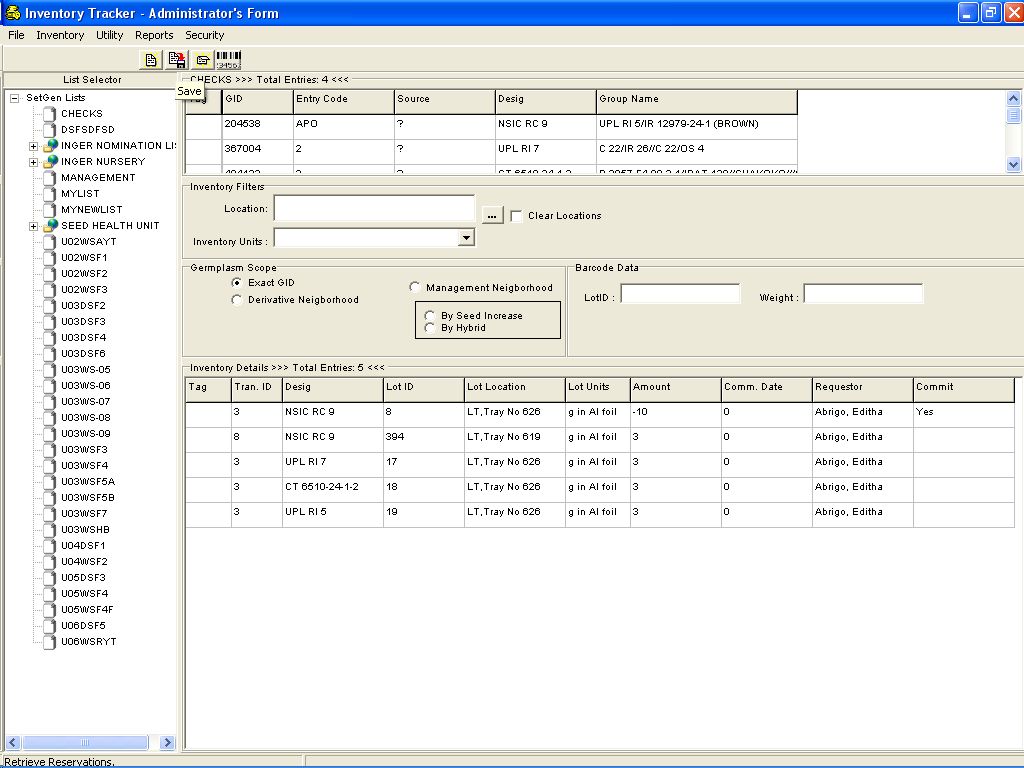
An information window displays showing the number of transaction processed, the number of successful transactions and the number of failed transactions.
Take note that when a reserve is approved, it is committed and the system sets the status to 1.
Retrieving a Deposit
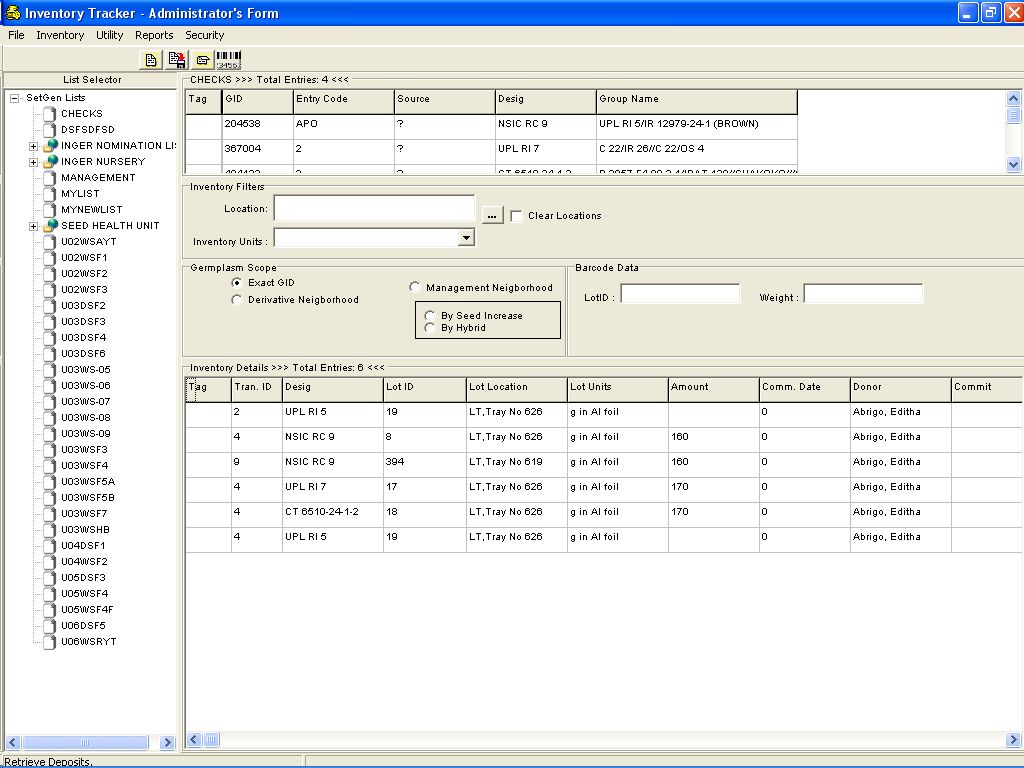
Retrieving of deposits is done by double-clicking on a list from the List Selector. On the Inventory Tracker - Administrator's Form, an item in the menu called Inventory - Retrieve - Deposits is then selected.
A list of deposits is displayed on the Inventory Details window. Notice that the title of the Inventory Details window shows the total number of inventory entries.
There are 2 ways of approving reservations :
(a) If a barcode reader and/or weighing scale are/is attached to the workstation, the Barcode Details window can be used.
Using the barcode reader to read the label on the seed stock and weighing the amount of seed on the scale automatically selects the record and updates/confirms the amount of deposit.

(b) If no equipments are attached to the work station :
- Select deposits to approve by double-clicking on Commit column of the Inventory Details window.

Notice that the value on the Commit column changes to Yes.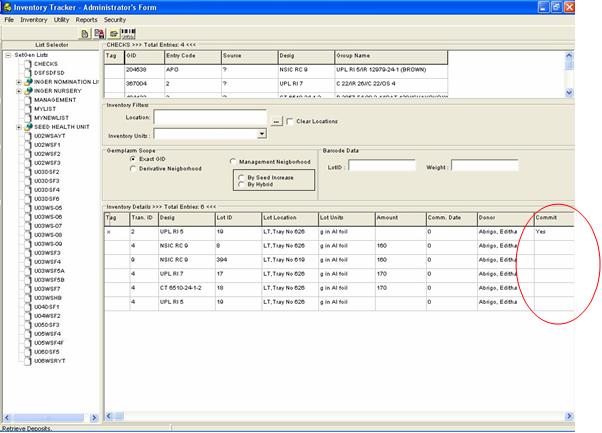
- Click on the amount column when the actual amount is not equal to the amount deposited then encode the correct amount and press <Enter> on the keyboard.


An information window displays showing the number of transaction processed, the number of successful transactions and the number of failed transactions.
Take note that when a deposit is approved, it is committed and the system sets the status to 1.
Cancelling a Deposit
The user with administrative rights is allowed to disapprove deposits. This is done by selecting a list from the List Selector window. Take note that the user must know which list has deposit records. Then selecting Inventory->Transaction->Cancel->Deposits from the menu.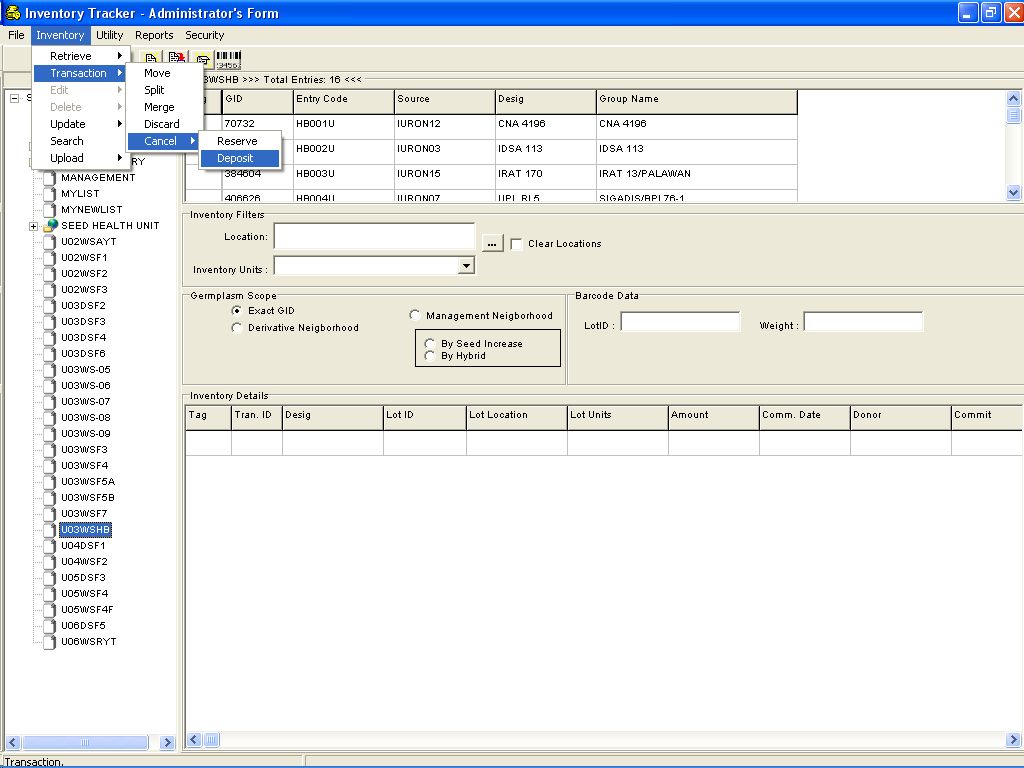
This will retrieve inventory records that has deposits.

Tag on the rows that needs to be cancelled

Then click on the Save button on the toolbar
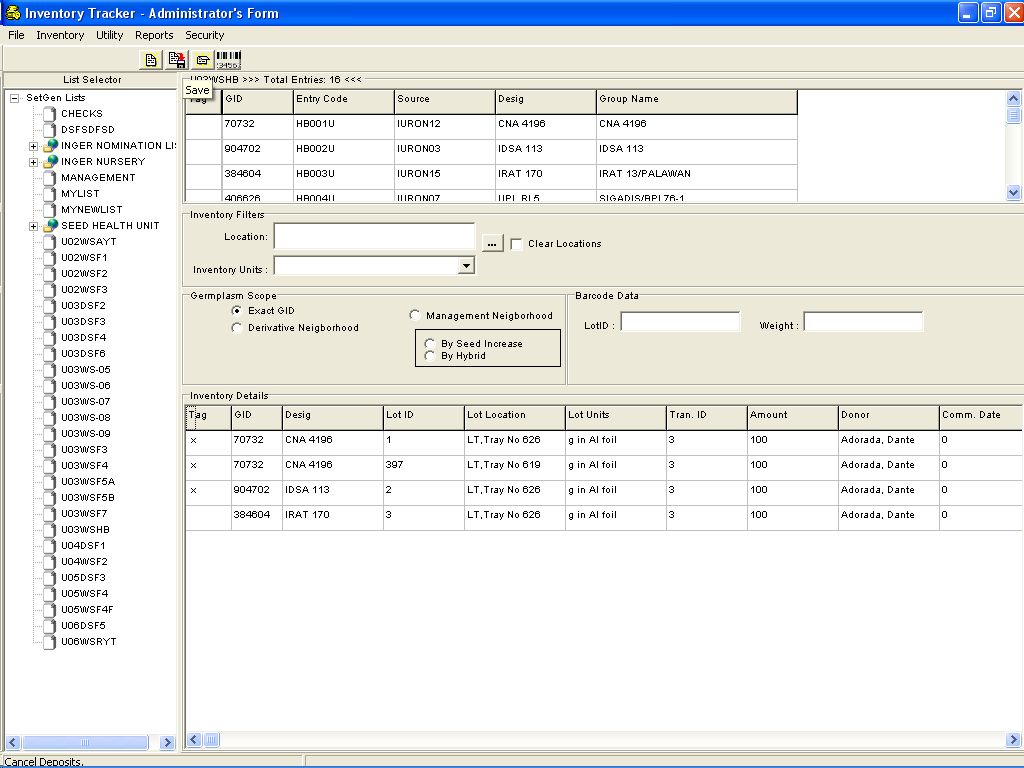
This will display a confirmation message
Click on the Yes button to continue or the No button to abort.If the user opts to continue with the cancellation, an information window will display
Clicking on the ok button will go back to the Inventory Tracker - Administrator's Form Main Screen.
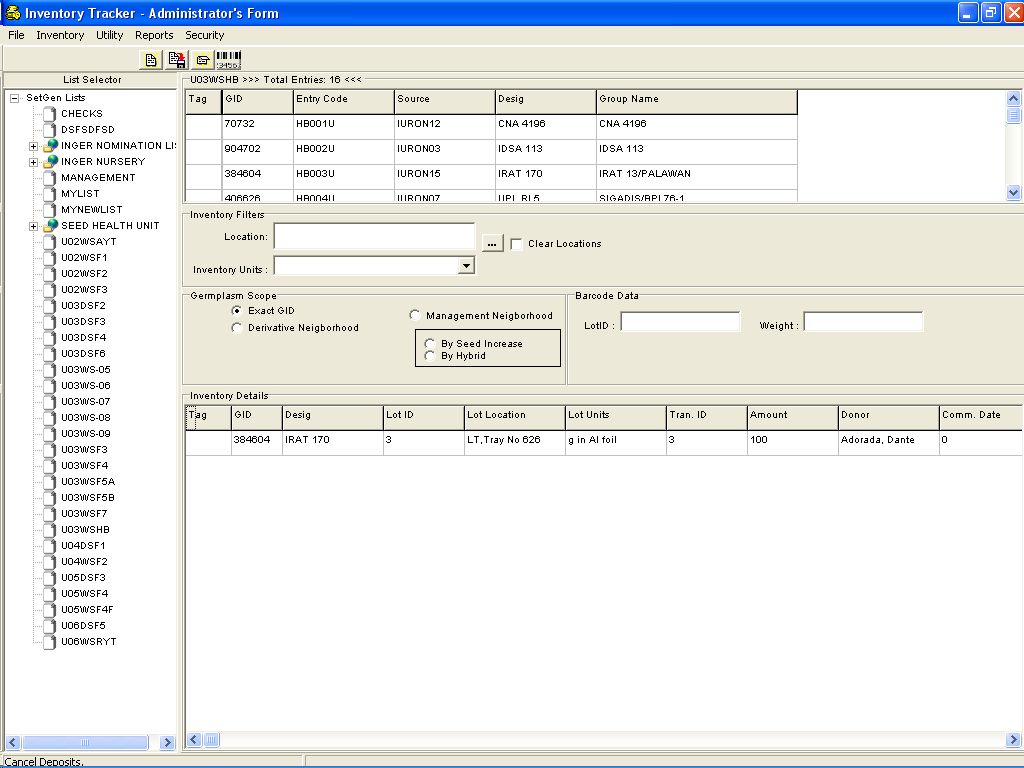
Notice that the cancelled deposit records are no longer on the Inventory Details window.
Cancelling a Reserve
The user with administrative rights is allowed to disapprove reserves. This is done by selecting a list from the List Selector window. Take note that the user must know which list has reserve records. Then selecting Inventory->Transaction->Cancel->Reserve from the menu.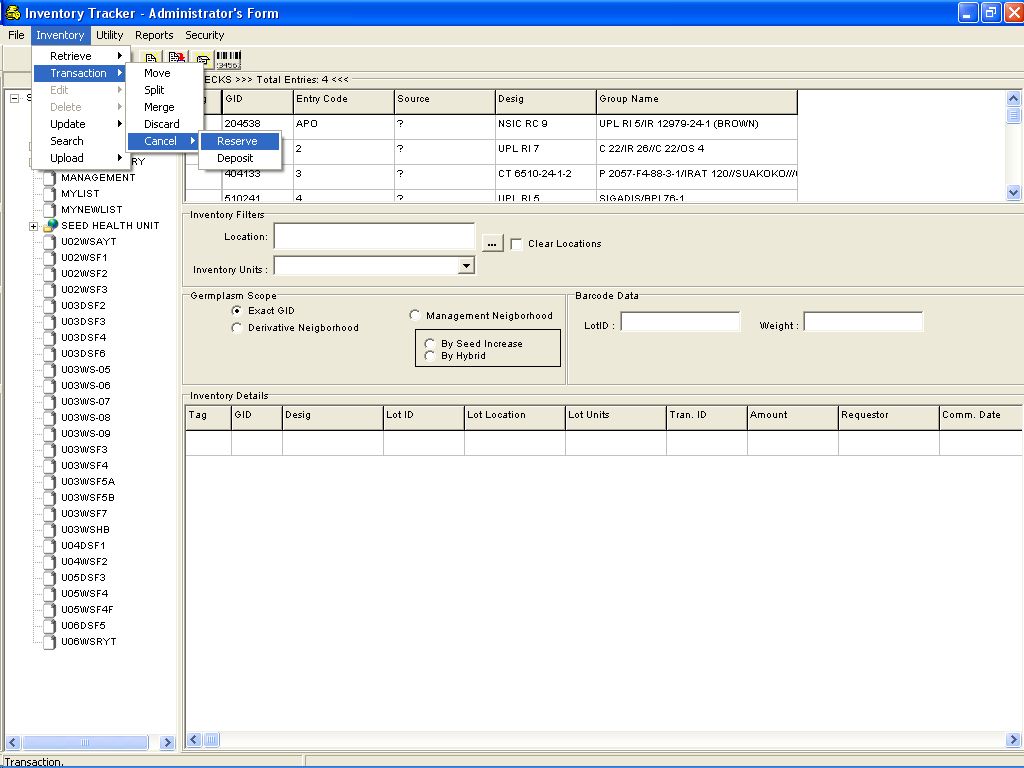
This will retrieve inventory records that has reserve.

Tag on the rows that needs to be cancelled
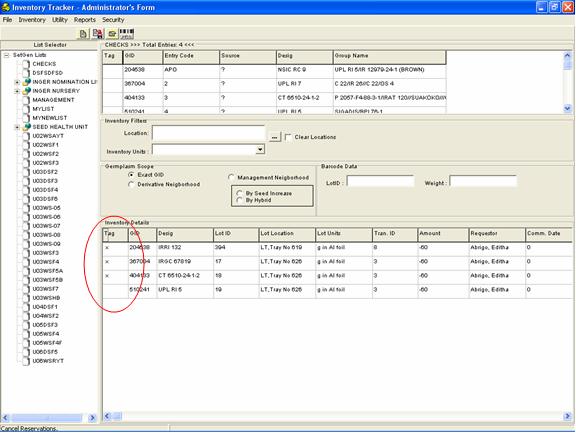
Then click on the Save button on the toolbar

This will display a confirmation message
Click on the Yes button to continue or the No button to abort.If the user opts to continue with the cancellation, an information window will display
Clicking on the ok button will go back to the Inventory Tracker - Administrator's Form Main Screen.
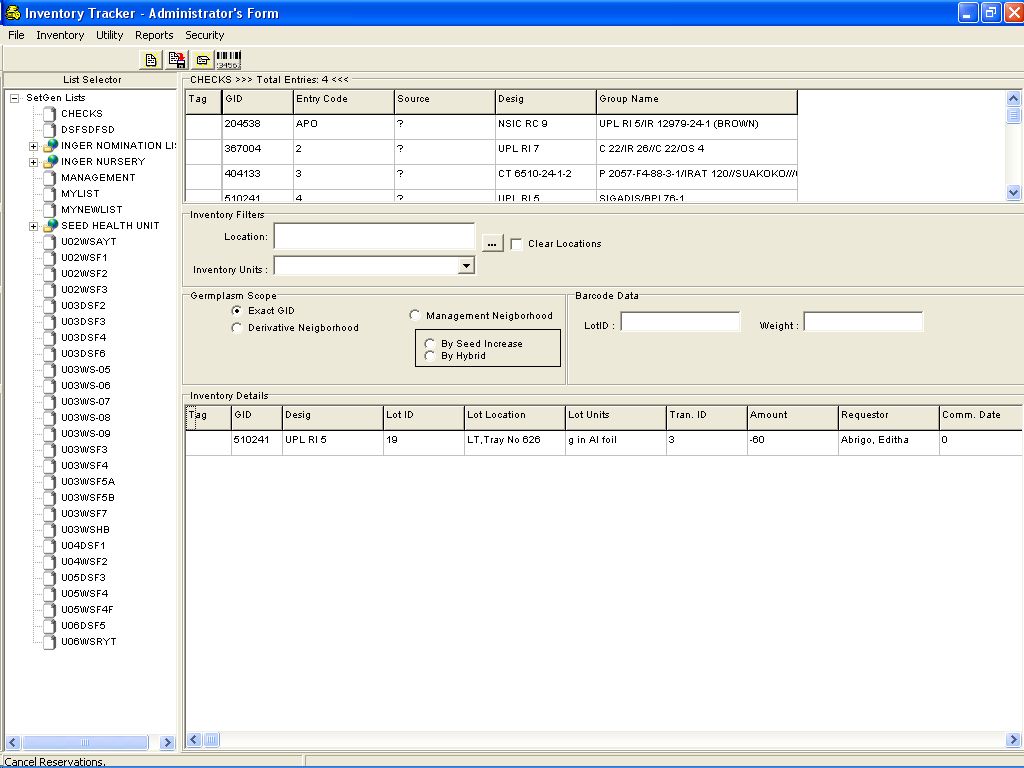
Notice that the cancelled reserve records are no longer on the Inventory Details window.
Material Repackage/Move
When inventory location needs to be changed, select a list from List Selector then click on Inventory ->Transaction ->Move from the menu.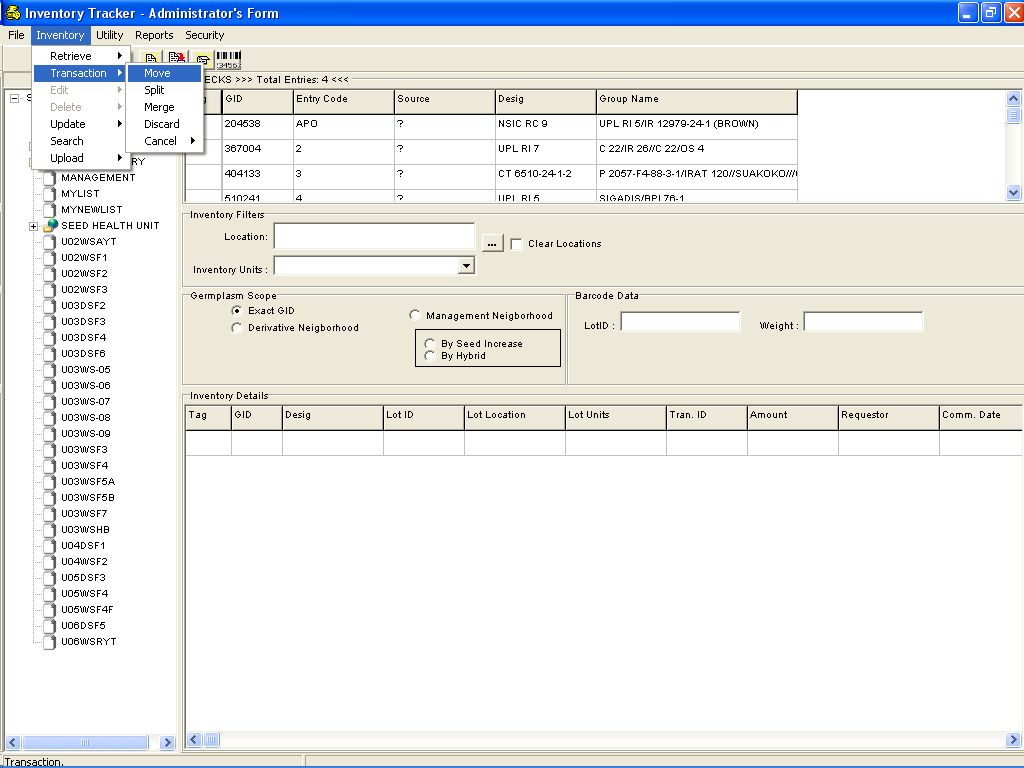
Notice that the layout of Inventory Details window has changed.
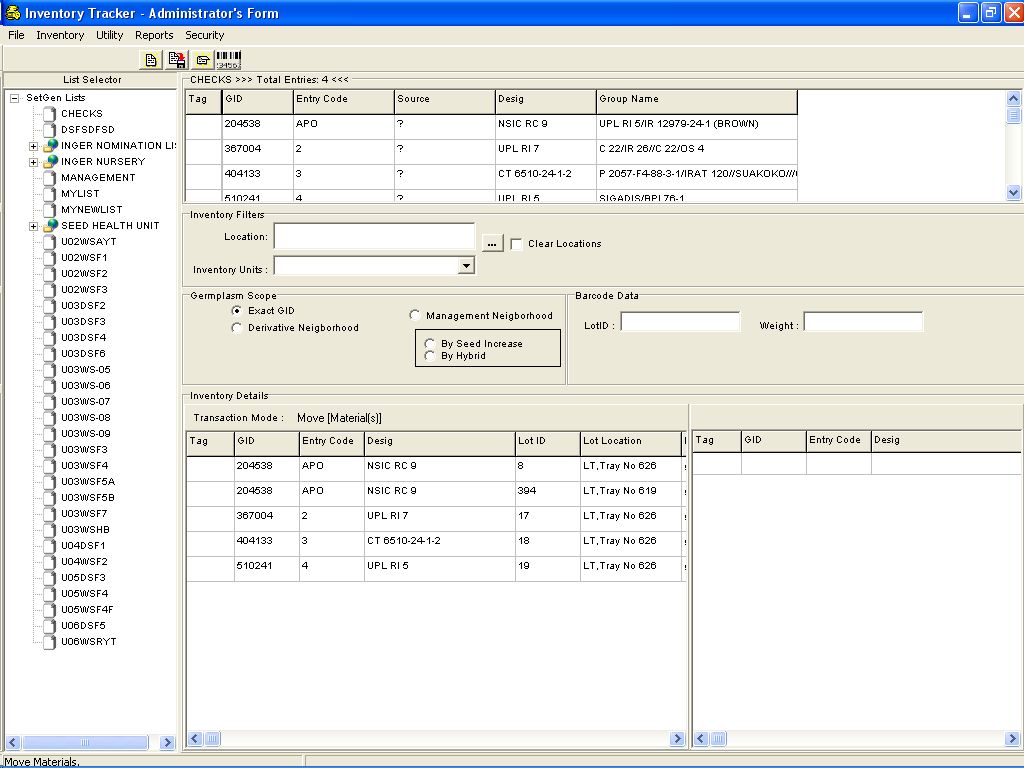
The window is divided in to two grids.
- on the left grid is all inventory information for the selected list,
- while the right grid is the work area for the user.
To move a material from one location to another, tag on the rows on the left grid
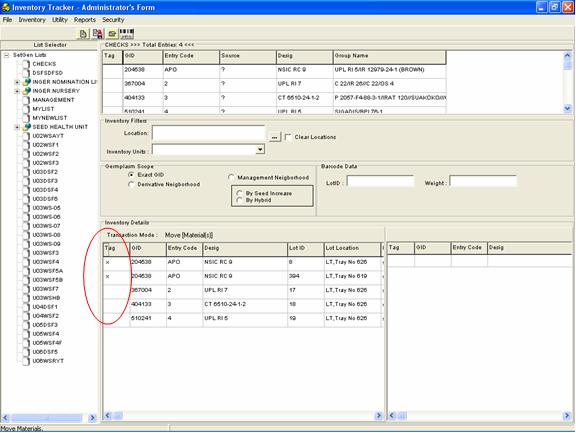
then drag-and-drop those records to the right grid.
From the right grid, tag on the row
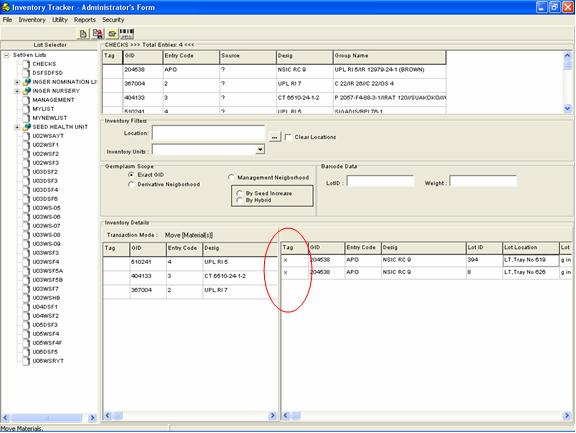
and click on the Lot Location column. A pop-up window is displayed showing all locations.

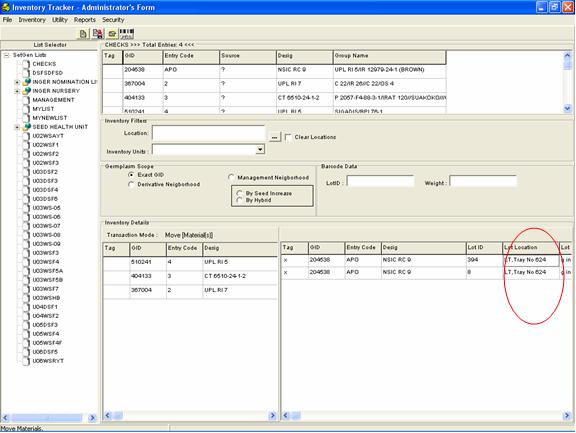
The select a location and click on the Ok button. Then pop-up window closes and the new location is displayed on the selected rows on the right grid.
When the scale needs to be changed as well, click on the Lot Units column. A dropdown list of Scales is displayed.
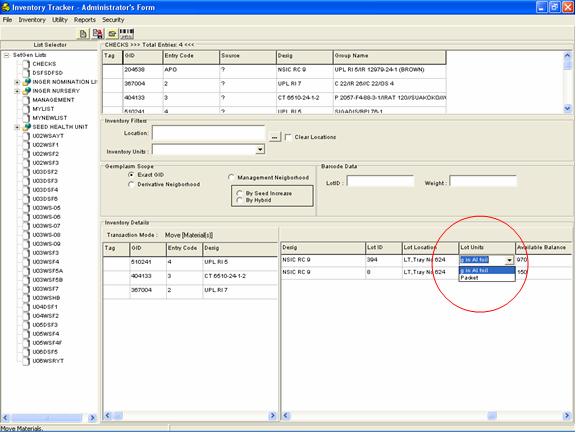
Select a scale to change the the value on the row.
Click on the Save button on the toolbar to save changes to the database.

Retrieving the list (please refer to Retrieving Inventory section of this module) displays the new location and scale of the moved records.
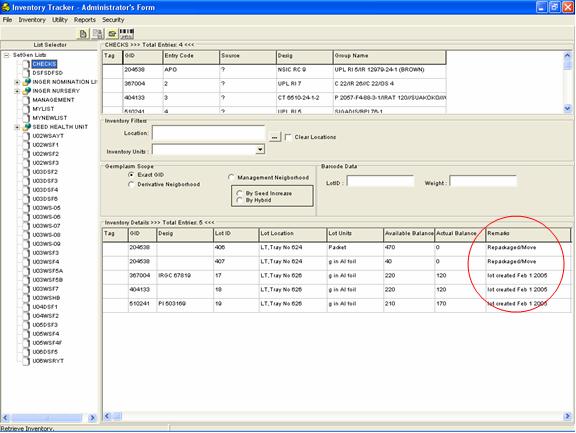
Take note that the Remarks column on the Inventory Details window has changed to Repackaged/Move.
Material Split
Inventory lots can be split into various sub-lots for storage in different locations. Select a list from List Selector then click on Inventory ->Transaction -> Split on the menu.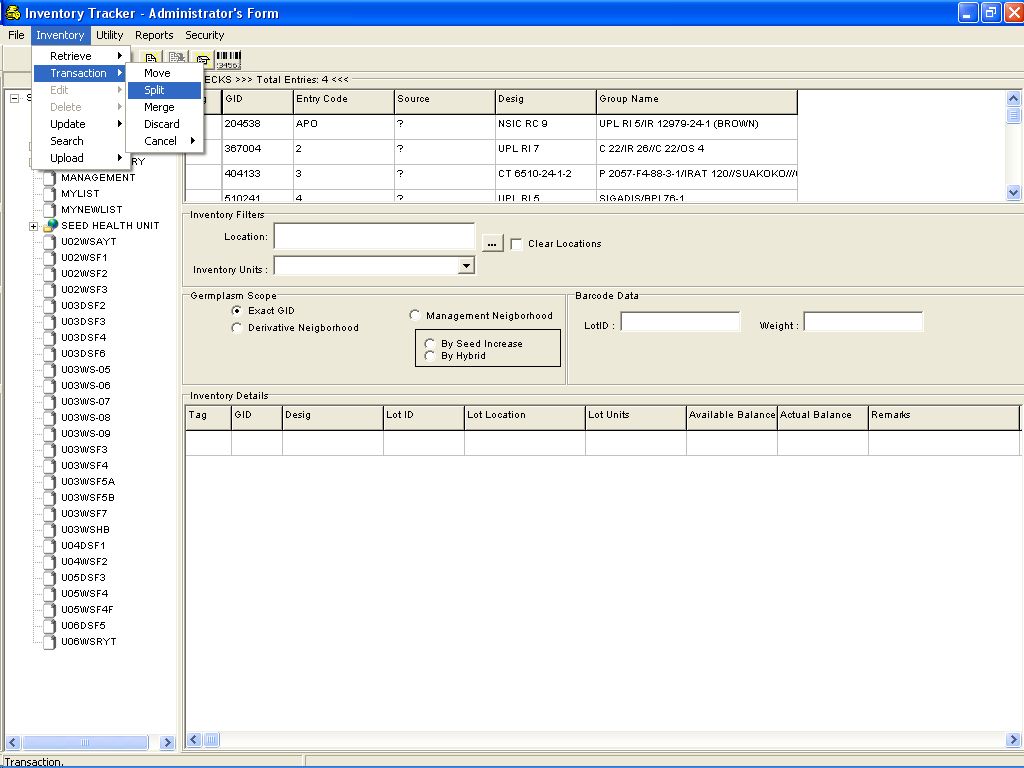
Notice that the layout of Inventory Details window has changed.

The window is divided in to two grids.
- on the left grid is all inventory information for the selected list,
- while the right grid is the work area for the user.
To select items for splitting, tag on the rows on the left grid

then drag-and-drop those records to the right grid.
Take note that only one lot can be split into sub-lots at a time. From the right grid, tag on the row

and right-click on the white space.
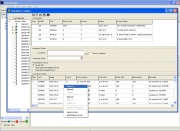
The Split Transaction Form window displays.
The inventory information for the selected list is displayed on the left grid. To select items for Splitting, the administrator has to tag items from the left grid then drag-and-drop these items to the right grid. Only one lot can be split into sub-lots at a time. The administrator selects the lot record from the right grid then right clicks on the white space. A transaction window displays.
On the transaction window, the administrator clicks on the Insert row button to add lot location for the Split lot. The administrator then clicks on the Lot Location column to select a location; Lot Units column to select a scale; and types the quantity on the Amount column. The administrator then clicks on the Save Changes button to update the database. The new Lot ID generated by the system is displayed on the transaction form.
Material Merge
When different containers of inventory material needs to be combined, the administrator selects an item from Lists then clicks on Inventory-Transaction-Merge on the menu. Inventory information for the selected list is displayed on the left grid. The administrator then selects items to be merged from the left grid then drag-and-drop these items to the right grid. For merging lots, two or more lots are required. The administrator then selects on the items on the right grid then right clicks on the white space. A transaction window is displayed.

On the transaction window, the GID is automatically displayed by the system if the merged lots have the same GID, otherwise, the administrator needs to specify a valid GID. The Lot Units is also automatically displayed when the merged lots have the same scale, else the user has to select an item from the dropdown list of scales, by clicking on the Lot Units column. The quantity is typed on the Amount column. The Save Changes button is clicked to save the new location.

Adding a Person
For every transaction, a requestor or a donor is assigned, though not required. If in case a person is not in the database, the administrator can add the person’s details by selecting Utility-Add Person on the menu bar.
The Add Person Window appears.

The administrator then clicks on the <+> button to add a person. A blank form shows. The administrator then fills up the information sheet of the Add Person window, and clicks on the <Save> button to update the database.
Adding a Location
When there are new storage locations, the administrator can add the storage location by selecting on Utility – Add Location on the menu.

The Add Location window appears. The administrator can add level locations by clicking on the <Add…> button placed next to each level location drop down.
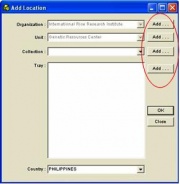
Note : in case the level location is existing, the administrator selects the level location on the dropdown list then goes to the next level location to add a new one.
When the administrator clicks on the <Add…> button, the Add Location –Details window appears.
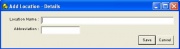
Here, the location name and abbreviation is specified by the administrator. Clicking on the <Save> button updates the database, closes the window, returns to the Add Location window and the new level location is included in the drop down list.
Importing Inventory Data From Excel
Inventory data saved in an excel file can be imported to IMS. To do this,
From ICIS Launcher, select IN-TRACK -> Security -> LogOn as Administrator
From the Administrator LogOn just click OK
The Import Inventory Data window displays.
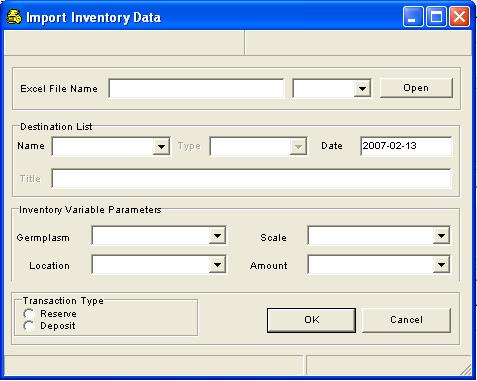
This window is divided into four parts:
- The first part is the File Name section where the name of the excel file is provided.
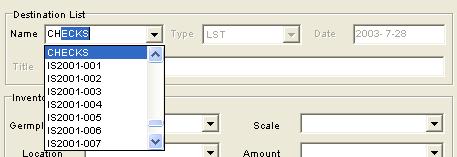
- The second part is the Destination List section where a target list is selected from the dropdown window or a list name is created.
- The third part is the Inventory Variable Parameters section where inventory-specific items (GID, Location, Scale, Amount) are provided. The dropdown window displays the column headings of the excel sheet,and becomes a reference to the information needed for each inventory item.
- The last part is the Transaction Type section. If an amount is indicated in the Inventory Variable Parameters section, the type of transaction before must be selected before uploading the data. Otherwise, this section is left unchecked.
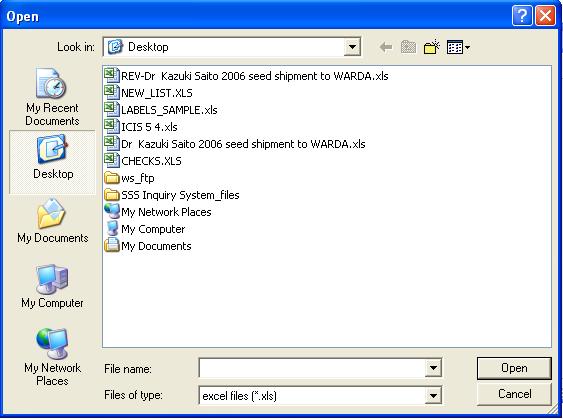
Select a file for uploading and click on the Open button. After selecting a file, the system displays the filename (with its path) on the blank space provided.Beside this is a list of sheetnames in a dropdown window.Select the sheetname to be used.If only one sheet is found in the file selected, the system sets this sheet as default.

When a list is created, the type of the list should be indicated by selecting an item on the Type dropdown window.Type the date on the space provided.Type a description on the Title space provided.
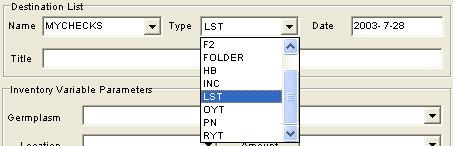
Otherwise, if a list name is selected from the dropdown window, the Type,Date and Title are generated by the system.
On the Inventory Variable Parameters section, select items from the dropdown windows for GID,Location,Scale and Amount.

If the Amount item is provided,select a transaction type from the Transaction Type section.Otherwise leave this section unchecked

Then click on the Ok button to continue or click on the Cancel button to abort.
If a list is selected from the Destination List window, then this confirmation window displays.
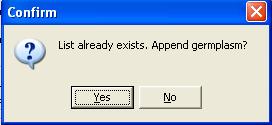
Click on the Yes button if the germplasm is to be added to the list. Otherwise, click on the No button.
If a list is created,this confirmation window displays
Click on the Yes button to save the list. Otherwise click on the No button.
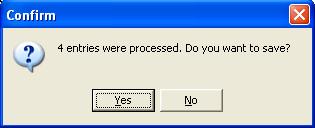
If not all items in the Inventory Variable Parameters section are provided, this confirmation window displays.

Click on the Yes button to confirm. Otherwise, click on the No button to go back to the Import Inventory Data window to add/remove variable parameters.
Uploading of data begins after these series of confirmations. After upload, the Import Inventory Data window closes and the imported list/data is displayed on the Inventory Details section of the Inventory Tracker - Administrator's Form.
Updating a Lot Data
Updating a Requestor/Donor
Searching Inventory Data by List
Searching Inventory Data by Requestor
Searching Inventory Data by Donor
Generating and Printing Barcode Labels
Generating and printing barcode labels is done by :(a) selecting an item from the List Selector,
(b) tagging on items on the List Data window,
(c) clicking on the Retrieve Inventory button on the toolbar to display inventory information on the Inventory Details window,
(d) tagging on items on the Inventory Details window,
(e) and clicking on the Generate Barcode button on the toolbar.
The IMS Barcode Generation Window displays.
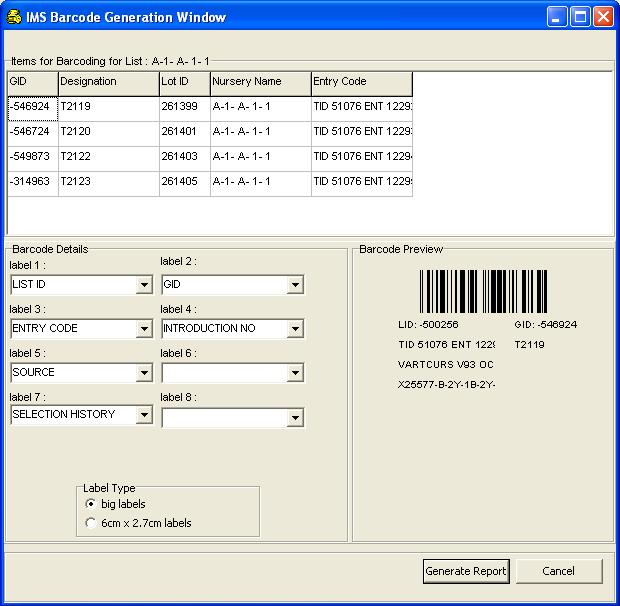
This window is divided into three parts:
- The first part is the Items for Barcoding list which displays all the items selected from the previous window.
- The second part, found on the lower left-hand side, is the Barcode Details window where the layout is designed by specifying the position of the barcode label text. This is done by selecting from the pull-down windows the text to be printed. It also provides the type of labels to choose from – big labels or 6cm x 2.7cm labels(please take note that these are the available sizes at the moment).
- The third part is the Barcode Preview window found on the lower right-hand side which gives the user an idea on how the barcode would look like when printed.
To start with barcode label generation and printing, do the following :
- Design the barcode label by selecting label items on the provided dropdown windows.
- Select a label type on the Label Type radiogroup.
- Click on the Generate Report button to continue. Otherwise click on the cancel button to abort the operation.
Clicking on the No button will abort the operation while clicking on the Yes button will display an Output Options window.

Click on the OK button to preview the report before printing.A Report Preview window will appear on screen.
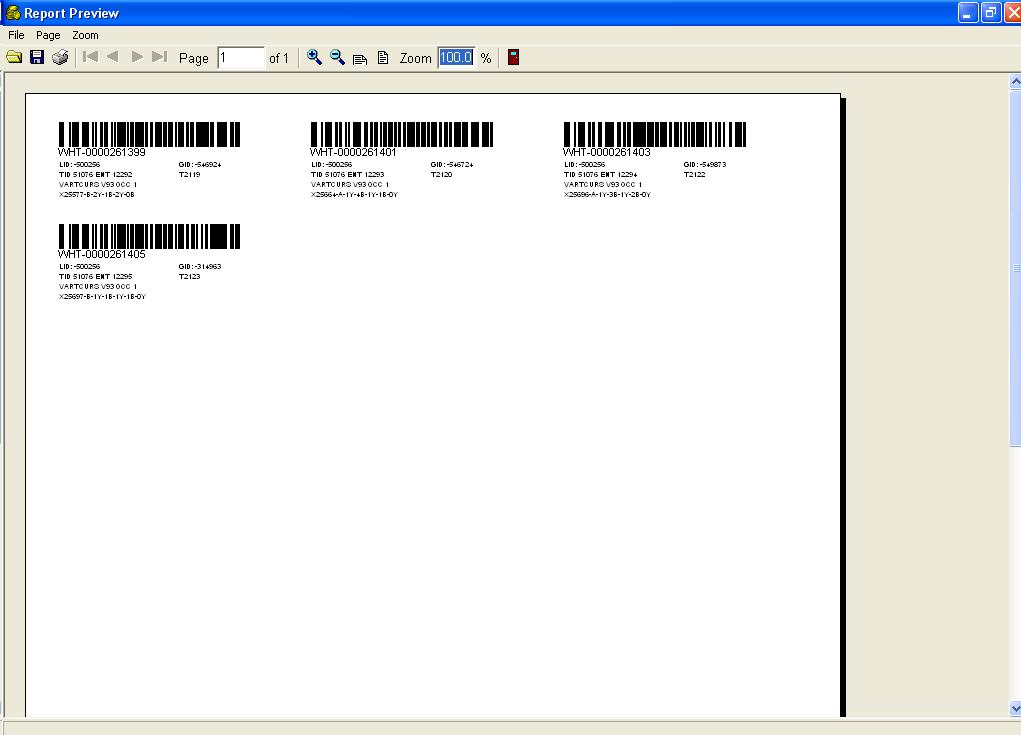
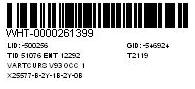
The barcode combines the PREFIX (retrieved by the system from the [IMS] section of the INI file) with the LOTID; together they constitute the unique identifier for many records in the IMS database. In theory, this combination identifies a sample of biological materials across crops.
Close the Report Preview window. Then select Cancel button from the IMS Barcode Generation Window to go back to the Inventory Tracker - Administrator's Form.
Choosing Skin Color
Reports
Get Balance(Total and Reserve)
Get Transactions
Get Lots
Dormant Entries
Empty Lots
Amount Less Than Minimum
Distribution of Materials by a Selected Requestor
Distribution of Materials by All Requestors
Saving Data As An Excel File
Integrated to SetGen
Main Screen
This screen works the same way as the Stand-Alone Main Screen. But notice that this screen doesn’t have menus and is initially set to Retrieve Mode with the active list specified and tagged items from Set Gen’s Edit Window are displayed in the form.
Please refer to http://cropwiki.irri.org/icis/index.php/TDM_ICIS_Inventory_Tracking#Main_Screen.
Add Lot Record
This function works the same way as IMS Stand-Alone. In this program, however, the user right-clicks on the white space and selects Add Lot on the pop-up menu (please refer to http://cropwiki.irri.org/icis/index.php/TDM_ICIS_Inventory_Tracking#Add_Lot_Record for more information).
Reserve Mode
The process is the same as IMS Stand-Alone. Although in this program, the user selects items on the detail window, right-clicks on the white-space then selects Reserve on the pop-up menu
(please refer to http://cropwiki.irri.org/icis/index.php/TDM_ICIS_Inventory_Tracking#Reserve_Mode for more information).
Deposit Mode
The process is the same as IMS Stand-Alone. The user selects items on the Detail window, right-clicks on the white space then selects Deposit on the pop-up menu (please refer to http://cropwiki.irri.org/icis/index.php/TDM_ICIS_Inventory_Tracking#Deposit_Mode for more information).