Talk:TDM ICIS Workbook 5.4
From ICISWiki
Contents |
SPECIALIZED FUNCTIONS
GMS Functions
Retrieves related GMS information from Setgen given a specific GIDs. GMS Functions → Add-ins → Get GMS Info or using the GMS toolbar
GMS Informations:
Get Management GID
Get Source GID
Get Accession No.
Get IRTP No.
Get Unique ID
Get Cross Expansion
Get Variety Name
Get Species
Get Origin
Import Column... - Retrieves information from the Source File (excel or workbook file) to your Workbook (working file or destination file).
GMS Functions → Add-ins → Get GMS Info Retrieves GMS Information by placing the cursor on the column where the users wants to get the information.
(e.g. Source GID, Accession No., IRTP No...) in this example 'Get Origin.'

Import Column
Import Column retrieves information from the Source File (excel or workbook file) to your Workbook (working file or destination file).
SMTA Functions
Retrieves related Standard Material Transfer Agreement (SMTA) information by selecting the column to fill in information. SMTA Functions→ Add-ins → SMTA functions or using the toolbar SMTA
Get Unique Sample ID
Get MTA Status
Refer Ancestors Set
Export Seed
Export NSBM
Load MLS Ancestors
Go to SMTA Website
Create SMTA
Version Shrink/Version Signed - Creates pedigree nurseries in pdf format
Create SMTA Short
Version Shrink/Version Signed - Creates IRTP, or IRIS No. in pdf format
GEMS Functions
Generating a Fieldbook
Add-ins → Generate Fieldbook Menu
Add-ins → Generate Fieldbook menu launches a dialog interface to get the necessary information and creates a Fieldbook based on the specified SetGen List, a Layout File and a Workbook Template.
Mutant Selection
This is a specialized function starting with ICISworkbook ver.5.5.0.7 and is used by the IR64 Mutant Rice Team at IRRI. The Add-ins → Mutant Selection menu or the equivalent toolbar icon creates an ICIS Workbook by filling-up a workbook template with data coming from a Mutant Selection File, and retrieving the associated list data from a specified SetGen List. The Mutant Selection File is a regular Excel file containing in the first sheet at least three columns: [1] the mutant name, [2] the phenotypic ID, and [3] the selected plant numbers.
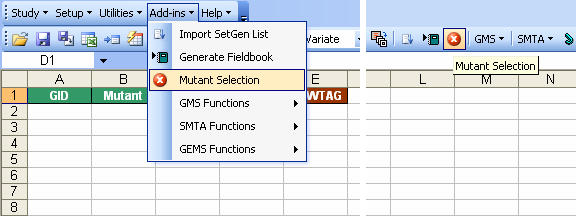
Add-ins → Mutant Selection menu and toolbar icon
The first requirement is the corresponding workbook template. Normally, you would first open the workbook template before clicking on the menu. But if there's no open workbook yet, the application will launch the Open dialog interface to ask for the name and location of the template file.

Open dialog interface asking for the Mutant Workbook Template if there's no active workbook yet
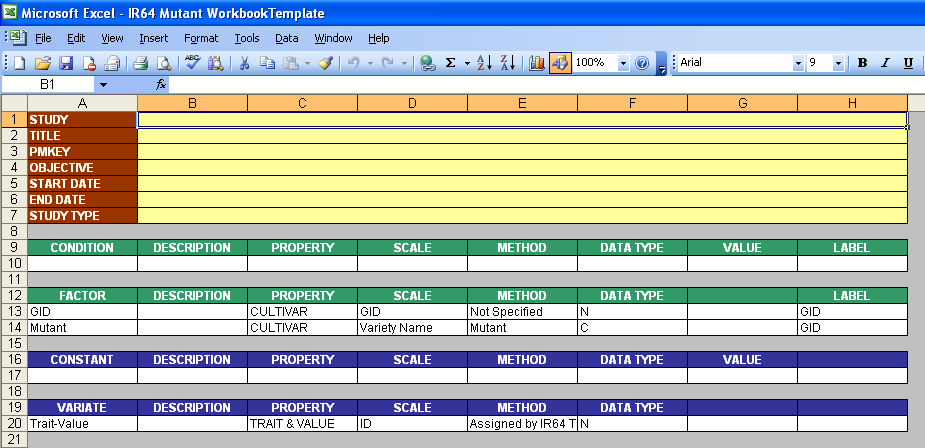
Description Sheet of the Mutant Workbook Template
If there's already an active workbook, the Mutant Selection dialog interface will appear where the user must specify the necessary column mappings in order to fill-up the workbook template. The step-by-step procedures to setup the form are as follows:
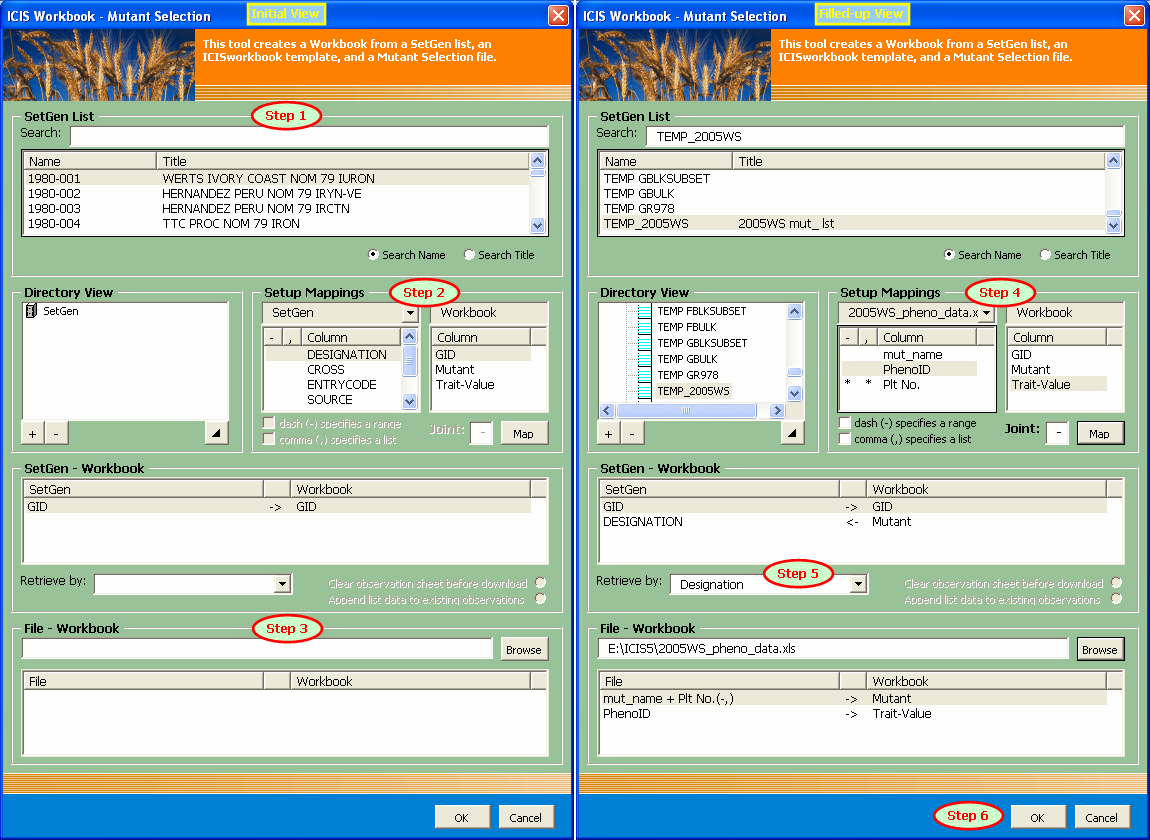
Mutant Selection dialog interface highlighting the numbered steps to setup the form
Step 1. Select the SetGen List
As you type along the name of the SetGen List in the corresponding textbox, an auto-search is being conducted to select the matching list items below, depending on the ticked search option. "Search Name" is the default option, meaning that the characters typed are being compared against the List Names. If "Search Title" is selected, the user can search for the List Title instead. Such option enables the user to find a particular SetGen List in case the title is easier to remember than the name because generally, names are coded while titles are more descriptive.
Step 2. Setup the SetGen - Workbook column mappings
The Setup Mappings section of the form provides the controls to map the SetGen - Workbook columns. The standard SetGen columns are shown on the left while the available Workbook columns are shown on the right side. The user must select the pair of columns and click on the Map button to make the link. The SetGen - Workbook section of the form shows the created link. It's possible that there are already created links at the initial launch of the form. This was automatically generated by the application using a specialized algorithm and available information for the user's convenience.
Step 3. Specify the Mutant Selection File
If you know the complete path and name of the Mutant Selection File, you can immediately type it in the textbox provided. By pressing the Enter key at the end, the path will be verified by the application. However, the file is probably located far away from the root drive, thus it is better to use the Browse button. The Open dialog interface will be launched to ask for the Mutant Selection File.
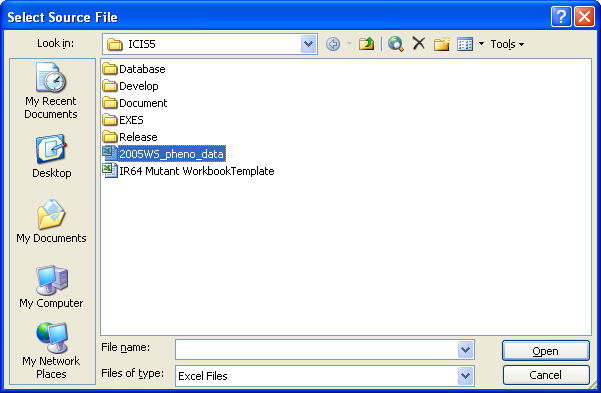
Open dialog interface asking for the Mutant Selection File

Mutant Selection File
Step 4. Setup the File - Workbook column mappings
Once the file name and path has been verified by the application, the file name will be added as the second choice of the combobox in the Setup Mappings section of the form. The user must then select this choice and consequently, the list of available columns in the Mutant Selection file will replace the list of standard SetGen columns. Again the user must select the pair of File - Workbook columns and click on the Map button to create the link. However, there are special controls that are enabled when the Mutant Selection File is selected in the combobox. These are two checkboxes for specifying whether a dash or commas contained in the selected File column will be interpreted as symbols for a range or a list of values respectively. Also, multiple columns in a Mutant Selection File can be combined together to be mapped to a single Workbook column. A textbox where the user can specify the "joint" character(s) is also enabled. Multiple selection of File columns can be done by pressing down the Ctrl key while selecting the columns to be joined. The File - Workbook section of the form will show the generated link.
Step 5. Select the basis of retrieval for the SetGen List
You will notice in both the SetGen - Workbook and File - Workbook sections that there is a middle column that shows the data flow. By default, the left column is the source and the right column is the destination. But to establish the connection between the File data and the SetGen list data, a basis of retrieval for the SetGen list must be specified through a combobox in the SetGen - Workbook section of the form. By selecting a basis column, the corresponding data flow for the pair of columns will change accordingly.
Step 6. Press the OK button to execute
If the previous steps have all been performed, what's left is to click on the OK button to fill-up the workbook template, and the resulting workbook will be ready for loading.

