TDM SET GENERATION
From ICISWiki
SET GENERATION MODULE (SETGEN)
Introduction
The Set Generation Module (SETGEN) is an application that uses the GMS to produce lists of germplasm descriptors for breeding, evaluation, or any other purpose. List entries need not exist in GMS, but if they do not, they may be added through the external pedigree input tool, which is integrated with SETGEN. Germplasm descriptors can be selected from existing lists or directly from GMS. Details of the new germplasm generated by the list process are stored in the GMS. It is not necessary that all information about a particular germplasm be entered at one time, because modifications can be made to germplasm records at any time.
The functions of SETGEN are:
• to produce lists of germplasm descriptors defining new crosses or selections, or for evaluation, distribution, or management,
• to retrieve GMS details of existing germplasm needed for field book construction, and
• to record all GMS details of new germplasm generated by the list process.
SETGEN is an application designed for plant breeding and germplasm evaluation. Breeders usually start with a list of potential parents (i.e., a list of rice varieties, each known for specific traits). From this list, the breeder selects male and female parents and makes a crossing list. After crossing and selfing, selections are made from one list and moved to the next list for the next generation. This process continues until successful fixed lines are derived.
SETGEN adds new germplasm to the Local GMS, which are seen only by authorized users. Only when the local database is uploaded to the Central GMS will the information be made public.
SETGEN allows the user to specify default values to use at start-up by reading the [SETGEN] section of the current INI file. The types of default values that may be specified are: crop, default methods, and locations. The [SETGEN] section is also used to store values used by SETGEN in the session immediately preceding. If the [SETGEN] section does not exist, the following defaults are used: RICE for crop, and all of the self pollinated (‘S’) and general (‘G’) methods.
The [SETGEN] section follows the INI file format (please refer to...). For example, to specify the bread wheat crop, the [SETGEN] section must include the following line: CROP=BW. The table below contains SETGEN keys that may be specified to a desired value, if the default value is otherwise. If a key is not found, the corresponding default value (in parenthesis) is assigned.
Table 1.1 SETGEN Initialization Keys
| Key | Valid Values | Remarks |
|---|---|---|
| CROP | CROP NAME (RICE) | Id CROP=BW (bread wheat), group names are constructed using abbreviated cross names instead of conventional purdy cross expansions. |
| STANDARDIZE | YES, NO (YES) | If STANDARDIZE=YES, a name is first converted to the ICIS naming convention before it is added to the local GMS. |
| DEFCTYID | Long Integer (171) | The Location ID of a country whose locations are initially displayed in the Select a Location window. Valid country ID values currently range from 1,2,..,267. |
| DEFLOCID | Long Integer (9000) | The Location ID whose name appears as a specified default location in windows wherein location may be specified. |
| GENERATIVEMETHOD | Integer (101) | The generative Method ID of a default method to appear in the Generate Crosses window. |
| DERIVATIVEMETHOD | Integer (205) | The derivative Method ID of a default method to appear in the Advance a Line One Generation window. |
| CHECKDERIVATIVE | Integer (10) | If CHECKDERIVATIVE<10, a derivative name is verified for its existence in the GMS. If a name exists, a query appears with several options for the user. Otherwise, if CHECKDERIVATIVE>=10, no checking is done; a derivative is automatically added to the local GMS, whether or not the name already exists. |
| PNAME_IF_UNKNOWN_GRP | YES, NO (NO) | If PNAME_IF_UNKNOWN_GRP=YES, a germplasm whose group is unknown is displayed as ‘?/? [preferred name]’; otherwise group germplasm is ‘?/?’. |
| NO_LISTNAME | YES, NO (NO) | If NO_LISTNAME=YES, the default seed source value is displayed as ‘entry code’; otherwise seed source is displayed as ‘list name-entry code’. The default value appears only when an entry is selected from the Browse window. |
| AUTOCOMMIT | YES, NO (NO) | If AUTOCOMMIT=YES, each change SetGen makes to the local database is automatically saved immediately after the change is done; otherwise, changes have to be made by clicking on the <List><Save> menu. |
| MULT_ENTRYCD | YES, NO (NO) | Used in the Advance a Line One Generation window. If MULT_ENTRYCD=YES, each derivative has an entry code value as ‘entry code-plant no.’; otherwise, each derivative has the same entry code value. |
| UPD_GRP | YES, NO (NO) | If UPD_GRP=YES, group germplasm values of entries added by selecting from the Browse window is automatically updated to its cross expansion; otherwise, the group value from the Browse window is copied to the Edit window. |
| METHODGRP | METHODS.MGRP values (S G) | The group of methods retrieved from the GMS METHODS table and displayed to the user to select from. The default group of methods retrieved are selfing (S) and general (G) methods. Each group of method must be separated by a space. Other groups as cloning (C) and open pollination (O). |
| MULT_SAMENTYPE | YES, NO (NO) | If MULT_SAMENTYPE=YES, a germplasm can have several names of the same nametype. |
| MULT_SAMEATYPE | YES, NO (NO) | If MULT_SAMEATYPE=YES, a germplasm can have several attributes of the same Attribute type. |
| MAX_LISTNAMECHAR | Integer (48) | Number of LISTNAME characters. The maximum value is 48. |
| AUTO_GENLSTNAMESCALEID | Integer (0) | ScaleID of the SQL to be used to generate the ListName. |
| AUTO_GENFUNCCODE | CODE | Generate Code String used to identify the algorithm to use to generate ListName. |
| ENABLE_INV | YES,NO (NO) | Flag whether to enable InTrack(ICIS Inventory Tracker). |
| MULT_SOURCE | YES,NO (NO) | Used in the Advance a Line One Generation window. If MULT_SOURCE=YES, each derivative has an source value as ‘source-plant no.’; otherwise, each derivative has the same source value. |
| AUTOFILLVCOL | YES,NO (NO) | Flag to automatically retrieve contents of virtual columns. |
| HELPFILE | help File Path | The file path of the Helpfile to use. |
| CHECK_NTYPE | Integer (0) | Flag to provide check for the existence of a Name TYPE id specified for each germplasm whenever a list is being closed. |
| TEXT_SUFFIX | String | The String to use as suffix for textlines whenever a fill with sequence is done. When you have text lines you dont want them to be numbered in the sequence so you can add this suffix to the sequence value for the line above the text line. |
Starting SETGEN
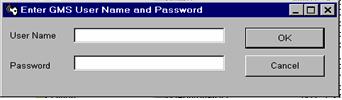
Start SETGEN by clicking on the SETGEN icon, or select SETGEN from the ICIS Launcher. If the ICIS User_ID and Password have not been stored in the current INI file (4.2.4), the log-on window (Figure 1.2.1) prompts the user for an ICIS username and password. Enter them in the spaces provided and click <OK>.
Any one of the following results may occur:
- ''The List Manager Opens.'' If connection to the central and local databases is successful, the List Manager opens.
- ''An Error Message Appears.'' If an invalid username or password is entered, you are prompted to re-enter the username or password.
- ''An ODBC Warning Appears.'' An ODBC warning appears when the user does not have write privileges on the computer where either the central or local database resides. If the warning refers to the central database, ignore the warning and continue the session. If the warning refers to the local database, the user must exit the program and request for write privileges to the computer. Otherwise, an ODBC error may occur. A warning appears only if a computer can control user-access level, such as Windows NT.
- ''Not an authorized local GMS user. Setting local GMS to READ-ONLY.'' message appears. The logged on GMS user cannot make any changes to the local database. Name searching will only be allowed. Click <OK> to continue.
Note that the user can abort SETGEN before a successful log on. Simply click <Cancel>. The session will immediately terminate.
The List Manager
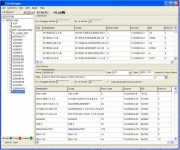
The List Manager (Figure 1.3.1) is SETGEN’s main form. It appears after a successful connection to ICIS. The List Manager is where germplasm lists (1.6) are viewed, generated, and manipulated.
The List Manager consists of the main menu and three windows: the List Selector, the Edit and the Browse windows. The List Selector displays existing germplasm lists in the local GMS that are not hidden. The edit and Browse windows are used to display the contents of a list. All lists can be opened in either window.
Figure 1.3.1 The List Manager
The Main Menu. The main menu is located at the upper leftmost part of the List Manager. There are five items in the main menu, namely: List, List Entry, Edit, GMS, Tools, and Help. A short description and contents of each submenu is found in Table 1.4.1. The corresponding shortcut to each item is in brackets (i.e., [..]), found after the description. Shortcuts are used while pressing on the <Alt> key and typing the keys that follow. Note that the <Alt> key must be kept pressed at the same time the other keys are pressed successively.
Table 1.2 Description of Each Item in the Main Menu
| Item | Description |
|---|---|
| List Submenu | Contains operations to manipulate lists. |
| New | Generate a new list ot Folder. • List - Create a new List in the Edit Window [Alt-L-N-L] |
| Open | Open an existing list in the Edit window [Alt-L-O] |
| Browse | Open an existing list in the Browse window [Alt-L-B] |
| Save | Save a list currently open in the Edit window [Alt-L-S] |
| Export As | Export a list highlighted in the List Selector in a specified file format. File formats to export to are: • XLS Excel File Format [Alt-L-E-X] |
| Close List | Close a list, which can be: • Edit [Alt-L-C-E] |
| Add Virtual Column | Add a virtual column, which can be: • Edit [Alt-L-V-E] |
| Import List | Import germplasms into a list [Alt-L-I] |
| Add Checks to List | Add or Insert check germplasms into a list [Alt-L-C] |
| Delete List | Delete a list highlighted in the List Selector from the local GMS [Alt-L-D] |
| Hide/Unhide List | Show/hide lists in/from the List Selector [Alt-L-H] |
| Auto Commit | If checked, each change made to the local GMS is immediately saved. [Alt-L-A] |
| Print: • List contents [Alt-L-P-L] | |
| Exit | Terminate SETGEN session [Alt-L-X] |
| List Entry Submenu | Contains interactive operations to add a list entry. [Note: A list must be currently open in the Edit window for List Entry operations.] |
| Add an Entry | Open the <Add a List Entry> window to specify an entry to add [Alt-N-A] |
| Generate a Cross | Open the <Generate Crosses> window to add a generative cross to the local GMS and the currently open list [Alt-N-C] |
| Advance a Line | Check to automatically save all transactions made [Alt-N-V] |
| Find | Search for a value in any of the columns of a list open in the Edit window. [Alt-N-F] |
| Edit Submenu | Contains operations that modify the contents of a list open in the Edit window. The items in the Edit submenu can also be displayed by right clicking on the mouse while the mouse is pointed over the Edit window. |
| Edit Entry Fields | Edit the fields of a highlighted entry [Alt-E-E] or <F2> |
| Remove Entry | Remove the highlighted entry from the list [Alt-E-R] |
| Add Blank Entry | Add a blank entry to the end of the list [Alt-E-A] |
| Replace Entry | Replace highlighted entry with another entry [Alt-E-Y] |
| Cut | Cut to clipboard one or more tagged entries. [Alt-E-T] or <Ctrl X> |
| Copy | Copy to clipboard one or more tagged entries. [Alt-E-C] or <Ctrl C> |
| Paste | Paste entries in clipboard before tagged entries in the list, or at the end of the list. [Alt-E-P] or <Ctrl V> |
| Random Sort Entries | Sort the entries of a list randomly. [Alt-E-S] |
| GMS Submenu | Contains operations to view or modify a GMS record. The items in the GMS submenu can also be displayed by right clicking on the mouse while the mouse is pointed over the Edit window. |
| View Characteristics | View characteristics of a highlighted entry [Alt-G-V] |
| Edit Germplasm in GMS | Modify characteristics of a GMS record [Alt-G-E] |
| Delete Germplasm from GMS | Delete a GMS record [Alt-G-D] |
| Replace Germplasm from GMS | Replace a GMS germplasm record with another one [Alt-G-R] |
| Batch Submenu | Contains batch mode operations. |
| Add Entries | Generate a list of entries [Alt-B-A] |
| Generate Crosses | Generate a list of new crosses [Alt-B-C] |
| Generate Derivatives | Generate a list of new derivatives [Alt-B-D] |
| Generate GIDs | Generate GIDs for a list of entries {Alt-B-G] |
| Matrix Crossing | Generate new crosses by a matrix [Alt-B-M] |
| Relative Search | Search for germplasm relatives [Alt-T-R] |
| Help Submenu | Contains version information. |
| Help | Open the on-line help. [Alt-H-H] |
| About | Display the current version. [Alt-H-A] |
The List Selector. The vertical window on the left is the List Selector. The List Selector maintains an alphabetically ordered list of lists in the current local database. Lists can be highlighted by clicking on their names or by typing their names in the space above the list. Right clicking on selected lists gives the user access to many of the list menu items.
A list can also be sorted by type. Check the Sort By Type box at the bottom of the List Selector to sort the lists by type. Uncheck the box to sort by name.
A list can be opened in the Edit window by double clicking on a desired list name. The list is opened and its contents displayed in the Edit window.
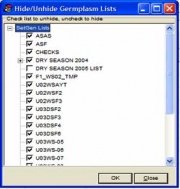
The List Selector has the option to hide or show existing lists. To hide or show lists, click on the <List><Hide/Unhide List> menu, or while the mouse is pointed over the List Selector, right click and select <Hide/Unhide List>. A window similar to Figure 1.3.2 appears. All existing lists in the local GMS are displayed in the window. To hide or prevent a list from being displayed in the List Selector, uncheck the box appearing before a list name. To show or display a list in the List Selector, check the box before a desired list name. After checking/unchecking all lists to display/hide, click <Close>. The List Selector is updated, with the checked lists displayed and the unchecked lists hidden.
Figure 1.3.2 Hide/Unhide a List
The Browse Window. The Browse window is the top window of the List Manager. It is used to “browse” or tag entries to add to the currently open list in the Edit window. A “browse” entry cannot be edited. A list can be opened in the Browse window by either:
(1) highlighting the desired list in the List Selector, and clicking on the <List><Browse> menu, or
(2) right clicking while pointed over the List Selector and clicking <Browse>.
The width of a column can be adjusted. Place the mouse on a column border on the first line of the window and drag the cursor left or right as needed. Similarly, the height of the Browse window can adjusted by placing the mouse on the bottom border and dragging the cursor up or down, as needed.
The following operations can be performed to a list open in the Browse window:
- Tag/Untag Entry
An entry is tagged if the last column has ‘x’ in it. To tag an entry, click on the desired line. A tagged entry can be untagged by clicking on it. A tagged entry can be added to the Edit window, or used in a process to generate new germplasm, or have its germplasm characteristics viewed. - Sort Column in Ascending/Descending Order
Any of the columns can be sorted in either ascending or descending order. To sort a column, right click on the desired column heading. A pop-up menu appears. Select either Sort Ascending or Sort Descending menu.
The Edit Window. The Edit window appears under the Browse window. It is used for generating or modifying germplasm lists. Entries added to the window may consist of newly generated germplasm or previously existing germplasm or both. The Edit window’s column widths or height can be changed in the same way as the Browse window.
A list in the Edit window can be manipulated by:
• Allowing new lists to be generated;
• Adding entries to a new or existing list;
• Removing entries from a list; or
• Modifying contents of a list entry.
Only one list can be opened in the Edit window at any given time. List manipulations can be specified by selecting an item from the main menu, or by right clicking while pointed over the Edit window.
- Generate a New Germplasm List
To create a new list, click on bhe <List><New> menu; or point over the Edit window, right click and select <New>.
If the Edit window has an open list that has been modified, the query “Save changes to GMS?” appears. Click <Yes> to save the list and commit changes to the GMS. Click <No> to discard changes. Click <Cancel> to continue working with the currently opened list. [Note: This query does not appear if the <Auto Commit> menu item is checked.]
Enter the list name, select the list type, specify a list date, and a list description or title in their appropriate places. A list name must be specified before any entries can be added; all other fields are optional. After desired fields have been filled in, entries can be added to the new list.
To automatically assign entry code values, check the ‘Entry Code Naming Convention’ box. A window similar to 1.3.3 appears.
Figure 1.3.3 Specify a Naming Convention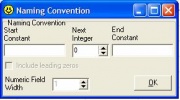

Specify values to any of the fields in the window: a start constant, an integer value, or an end constant. The include leading zeros check box and numeric field width are initially disabled. The start and end constants can consist of any combination of alphanumeric characters and/or blanks, up to a maximum length of eight. If an integer greater than zero is specified, the include leading zeros check box and numeric field width become enabled. The numeric field width default value is the number of digits in the next integer field. A value larger than the number of digits may be specified, if desired. To display entry code values in fixed format, check the include leading zeros check box.
Note: The maximum length an entry code value can have is 11. Any value whose length is greater than 11 is truncated.
Click <Close> when done; or press <Esc> to cancel. Values specified in this window will be assigned to the entry code field of each entry. For each succeeding entry, the next integer value automatically increments by one, if a value other than zero is specified.
- Open an Existing Germplasm List
To open a list in the Edit window, highlight a desired list in the List Selector, and:
(a) Click on the <List><Open> menu; or
(b) Point over the List Selector, right click, and select <Open>; or
(c) Double-click on the highlighted entry.
If a selected list is currently open in either Browse or Edit window, a warning message appears. Otherwise, the contents of the selected list are displayed in the Edit window. The list may now be manipulated.
- Browse a Germplasm List
In the List Selector, highlight a list to browse, and:
(a) Click on the <List><Browse> menu; or
(b) Point over the List Selector, right click, and select <Browse>.
- Save a Germplasm List
To commit all changes made since the last save, click on the <List><Save> menu. [Note: If <Auto Commit> is checked, there is no need to click on the <List><Save> menu.]
- Save a Germplasm List as a New List
A currently open Edit list can be saved as another list. Change the current list name to a desired new list name, and modify other list characteristics as desired. Click on the <List><Save As> menu.
- Export a Germplasm List
A germplasm list may be exported to files as either an Excel file, or a formatted ASCII file. An ASCII file can be exported to: an INI file format, a tab-delimited text file, or a fixed format text file. Table 1.1 contains the file formats a list can be exported to.
(a) To export a list currently open in the Edit window, point the mouse over the Edit window, right click, and select <Export As><export format>.
(b) To export a list appearing in the List Selector, highlight the desired list to export, point the mouse over the List Selector, right click, and select <Export As><export format>.
In either case, a Save Dialog box appears. Select the directory, enter a filename, and click <Save>. Click <Cancel> to abandon exporting. After exporting, the file can be opened and viewed using an appropriate application for it.
- Close a Germplasm List
Close Edit List. To clear the Edit window:
(a) Click on the <List><Close List><Edit> menu; or
(b) Point the mouse over the Edit window, right click, and select <Close List>.
If there are unsaved changes, follow the steps described in (4).
Close Browse List. To clear the Browse window:
(a) Click on the <List><Close List><Browse> menu; or
(b) Point the mouse over the Browse window, right click, and select <Close List>.
Close Browse and Edit Lists. To clear both Browse and Edit windows, click on the <List><Close List><All> menu. If there are unsaved changes, follow steps described in (4). Both windows are cleared.
- Delete a Germplasm List
To delete a list from the GMS, it must not be open in either Browse or Edit window. Highlight a list to delete in the List Selector, and:
(a) Click on the <List><Delete List> menu; or
(b) Point the mouse over the List Selector, right click and select <Delete List>.
NOTE: Only the list is deleted from GMS, not germplasm data.
- Hide/Unhide a Germplasm List
To specify which lists to show or hide from the List Selector:
(a) Click on the <List><Hide/Unhide List> menu; or
(b) Point the mouse over the List Selector, right click and select <Hide/Unhide List>.
- Auto Commit
The Auto Commit option is on if a check appears beside the <List><Auto Commit> menu. Each transaction that is made with the GMS is automatically saved. A saved or committed transaction cannot be unsaved. Set Auto Commit on to save each transaction that is made; if no check appears beside the Auto Commit option, set it on by clicking on the <List><Auto Commit> menu. Otherwise, set Auto Commit off; if a check appears before the option, set it off by clicking on the <List><Auto Commit> option.
- Print a Germplasm List
A list can be printed in any of the following ways:
(a) Print the contents of a list, i.e., entry code, designation, and source; or
(b) Print germplasm characteristics of each of the entries; or
(c) Print the contents of a list and print germplasm characteristics of each entry.
A list open in the Edit window or a highlighted list in the List Selector can be printed.
(a)Print a highlighted list in the List Selector. In the List Selector, highlight the desired list, right click and select <Print List><print option>.
(b)Print an Edit list. Click on the <List><Print><print option> menu.
- View Characteristics of a Germplasm List
To view list characteristics, highlight the desired list in the List Selector, right click and select <List Characteristics>. A window, similar to Figure 1.3.4 appears. A list’s name, type, date, and title are displayed. The local DSN also appears on the last line of the window. Click <Close> or press <Esc> to exit.
Figure 1.3.4 View Germplasm List Characteristics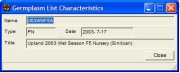
Common SETGEN Processes
Viewing germplasm characteristics, selecting a germplasm from a displayed list, or specifying a location are common SETGEN processes. These processes are used in more than one window.
- View Germplasm Characteristics
A list entry’s germplasm characteristics can be viewed in either the Browse or Edit windows, or in the Browse window of the Generate Crosses window.
To view germplasm characteristics, tag a desired entry or entries. Keep the mouse pointed over the (Browse or Edit) window, right click and select <View Characteristics>. The View Characteristics window appears. To view the tree or other characteristics, follow the steps described in TDM_GMS_SEARCH.
The step is repeated for each tagged entry. After characteristics are displayed, the entry is untagged.
To print the characteristics of the highlighted entry in the tree, click <Print>.
To exit viewing, click <Close> or press <Esc>.
- Select Germplasm
Whenever a germplasm name is specified in SETGEN, a name search is performed and the results are displayed in a window similar to Figure 1.4.1. The desired germplasm can be selected from the list as follows:
Double click on a highlighted germplasm, or simply click <Select>. The selected germplasm is then subjected for further processing. If the desired germplasm is not included in the displayed list, a new one may be generated by clicking <New>. Follow the steps described in 1.6.5-8.
If a specific germplasm record is desired and its associated GID (germplasm identifier number) is known, enter the GID in the GID field and click <Go>. Only the germplasm record having the specific GID is retrieved and displayed.
To enter another search name, enter the name in the search box and click <Search>. Repeat the selection process.
To cancel selection, click <Cancel>.
Figure 1.4.1. Select Germplasm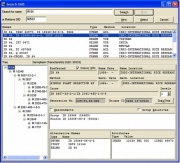
- Select Location
A location can be specified when specifying characteristics of a cross or line, or when changes to a germplasm record, i.e., edit, delete, or replace, are made. A location can be specified in a window where a <Change> button appears beside a location field.
To specify a location, click <Change>. A window, similar to Figure 1.4.2 appears. The locations displayed in the listbox are the locations of a specified country. The four most recent locations selected are displayed in the shaded box below the listbox.
To retrieve locations, select the desired country from the country pick list. If the location ID of the desired country is known, it can be selected from the location ID pick list instead. Locations in the selected country are displayed in the listbox with the country itself as the default.
To select a different location, scroll the list with the scroll bar, or type the name of the location in the location field. Typing a name will cause the highlighted value to change to the one nearest the typed value. There is no highlighted value if no locations match a typed name.
To select a location, follow any of the steps described below:
(a) Double click on a desired location in the listbox; or
(b) Highlight a desired location and click <OK>; or
(c) Type the complete name and click <OK>. [Note: A location name which has been typed must match exactly a location in the listbox. Otherwise, an error message appears.]; or
(d) Select from the list of recent locations by double clicking on the desired location in the box; or
(e) Change a specified location to an unknown one. Clear the location field and click <OK>. The previously specified location is removed.
Figure 1.4.2 Select Location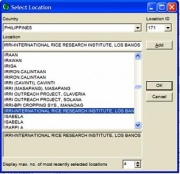
To cancel the selection process, click <Cancel> or press <Esc>.
SETGEN GMS Tools
SETGEN provides a set of GMS tools to perform name searches or to assist the user to edit, delete, or replace germplasm records. Select a tool on the GMS menu or select a tool by right clicking while pointed over the Edit window.
- View Germplasm Characteristics
To view germplasm characteristics, follow the steps described in 1.4 Common SETGEN Processes - View Characteristics[1].
- Edit Germplasm Characteristics
New information pertaining to a germplasm may have been learned after having entered it into the GMS. Open the Edit a GMS Germplasm Record window:
(a) Point the mouse over the Edit window, right click and select <Edit GMS>; or
(b) Click on the <GMS><Edit> menu.
Figure 1.5.1 Edit Germplasm Characteristics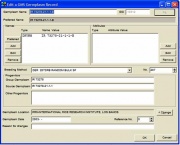
If a germplasm to edit is an entry in the Edit window, it can be tagged before opening the Edit a GMS Germplasm Record window.
A window similar to Figure 1.5.1 appears.
If an entry was tagged in the Edit window, its characteristics appear when the Edit a GMS Germplasm Record window appears. The <Go> button is disabled. Otherwise, enter the name, or germplasm ID, if known, in the appropriate field, and click <Go>. Select a desired germplasm by following the steps described in 1.4 Common SETGEN Processes - Select Germplasm [2].Characteristics of the specified or selected germplasm are displayed in the window.
The preferred name may be changed to another, and additional names associated with the germplasm record may be specified. Characteristics that may be edited are: breeding method, sources, i.e., parents or source germplasm, germplasm location, or germplasm date. Progenitors may be added, if needed; but, may only be removed while in the same process where they were added.
To change a preferred name to another, the desired name must already exist. Highlight a name from either listbox displaying alternative names and click <Preferred>. The specified name appears in the preferred name field. [Note: The option to change a preferred name to another is available only to germplasm records from the local GMS. This option is not available to germplasm records from the central GMS.]
To add an alternative name, click <Add>. A window as in Figure 1.5.2 appears. Specify a name and type. If the name location and date are known, specify them in their appropriate places. To specify a location, follow the steps described in 1.4 Common SETGEN Processes - Select Location [3]. Click <OK> when finished. The name appears in the listbox on the right. To cancel adding a name, click <Cancel> or press <Esc>. Any newly prescribed name appearing in the right hand side of the listbox can be removed or cancelled. Highlight the name to remove and click <Remove>. The name is no longer added as an alternative.
Figure 1.5.2 Prescribe an Alternative Name
- Delete GMS Germplasm Record
A germplasm record may be deleted, because of erroneous entries, from the GMS. Open the Delete GMS Record window by either:
(a) Point the mouse over the Edit window, right click and select <Delete GMS>; or
(b) Click on the <GMS><Delete> menu.
If a germplasm to delete is an entry in the Edit window, it can be highlighted before opening the Delete a GMS Germplasm Record window.
A window similar to Figure 1.5.3 appears.
If an entry was tagged in the Edit window, its characteristics appear when the Delete GMS Germplasm Characteristics window appears. The <Go> button is disabled. Otherwise, enter the name, or germplasm ID, if known, in the appropriate field, and click <Go>. Select a desired germplasm by following the steps described in 1.4 Common SETGEN Processes - Select Germplasm [4]. Characteristics of the specified or selected germplasm are displayed in the window.
The reason why a germplasm is being deleted must be specified; otherwise, the deletion process will not proceed. If the location where the deletion occurred is known, follow the steps described in 1.4 Common SETGEN Processes - Select Location [5]. Click <Delete>. To cancel deletion, click <Close> or press <Esc>.
Figure 1.5.3. Delete GMS Record
- Replace a GMS Germplasm Record with Another One
A germplasm record may be replaced with another one deleted, because of duplicate entries, from the GMS. Open the Replace a GMS Germplasm Record with Another One window by either:
(a) Point the mouse over the Edit window, right click and select <Replace GMS>; or
(b) Click on the <GMS><Replace> menu.
A window similar to Figure 1.5.4 appears.
To replace a germplasm record, enter a germplasm name to be replaced in the find field and click <Go> beside it. Follow the steps described in 1.4 Common SETGEN Processes - Select Germplasm [6]. Enter a germplasm name to replace it with in the replace with field and click <Go> beside it. Follow the steps described in 1.4 Common SETGEN Processes - Select Germplasm [7]. Characteristics of a germplasm to be replaced are displayed on the left side of the window; Characteristics of a germplasm to be replaced with are displayed on the right.
Figure 1.5.4 Replace a GMS Germplasm Record with Another One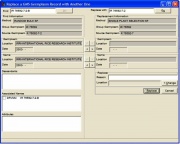
Specify the germplasm locations and dates, and name locations and dates to use. To retain a value from the record to be replaced, click ‘<’ on the line corresponding to the desired field; otherwise, click ‘>’ on the line corresponding to a desired field. The default values are replacement germplasm record values.
Enter a reason why for the replacement. If the location where the replacement occurred is known, follow the steps described in 1.4 Common SETGEN Processes - Select Germplasm [8]. Click <Replace>. To cancel replacement, click <Cancel> or press <Esc>.
Basic Lists
The Add a New List Entry window is one window for adding germplasm entries to the Edit window. An entry is added by tagging a desired entry from the Browse window, or by specifying a name.
A list must be open in the Edit window, either by selecting an existing list from the List Selector or by creating a new list (1.3 The List Manager - The Browse Window - Tag/Untag List)[9].
- Add entry/entries from an existing list. To add an entry/entries from an existing list, open the list to add entries from in the Browse window (1.3 The List Manager - The Edit Window - Browse a Germplasm List)[10]. Tag a desired entry, or a range of entries, and click the ‘+’ speed button.
Add entry by specifying its name. Click the ‘+’ speed button.
The Add a New List Entry window (Figure 1.6.1) appears, with the ‘Standardize Name’ option checked as the default. If an entry was tagged from the Browse window, details of that entry, except for any attributes it may have, appear in the window. The <Ok to All> button is also enabled. If no entry was selected, the window is blank, except for the entry code and source default values. The <OK to All> button is disabled. The number of the next entry in the Edit list is entry code’s default value. Source has ‘?’ as the default value.
Figure 1.6.1 Add a New List Entry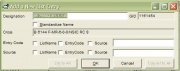
- If an entry was selected from the Browse window, modify any of the displayed fields to a desired value; otherwise, if the designation field is blank, enter the germplasm name to add to the Edit list. The designation field cannot be blank; all other fields are optional. Modify or add values to the entry code and source fields. If an entry naming convention was specified (see 1.3 The List Manager - The Edit Window)[11]), a default entry code value appears.
To specify an attribute, click <Attribute>. A window similar to Figure 1.6.2 appears. Select the type of attribute to add from the drop down list, and enter its value in the appropriate space. Click <Add>. The newly specified attribute is added to the list box below the attribute value. To add another attribute, repeat the steps described. To remove an attribute from the list box, highlight the attribute and click <Remove>. The removed entry will no longer be added as an attribute. After all desired attributes have been entered, click <Close>.
Notes:
(a) An attribute becomes associated with the germplasm record, and not the germplasm entry only.
(b) An attribute can be removed only in the same session as specifying an attribute. When the window is closed, specified attributes can no longer be removed. You must cancel adding an entry to remove all newly associated attributes.
Figure 1.6.2 Add a Germplasm Attribute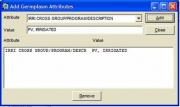
- To automatically convert a name to the ICIS naming convention [12], check the ‘Standardize Name’ option. Otherwise, to add a name exactly as typed, uncheck or remove the ‘Standardize Name’ option.
- After entering or modifying field values, click <OK>. Follow the steps described in 1.4 Common SETGEN Processes - Select Germplasm)[13].
If an entry to add was tagged in the Browse window, the <OK to All> button is enabled; otherwise, it is disabled. Click this button to automatically add all tagged entries to the Edit list. The Add a New List Entry window will no longer appear for the remaining entries to be added.
If a group name value is specified and is not the same as the cross expansion of a selected germplasm, a query appears. Click <Yes> to overwrite the specified group name value with the cross expansion; click <No> to retain the specified value.
If a name does not exist, follow steps 5-8 below; otherwise, select the appropriate germplasm to be added to the list. To cancel adding an entry, click <Cancel> or press <Esc>. The window is closed and returns to the List Manager.
- Specified name does not exist in the GMS. If the name does not exist in the GMS, as window similar to Figure 1.6.3 appears. The specified name appearing in the germplasm name field cannot be edited. Default values for name type and method appear in the window. Default values for name location and name date appear if a previous session specified a location or date in this window.
Figure 1.6.3 Name Information for New Germplasm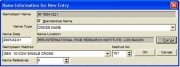
Modify any of the default values that appear to the desired values. The name type and method must be specified by selecting from their drop down lists. If a method number is known, it can be entered instead of selecting from the germplasm method list. If location is known, click <Change> and specify a location. Follow the steps described in 1.4 Common SETGEN Processes - Select Location)[14] A name reference can be specified as well.
After all known information is been prescribed, click <OK>. The External Pedigree Input Tool window (Figure 1.6.4) appears.
Adding a new germplasm can be desired, if desired. Click <Cancel> or press <Esc>. The query ‘Cancel entry?’ query appears. Click <Yes> to cancel the process and return to the previous window; otherwise click <No> to continue the process.
- New entries not yet in the GMS are prescribed in the External Pedigree Input Tool window.
Prescribe germplasm sources, germplasm date, and germplasm location. If the method prescribed in step e is generative, enter the purdy cross history, if known. A default purdy cross history value appears if the new entry is in cross expansion form, i.e., there is a slash (‘/’) in the name. Otherwise, if the method is derivative, enter the source and group germplasm, if known. A default source and group germplasm value appears if there is at least one dash (‘-‘) in the new entry name. Overwrite the default values to the correct, if needed.
Figure 1.6.4 External Pedigree Input Tool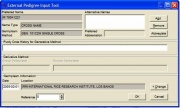
- To add an alternative name, follow the steps described in 1.5 SETGEN GMS Tools - Edit Germplasm[15]. To prescribe a preferred abbreviation, highlight the desired name from the list of alternative names added and click <Abbreviate>. Repeat the process for each alternative name.
Default values for germplasm date and location appear, if, in the previous window (Figure 1.6.4), a date and location was prescribed. Change the default values to desired values, if needed.
- When done, click <OK>. Each of the components of the purdy cross history or source germplasm is automatically parsed and a name search performed.
If more than one name exists in the GMS, select the appropriate germplasm. If there is only a single hit, it is automatically selected by the process. If a component name does not exist in the GMS, it is automatically added as an unknown derivative method with unknown sources. The new entry is added to the Edit window.
To cancel the process, click <Cancel>.
Edit Germplasm List
An Edit list can be modified by any of the following: edit list characteristics, edit entry fields, remove an entry, add a blank entry, or replace an entry with another one. Tag the desired entries to edit and select the appropriate operation from the <List Entry> menu or by right clicking while pointed over the Edit window.
- Edit List Characteristics
List characteristics may be edited, if desired. To edit a list characteristic, change the value of the list characteristic to a desired one. Any of the fields may be edited.
Note: If the list name is changed to another name, click on the <List><Save As> menu item instead of <List><Save>. The current list will be saved to a new list.
- Edit Entry Fields
Entry fields can be edited, if desired. To edit an entry, open the list containing the desired entry in the Edit window. Tag the entry or entries to edit, then:
(a) Click on the <Edit><Edit Entry Fields> menu; or
(b)Point the mouse over the Edit window, right click and select <Edit Entry Fields>.
The Edit a List Entry window appears, similar to Figure 1.6.1. Modify the desired fields, or add more attributes by following the steps described in 1.6 Basic Lists - step # 2.[16].
When done, click <OK>. To cancel editing at any time, click <Cancel> or press <Esc>.
When <OK> is clicked and the designation was edited, SetGen checks if the new name is already an existing name for the germplasm record. If not, the Confirm Entry window (Figure 1.7.1) appears.
Figure 1.7.1 Confirm Entry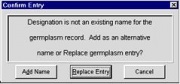
(a) Click <Add Name> to add the modified name as an alternative name; or
(b) Click <Replace Entry> to perform another name search and replace the entry with another GID; or
(c) Click <Cancel> to cancel the process and go back to editing the entry.
The process is repeated for each tagged entry.
- Remove List Entry
Tag an entry or entries to remove from the list, then:
(a) Click on the <Edit><Remove Entry> menu; or
(b) Point the mouse over the Edit window, right click and select <Remove Entry>.
The tagged entries are removed from the list. [Note: Removing an entry from a list does not delete the germplasm record. To delete a germplasm record, click on the <GMS><Delete > menu.]
- Add Blank Entry
To add a blank entry to the end of an Edit list:
(a) Click on the <Edit><Add Blank> menu; or
(b) Point the mouse over the Edit window, right click and select <Add Blank>.
A blank entry makes spaces for unknown checks or general entries, whose GIDs are not yet known. Names and codes can be added to a blank entry at a later time by either editing the entry fields (1.7 Edit Germplasm List - Edit List Characteristics)[17], or replacing an entry (1.7 Edit Germplasm List - Replace Entry)[18].
- Replace Entry
If an error was made in entering an entry, or if a specific entry is already known after adding a blank entry, it would be desired to replace the entry with a correct or known one.
To replace an entry with another one, tag all entries to replace, then:
(a) Click on the <Edit><Replace Entry> menu; or
(b) Point the mouse over the Edit window, right click and select <Replace Entry>.
The Replace a List Entry window appears, similar to Figure 1.6.1. The window appears with corresponding field values appear in their appropriate places, except for designation, which is blank. Follow the steps described in 1.6 Basic Lists [19].
Edit Window Pop-up Menu Items
Four pop-up menus exist in the Edit window. A pop-up menu appears when the user right-clicks while the mouse is pointed over the Edit window. When right-clicking on a column header, one of three menus appears, depending on the column.
The pop-up menu that appears when the user right-clicks while the mouse is pointed over the Edit window appears in Table 1.8.1.
Table 1.8.1 Pop-up Menu Items When Mouse is Pointed Over the Edit Window
| Item | Description |
|---|---|
| Close List | Close the list in the Edit window. |
| Export As | Same as the <List><Export As> menu item. |
| Edit Entry Fields | Same as the <Edit><Edit Entry Fields> menu item. |
| Remove Entry | Same as the <Edit><Remove Entry> menu item. |
| Add Blank | Same as the <Edit><Add Blank> menu item. |
| Replace Entry | Same as the <Edit><Replace Entry> menu item. |
| Cut | Same as the <Edit><Cut> menu item. |
| Copy | Same as the <Edit><Copy> menu item. |
| Paste | Same as the <Edit><Paste> menu item. |
| View Characteristics | Same as the <GMSt><View> menu item. |
| Random Sort Entries | Same as the <Edit><Random Sort Entries> menu item. |
| Print List Entries | Same as the <List><Print><List> menu item. |
| Print List Characteristics | Same as the <List><Print><Characteristics> menu item. |
| Edit GMS | Same as the <GMS><Edit> menu item. |
| Delete GMS | Same as the <GMS><Delete> menu item. |
| Replace GMS | Same as the <GMS><Replace> menu item. |
The pop-up menu in Table 1.8.2 appears when a user right-clicks on any of the following columns: Designation, Group Name, GID, or Entry ID column.
Table 1.8.2 Pop-up Menu Items for Designation, Group Name, GID, or Entry ID Column
| Item | Description |
|---|---|
| Sort Ascending | Sort the entries in ascending order by the values in the column. |
| Sort Descending | Sort the entries in descending order by the values in the column. |
The pop-up menu in Table 1.8.3 appears when the user right clicks on either the Entry Code or Source column.
Table 1.8.3 Pop-up Menu Items for Entry Code or Source Column
| Item | Description |
|---|---|
| Sort Ascending | Same as <Sort Ascending> in Table 1.8.2. |
| Sort Descending | Same as <Sort Descending> in Table 1.8.2. |
| Fill with Sequence | Fill the column with a sequence of values. |
| Fill with Name | Fill the column with a specified name type. If no name exists for a specified name type, the column value is blank. |
| Fill with Preferred Name | Fill the column with the preferred name of the entry. This menu item is disabled in the Entry Code column. |
| Fill with Female | Fill the column with the name of the female parent of the germplasm entry. If the germplasm entry’s method is generative, this corresponds to the GERMPLSM.GPID1 value; otherwise, if the method is derivative, this corresponds to the GERMPLSM.GPID2 value. |
| Fill with Male | Fill the column with the male parent of the germplasm entry. If the germplasm entry’s method is generative, this corresponds to the GERMPLSM.GPID2 value; otherwise, if the method is derivative, this is a blank. |
| Fill with Attribute | Fill the column with a specified attribute value. If specified attribute value does not exist for a germplasm entry, this is left blank. |
| Fill with Unique ID | Fill the column with the corresponding germplasm unique ID. The unique ID consists of: the first four letters of the INSTLN.DESCRIPTION record corresponding to INSTLN.INSTALID=1. This menu item is disabled in the Entry Code column. |
| Fill with Generation No. | Compute the generation number of each germplasm entry. |
| Comment Tagged Entries | All tagged germplasm entries will have ‘COMMENT’ written in the column. When a ‘COMMENT’ is written, the ‘Fill with …’ menu items will not fill the germplasm entry. |
| Save as Name | Add to the local database as a germplasm entry’s specified alternative name type whose value is in the column. |
| Save as Attribute | Add to the local database as a germplasm entry’s specified attribute type whose value is in the column. |
The pop-up menu in Table 1.8.4 appears when the user right-clicks on the Tag column.
Table 1.8.4 Pop-up Menu Items for the Tag Column
| Item | Description |
|---|---|
| Sort Ascending | Same as <Sort Ascending> in Table 1.8.2. |
| Sort Descending | Same as <Sort Descending> in Table 1.8.2. |
| Invert Tag | All tagged entries become untagged; all untagged entries become tagged. |
| Tag All | Tag all entries. |
| Untag All | Untag all entries. |
Cross List [GENERATIVE]
A cross list contains germplasm entries whose method of germplasm genesis was through a generative process. To generate a new cross list, click on the <List><New> menu. If modifications to an Edit list were made, the query ‘Save changes to GMS?’ appears. Click <Yes> to save changes; click <No> to discard changes; or click <Cancel> to continue editing the currently open list. Specify characteristics of the new list.
- To generate a new cross, click the ‘x’ speed button above the Browse window. The Generate Crosses window appears, which is similar to Figure 1.9.1. Default values for breeding method and name type appear. If a cross was specified previously, default values for dates and locations also appear. A List Selector appears on the left hand side, similar to the one in the List Manager. If a list contains a parent of the new cross, the list can be opened and browsed for an entry to be tagged and specified as a parent. [Note: The currently opened list in the Edit window cannot be browsed.] Double click on a list to browse. The entries of the list are displayed in the Generate Crosses’ browse window.
- A naming convention for new crosses can be specified, if desired. Check the use naming convention check box beside the designation field. A window, similar to Figure 1.3.3 [20] appears. Follow the steps described in 1.3 The List Manager - The Edit Window - Generate a New Germplasm List[21]. Each new cross that is specified is automatically assigned a new cross name. To stop the naming convention for new crosses, uncheck the box.
Figure 1.9.1 Generate Crosses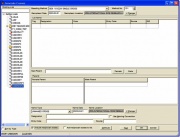
- The breeding method, germplasm date and location are specified at the top portion of the window. The breeding method is be specified by either selecting from the drop down list, or by specifying the breeding number. Modify the germplasm date to a desired value. Specify a germplasm location, by following the steps described in 1.4 Common SETGEN Processes - Select Location [22].
- Specify the parents of the cross, if known. Specify a parent by either tagging an entry from the browse window, or by manually specifying the name in the next parent field.
Parent is a list entry. To specify a parent from an existing list, browse the list containing the desired parent. Tag the desired parent, and specify as either a female or male parent by clicking the appropriate button. [Note: A parent can also be specified by keeping the mouse pointed over the browse window, right click and select either female or male.]
The tagged entry appears in the appropriate parent box. The maximum number of parents that can be prescribed for a new cross is determined by the breeding method.
To specify another parent in place of the currently specified one, delete the parent from the parent box. To delete a parent, highlight the parent to delete, right click while pointed over the window, and click <Delete>. The highlighted parent from either female or male parent window is removed.
Parent is not a list entry. To manually specify a parent, type the parent name in the next parent field. Click <Female> if the typed name is a female parent; otherwise, click <Male>. A name search is performed. Select the desired parent from the displayed list.
Note: Germplasm characteristics of an entry in the browse window, or a specified parent can be viewed. To view germplasm characteristics of an entry in the browse window, tag the desired entry. While pointed over the window, right click, and select <View, Characteristics>. Follow the steps described in 1.4 Common SETGEN Processes - View Germplasm Characteristics [23]. The steps are repeated for each tagged entry. To view characteristics of a specified parent, highlight a desired parent select <View Characteristics>.
- The name type, name date, and name location are specified at the bottom portion of the window. If a cross naming convention was specified, the default name type that appears is cross name; otherwise, unnamed cross appears. Modify the values to new values, if desired.
If there is no naming convention, the default name that appears in the designation field is a cross expansion, based from the specified parents; otherwise the corresponding name for a new cross appears.
If there is an entry code name convention, the corresponding default value appears; otherwise, no value appears. The default source field value that appears is ‘list name- entry code of female parent/list name-entry code of male parent’. If a parent was specified through a name search, its corresponding source value is ‘?’ instead.
- There is the option to automatically add reciprocal crosses to the GMS or Edit list. To automatically add reciprocal crosses, check the ‘add reciprocal cross’ check box. To include a reciprocal cross in the Edit list, check the ‘add to list’ check box. [Note: Reciprocals are added only if a cross has one female and one male parent prescribed. Otherwise, no reciprocal is generated.]
- When done, either click <Next> or <OK>. Click <Next> to continue specifying another new cross in the window. Otherwise, to close the window and return to the List Manager, click <OK>.
A newly prescribed cross is automatically added to the Edit list.
To cancel a process, click <Cancel>, or press <Esc>.
Selections List [DERIVATIVE]
A selections list contains germplasm entries whose method of germplasm genesis was through a derivative process from a source germplasm. A source germplasm, which can be a tagged entry in the browse window, specified manually. To generate a new selections list, click on the <List><New> menu. If modifications to an Edit list were made, the query ‘Save changes to GMS?’ appears. Click <Yes> to save changes; click <No> to discard changes; or click <Cancel> to continue editing the currently open list. Specify characteristics of the new list.
- A source germplasm to be put through a derivative process can be tagged in the Browse window, or specified manually. Tag all source germplasm entries in the Browse window, if there are any.
- To generate germplasm selections, click the ‘-’ speed button above the Browse window. The Advance a Line One Generation window appears, similar to Figure 1.4.18. Default values for breeding method and name type appear. Default values for dates and locations may or may not appear.
If a source germplasm is from the Browse window, its name appears in the source germplasm field. The group germplasm value that appears is itself, if the source germplasm has a generative breeding method, or its group germplasm, if it has a derivative breeding method. A default source value also appears as ‘browse list name-entry code value of source germplasm’.
If no entry was tagged in the Browse window, the source germplasm and group germplasm fields are blank.
- Specify the breeding method and name type at the top of the window to desired values.
- Specify a naming convention for the new derivatives in the naming convention group box. The naming convention is applied to the new derivatives by adding the convention to the end of the source germplasm name.
Different crops may use different naming conventions. SETGEN uses a standard naming convention for germplasm selections; i.e., given a SOURCE germplasm, a derivative can take any of the following forms:
• SOURCE-C1
• SOURCE-C1n
• SOURCE-C1nC2
• SOURCE-nC2
• SOURCE-n
• SOURCE
where n is an index such as the number of plants selected; and C1 is a start constant and C2 is an end constant.
Derivative names are automatically generated with the number of generated names equal to the no. of plants selected (specified within the naming convention group box). If the number of plants selected is zero, one derivative is generated, whose name is the same as the source germplasm.
Figure 1.10.1 Advance a Line One Generation

If no convention is specified, only one new germplasm is generated whose name is the same as its source.
A naming convention used in a derivative process is independent of the method or crop. Thus, different germplasm selections derived from the same method can have different naming conventions employed.
If a source germplasm was selected from the Browse window, proceed to step (6); otherwise, if a source germplasm is specified manually, proceed to the next step.
- If a source germplasm is not from the Browse window, specify it manually in the source germplasm field. A name search is performed and the results displayed in a window. Select the appropriate source germplasm.
If the source germplasm has a derivative germplasm method, the default group germplasm value that appears is its group germplasm. Otherwise, the source germplasm is the group germplasm itself.
If either source germplasm or group germplasm does not yet exist in the GMS, follow the steps described in 1.6 Basic Lists - steps 5 - 8 [25].
- The resulting germplasm derivatives are automatically added to the derivative names field.
- Specify dates and locations, if desired.
- When done, click <OK>. The derivatives are added to the database as new germplasm, and to the Edit list.
To cancel generating new derivatives, click <Cancel>, or press <Esc>.
Batch Mode Processing
A number of entries can be processed in batch mode instead of one at a time through the batch mode processes. There are two types of batch mode: the first type generates a new list by having the source of information from a study in the DMS; the other type generates a new list by having an existing list as a source of information. In either case, resulting entries of a new list can either be already existing germplasm, or new germplasm.
Data Source is a DMS Study. A DMS study (discussed in chapter 10) must have been previously loaded to use study information to generate a new list. The study must contain at least one factor whose scale is defined as GID.
Note: In the batch processes that use a DMS study as its source, the study MUST contain a factor whose values contain GID values. The corresponding scale of this factor must have been defined as GID. Otherwise, the process will not continue.
Three batch processes use a DMS study as its source of information for generating a list entry. They are: Add Entries in Batch Mode, Generate Crosses in Batch Mode, and Generate Derivatives in Batch Mode.
- Add Entries in Batch Mode
If a study contains germplasm information, i.e., name or GID, and a new list is desired, click the ‘B+’ speed button above the Browse window. The Add Entries in Batch Mode window, as in Figure 1.11.1 appears.
Select the DMS study containing the desired germplasm entries from the drop down list. The factors in the study appear in the GID factor. In the GID factor field, specify the factor from the drop down list containing GID information. [Note: A specified GID factor must have GID as its scale. Otherwise, the process will not continue.]
Prescribe a destination list name and its characteristics, if desired. If a list is currently open in the Edit window, a default value appears in the destination list as the currently open Edit list; otherwise, if no Edit list is opened, no default value appears.
A new entry may or may not have an entry code or source value. An entry code or source value can either be a constant value, or a data value from the specified study.
If a value is variable, data is read from the study. The factors containing a value must be specified in the fields under the DMS VARIABLE COLUMN. To assign an entry code by reading data from the DMS, specify the factor containing the entry code value in the entry code field. Likewise, to assign a source value by reading data from the DMS, specify the factor containing the source value in the source field.
To specify an entry code name convention, specify the start and end constant values in the fields under the SPECIFY CONSTANT PARAMETERS. Specify a start number for the entry code value. If a start number is specified, the next value is automatically incremented. An entry code is assigned as: C1 n C2.
Figure 1.11.1 Add Entries in Batch Mode
If a source is a constant, specify the source value under the SPECIFY CONSTANT PARAMETERS in the source field. All new entries will have the same source value.
When all desired variables have been specified, click <Start>. If the destination list is already existing, the query ‘Germplasm list already exists. Append entries to existing list?’ Click <Yes> to append entries to the existing list; click <No> to specify another list name.
If Auto Commit is not on, the query ‘N entries were processed. Save changes?’ appears after all entries have been processed. Click <Yes> to save; otherwise, click <No> to save at a later time.
To close the window, click <Close>.
To cancel a batch process, click <Close>. [Note: A batch process cannot be cancelled once it has started processing the entries.]
- Generate Crosses in Batch Mode
New crosses can be generated in batch mode from information contained in a DMS study. The study must contain separate factors corresponding to a female GID and a male GID to generate new crosses. Click the ‘Bx’ speed button above the Browse window. The Generate Crosses in Batch Mode window appears, similar to Figure 1.11.2 appears.
Select the DMS study which contain the necessary information. The factors of the selected study appear in the female GID and male GID fields. Specify the factor that contains the female GID; similarly, specify the factor containing the male GID. [Note: The specified female GID factor and male GID factors must have GID as its scale to continue.]
Specify the destination list and its characteristics.
Specify information for germplasm characteristics, which can either be a constant value, or a variable. Information for the germplasm method and name type MUST be known; all other information is optional. If the new crosses in the current process have the same breeding method, this may be specified as a constant by selecting the breeding method from the drop down list under the SPECIFY CONSTANT PARAMETERS column. If the method is a variable, select the DMS variable name containing information corresponding to breeding method. Similarly, if name type is constant, specify its value under the SPECIFY CONSTANT PARAMETERS column; otherwise, select the variable containing the name type value. If there is no available information corresponding to breeding method and name type, the entry without this information will not be processed. Specify other germplasm characteristics, either as a constant or variable, if known.
IMPORTANT: All of the following MUST have been defined as numeric variables in the study if the information is to be retrieved here. Otherwise, corresponding values will not be allowed to be selected.
• Breeding method: A valid value must be an existing breeding method number in the METHODS table;
• Female/Male GID: A valid value must be an existing germplasm GID in the GERMPLSM table;
• Name Type: A valid value must be an existing name type value, defined in the UDFLDS table;
• Germplasm/Name Location: A valid value must correspond to an existing location ID value in the LOCATION table;
• Germplasm/Name Date: A valid date value must have been entered in the format YYYYMMDD;
• Germplasm/Name Reference: A valid value must be an existing value in the BIBREFS table.
Figure 1.11.2 Generate Crosses in Batch Mode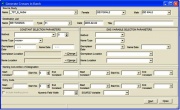
A name convention can be specified for new crosses. If the name convention is a constant, specify their values in their appropriate fields. A start number can be specified, which automatically increments as each new cross is added. If there is no name convention, either from the DMS or as constants, the name of a new cross is the corresponding cross expansion based on the specified parents.
A list entry can also have a corresponding value for entry code and source. To specify entry code and source value, follow the steps described in (1) above.
When all desired variables have been specified, click <Start>. Follow the steps described above.
- Generate Derivatives in Batch Mode
New derivatives can be generated in batch mode from information contained in a DMS study. The study must contain a factor whose scale is GID. A source germplasm name factor may also be specified if a new derivative name is from the source germplasm name. The source germplasm name may not necessarily be an existing name of the source germplasm GID. Click the ‘B-’ speed button above the Browse window. The Generate Derivatives in Batch Mode window appears, similar to Figure 1.11.3 appears.
Each component of the actual derivative process to be applied to each entry can be specified in one of two ways: either as a constant, or as a variable in a DMS study. If any elements are to be specified as variates, a study must exist in DMS with units indexed by a factor labelled by GIDs corresponding to the GIDs in the source list and variates containing the component values. Select the study containing the variates from the study name list, and then specify the variates in the component fields.
Figure 1.11.3 Generate Derivatives in Batch Mode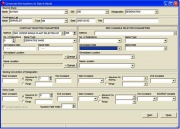
Data Source is an Existing Germplasm List. A new list can be generated in batch mode where information of the entries in the new list is from an existing germplasm list. The Generate a GID in Batch Mode and Matrix Crossing Tool are batch processes that generate new lists whose source of information is from existing lists.
- Generate GIDs in Batch Mode
A germplasm list may have been generated outside SETGEN, or associated GIDs of entries in a fieldbook removed; thus, GIDs of the entries are unknown. A list with unknown GIDs can be “imported” to have corresponding GIDs assigned to it. Click the ‘gid’ speed button above the Browse window. The Generate GIDs in Batch Mode window appears, as in Figure 1.11.4.
A germplasm list must have been entered by an external method with all GIDs set to zero. An example of how to do this is given in the GMS and DMS Tutorials[26][27] .
Select the source germplasm list, and specify destination list. The destination list may be a new list, or an existing one. If the specified destination list already exists, a query appears. Click <Yes> to append entries to the existing list; click <No> to specify another destination list.
If desired, locations can be specified for those entries not yet in the GMS.Specify or change the default germplasm and name locations by following the steps described in 1.4 Common SETGEN Processes - Select Location [28].
There are five options, which are all checked except for the option appearing in the last line. Check or uncheck any or all of the options, described below:
Figure 1.11.4 Generate GIDs in Batch Mode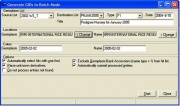
Automatically select hits with one find. The first option, which is selected as a default option, automatically select hits with only one find. The Search GMS window no longer appears if there is only one record with a specific name. The process is faster with this option checked.
Parse unknown derivatives. If the parse unknown derivatives option is checked, parsing of a derivative entry that is not yet in the GMS is automatically done (1.6 Basic Lists - step 9 [29]). All steps in a derivative is processed, and its cross searched for. If its cross is not in the GMS, it is added as a cross with unknown derivative method. If this option is not checked, a derivative that is not found is added to the GMS as a cross with unknown derivative method. The default option is not checked.
Exclude Germplasm Bank Accessions (name type = 1) from hit list. If the exclude germplasm bank accessions (name type = 1) from hit list is checked, germplasm records with accession numbers are not included in the hit list for selection. If a hit list consists of all accession numbers, then the list of accessions is displayed. The default option is not checked.
Automatically commit processed entries. If this option is checked, an entry is automatically saved after it is processed. To disable automatic saving, uncheck this option.
Do not process entries not found. If an entry does not yet exist in the GMS and this option is checked, it will skip the entry and proceed to the next one. It will not be processed, and neither will it be added to the destination list. The default option is unchecked.
Click <Start> to begin the process. For each entry with a zero GID, the process will search for the name specified in the DESIG field. If a name is found, the GID is selected and written to the source and destination lists. If a name is not found, it is processed and added to the GMS. If an error occurs when a name is being processed, that name is not added and the GID remains zero. An entry was not processed if in the source list, its corresponding GID is still zero.
- Matrix Crossing Tool
The Matrix Crossing Tool allows automatic generation of and array of new crosses. Five array schemes are available:
• All combinations of female/male from separate lists;
• Matched pairs of male/female from separate lists of equal length;
• Full diallel scheme from a single list;
• Upper half diallel scheme; and
• Lower half diallel scheme.
To generate an array of crosses, click the ‘a/b’ speed button above the Browse window, or click on the <Tools><Batch Mode><Matrix Crossing> menu. The Matrix Crossing window (Figure 1.11.5) appears.
Figure 1.11.5 Matrix Crossing Tool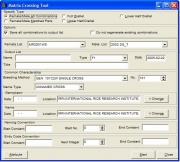
The female/male all combinations array type is selected by default. The default female list specified is the first unhidden list that appears; the default male list specified is the second unhidden list that appears. Default values for breeding method and name type are single cross and unnamed cross, respectively. Default values for dates and locations appear if values were prescribed in a previous process.
Specify the type of cross matrix desired. Each type generates a list of crosses, having the specified characteristics, but having a specific constraint, with respect to the list. Given a female list named LIST1, with entries A, B, C and a male list named LIST2 with entries B, C, D the following are descriptions of each type of cross matrix.
Female/Male All Combinations. All possible combinations of crosses are generated. The total number of crosses generated is: (no. of entries in the female list)x(no. of entries in the male list), regardless of the entries in each list. In the above illustration, nine new crosses are generated and added to a specified output list as follows: A/B, A/C, A/D, B/B, B/C, B/D, C/B, C/C, C/D.
Female/Male Matched Pairs. A one-to-one combination of female entries to male entries are generated. Thus, the number of entries in the female and male lists must be the same; if they are not, the process does not continue. The total number of crosses generated is the number of entries in either female or male list. In the above illustration, three new crosses are generated and added to a specified output list as follows: A/B, B/C, C/D.
In any diallel, only one list is specified. Entries of a specified list are used as both female and male parents in generating new crosses. It is assumed that each entry in a specified list is unique. Crosses generated from a diallel can be illustrated using a matrix. Table 1.11.1 illustrates the possible crosses that can be generated, given a list whose entries are: A, B, and C.
Table 1.11.1 Matrix for Diallel BreedingParent A B C A - A/B A/C B B/A - B/C C C/A C/B -
Full Diallel. All possible combinations, except the diagonal, when both female and male parents are the same, are generated. For a list with three entries, a full diallel generates six new crosses. In the illustration above, they are as follows: A/B, A/C, B/A, B/C, C/A, C/B. The total number of crosses generated can be generalized to: (no. of entries)*(no. of entries)-no. of entries.
Upper Half Diallel. All cross combinations that appear above the diagonal is an upper half diallel. For a list with three entries, an upper half diallel generates three new crosses. In the illustration, they are as follows: A/B, A/C, B/C. An upper half diallel can be generalized as all possible cross combinations wherein the order of list entries are such that a female parent appears before a male parent.
Lower Half Diallel. All cross combinations that appear below the diagonal is a lower half diallel. For a list with three entries, a lower half diallel generates three new crosses. In the illustration, they are as follows: B/A, C/A, C/B. A lower half diallel can be generalized as all possible cross combinations wherein the order of list entries are such that a male parent appears before a female parent.
Specify the parent list, or female and male lists by selecting from the drop down listboxes. Specify an output list to save generated crosses to. Specify the output list’s type, date, and title, if any. The output list may or may not be an existing list. If the specified output list exists, a query appears. Click <Yes> to append crosses to the existing list; click <No> to specify another output list.
Specify the common characteristics the generated crosses will have. Specify the breeding method and name type, if needed. If the dates and locations are known, specify these in their appropriate spaces. An attribute can be associated to each cross that will be generated. To specify an attribute, select the attribute type and specify its value in the appropriate space.
By default, names of the new crosses will be their cross expansion. If desired, a naming convention can be specified instead. To specify a naming convention for the crosses, specify the start constant, start no., and end constant in the Naming Convention group box (1.6 Basic Lists - step 3 [30]).
Entry code values may also be specified, either as constants or as an entry code naming convention. To specify an entry code constant, specify a start and/or end constant in the Entry Code Convention group box. To specify an entry code naming convention, specify a start constant, next integer value, and end constant in the Entry Code Convention group box.
When ready to generate new crosses, click <Start>. When the process is finished, a query appears. Click <Yes> to save changes to the GMS; click <No> to save changes at a later time. Contents of the output list can be viewed in either Browse or Edit window.
At any time before <Start> is clicked, generating new crosses can be cancelled. To cancel the process, click <Cancel> or press <Esc>.
Searching Germplasm Relatives
Relatives of a particular germplasm might want to be retrieved. To search relatives of a specified germplasm, click on the <Batch><Relative Search> menu. A window, similar to Figure 1.12.1 appears.
Figure 1.12.1 Search Germplasm Relatives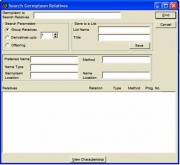
In the germplasm to search relatives field, enter a germplasm name whose relatives are to be searched. Click <Find>. Follow the steps described in 1.4 Common SETGEN Processes - Select Germplasm [31].
Characteristics of a selected germplasm are displayed in the group box above the relatives listbox. Immediate relatives of the displayed germplasm are searched and displayed in the relatives listbox. Only the option to search and retrieve immediate relatives is available.Characteristics of any of the displayed relatives can be viewed. To view characteristics of a relative, highlight the desired relative and click <View>. The View Characteristics window (1.4 Common SETGEN Processes - View Germplasm Characteristics)[32] appears.
At any time before <Start> is clicked, searching of relatives can be cancelled. To cancel the process, click <Cancel> or press <Esc>.


![[20]](http://cropwiki.irri.org/icis/index.php/Image:Namingconvention.jpg)